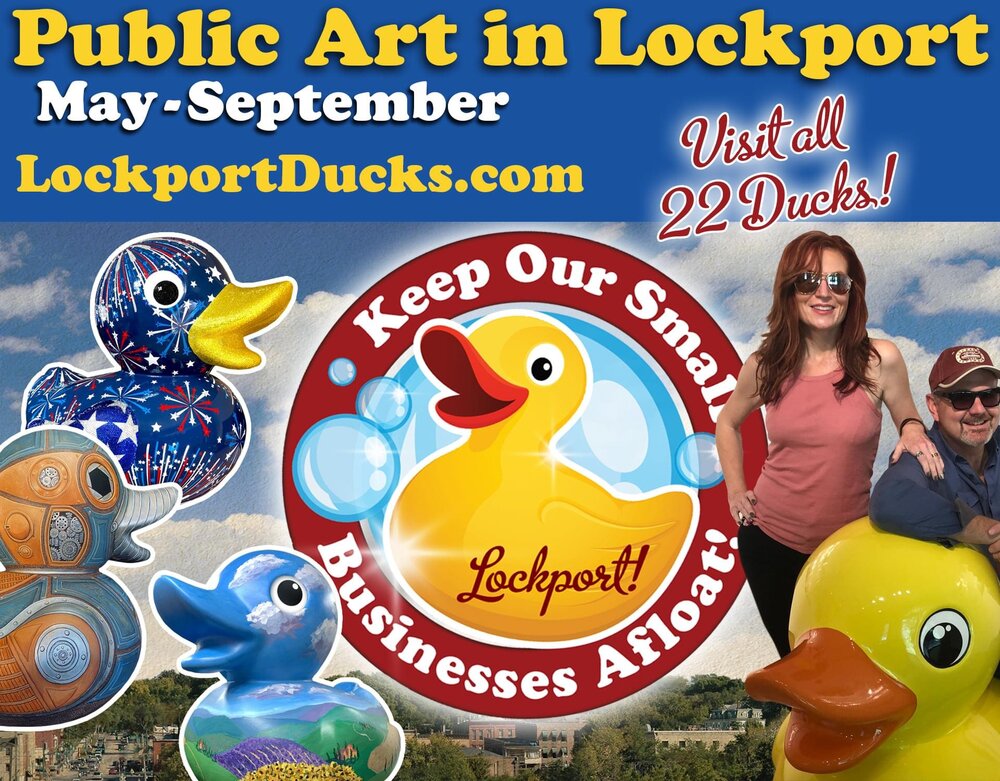
I was fortunate enough to be one of the 23 artists selected to create a duck for the upcoming Lockport Summer Art Series program Keep Our Small Businesses Afloat! The idea is that a duck will be sponsored and placed in front of a small business in an effort to gain them more traffic and customers after a year that was hard for so many.
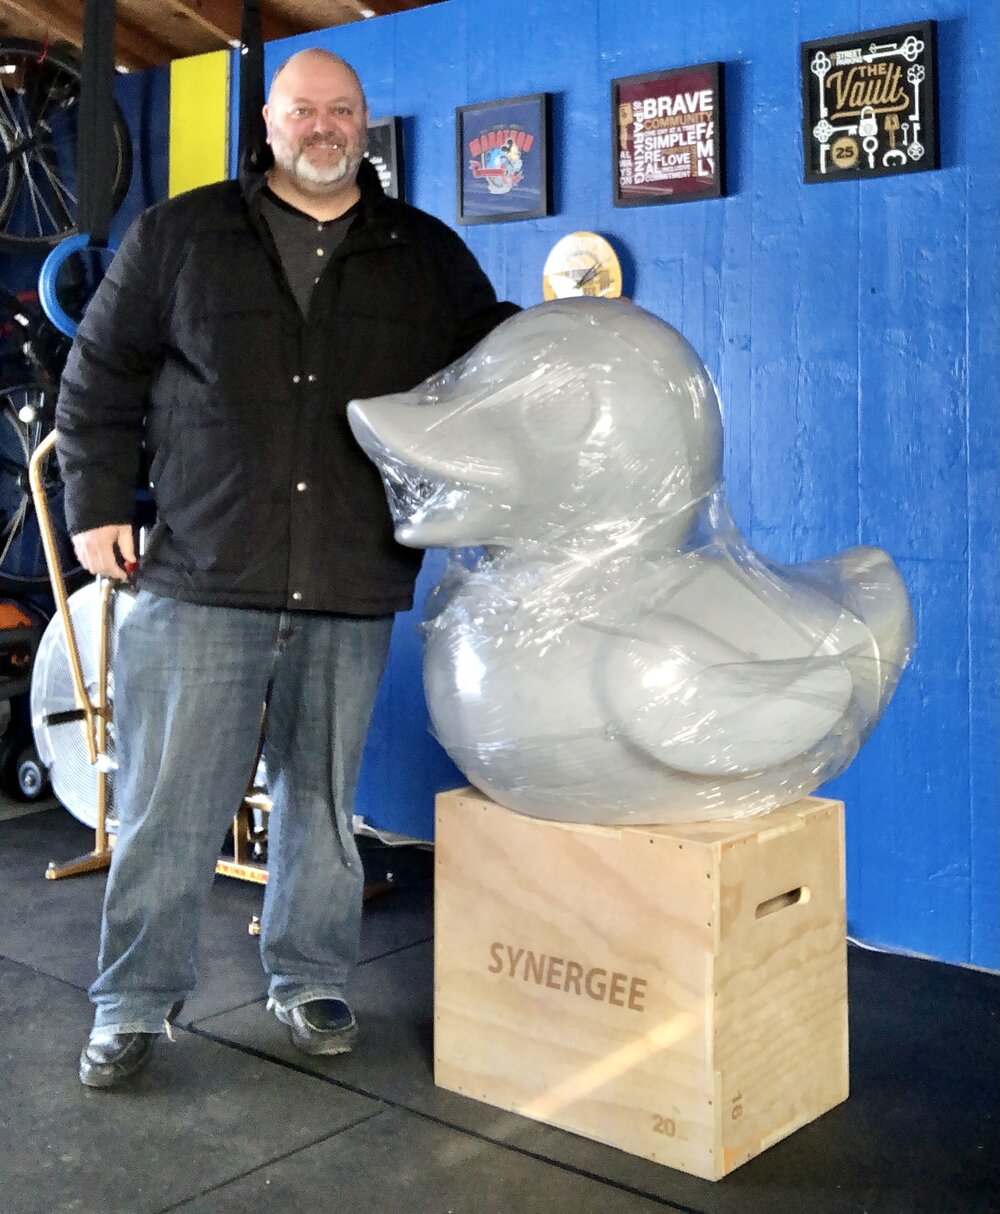
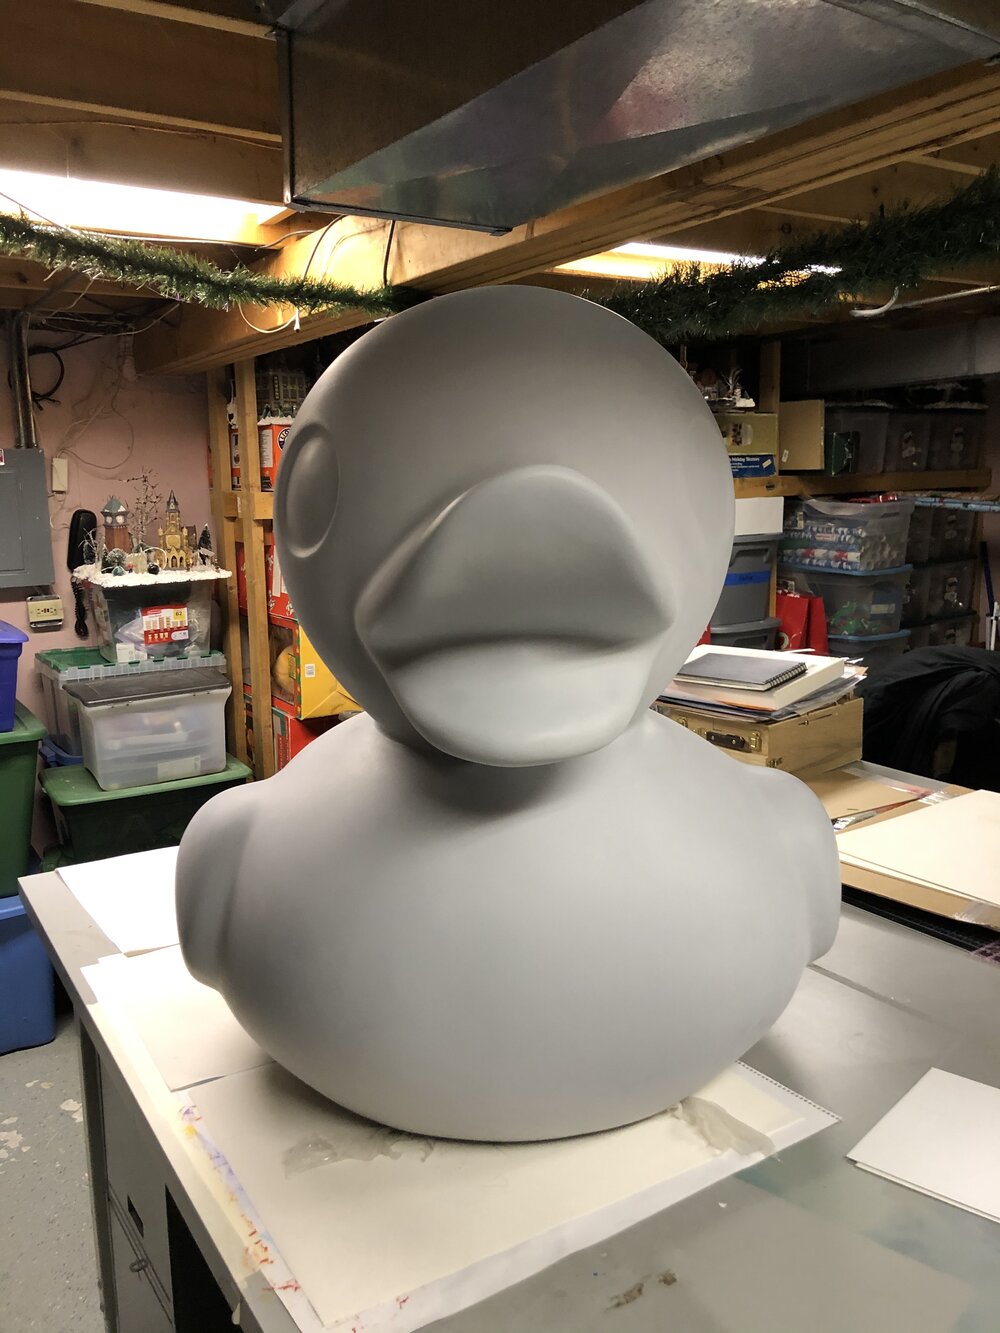
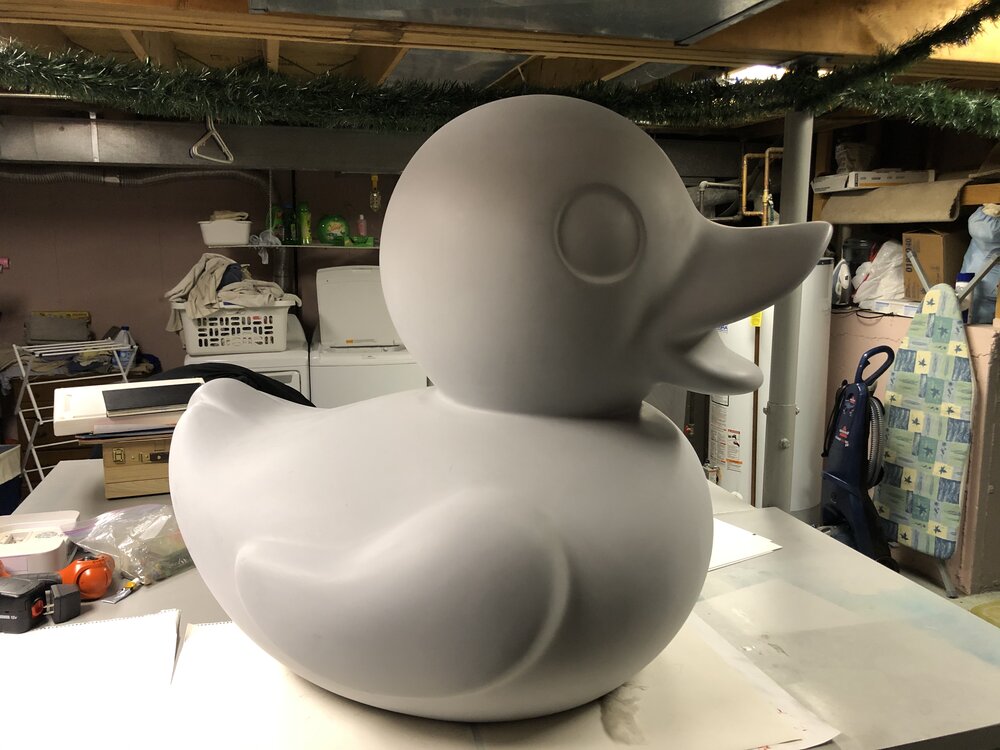
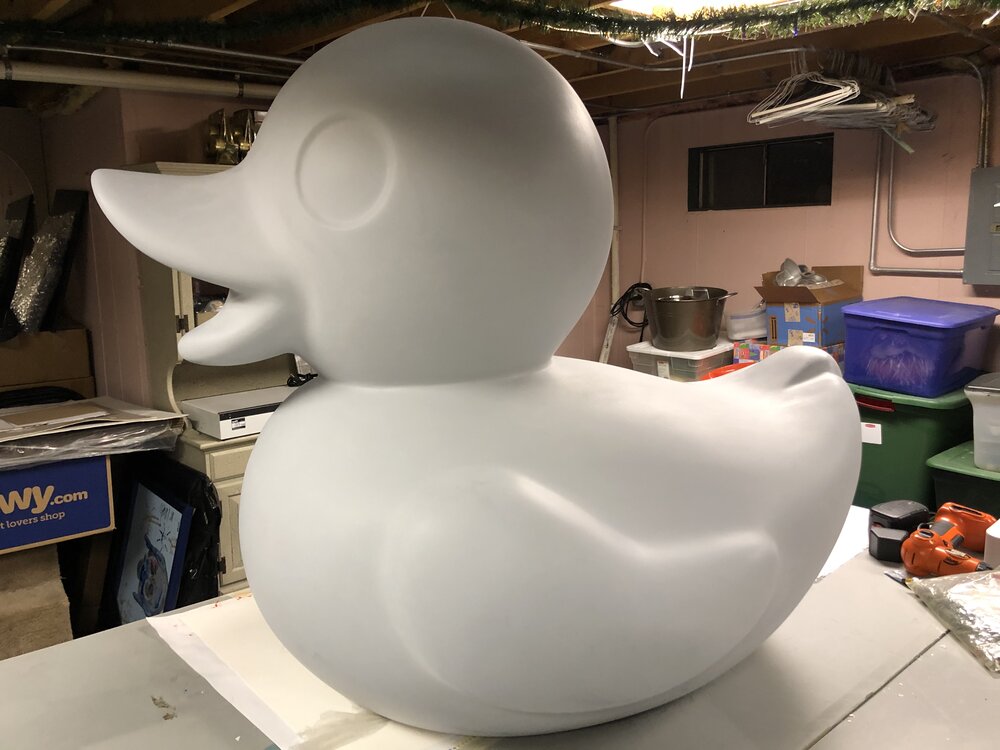
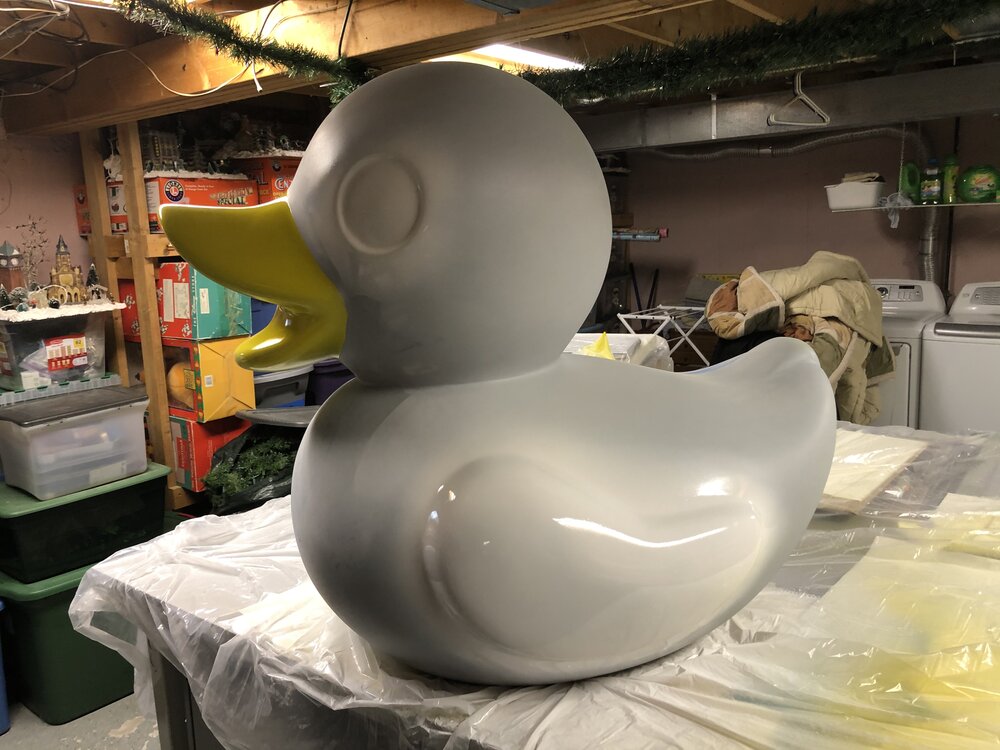
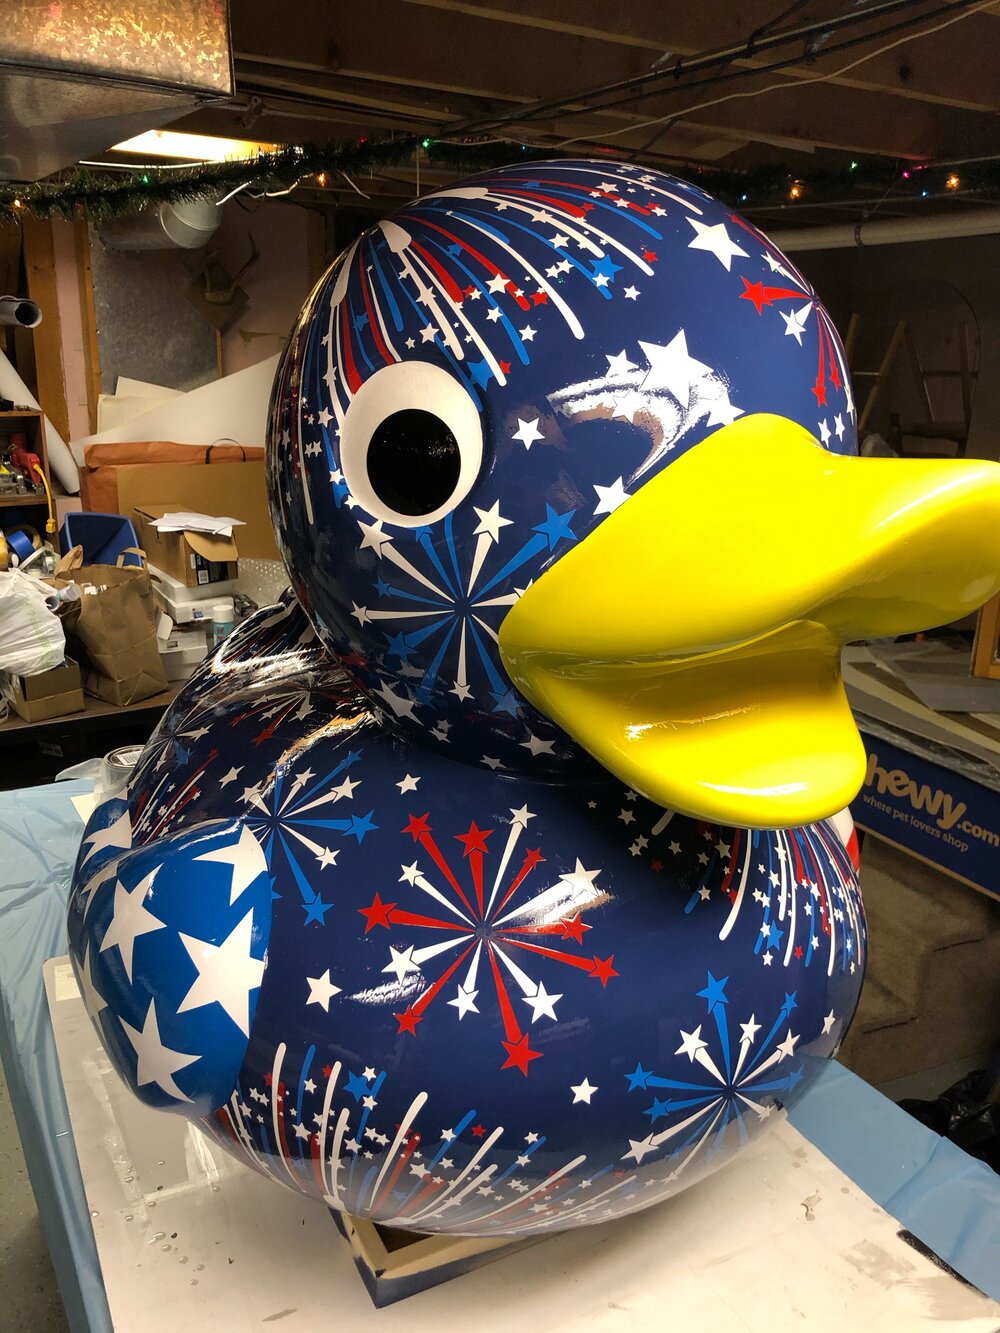
The fiberglass rubber duck sculpture stand about 3 foot and is a canvas just awaiting creation.
My sponsor is Highland Ridge Property Management and the sponsored business is George’s Restaurant located at 990 N State St, Lockport, IL 60441.
I felt a connection being paired up with George’s immediately as that is where the Artist Guild of Lockport held our weekly socials, so we know it well.
The ducks will be going on display in May 2021 through early September.
After an initial meeting with the sponsor and sponsored business it was time to get to work on a handful of concepts I could propose to them for consideration and selection.
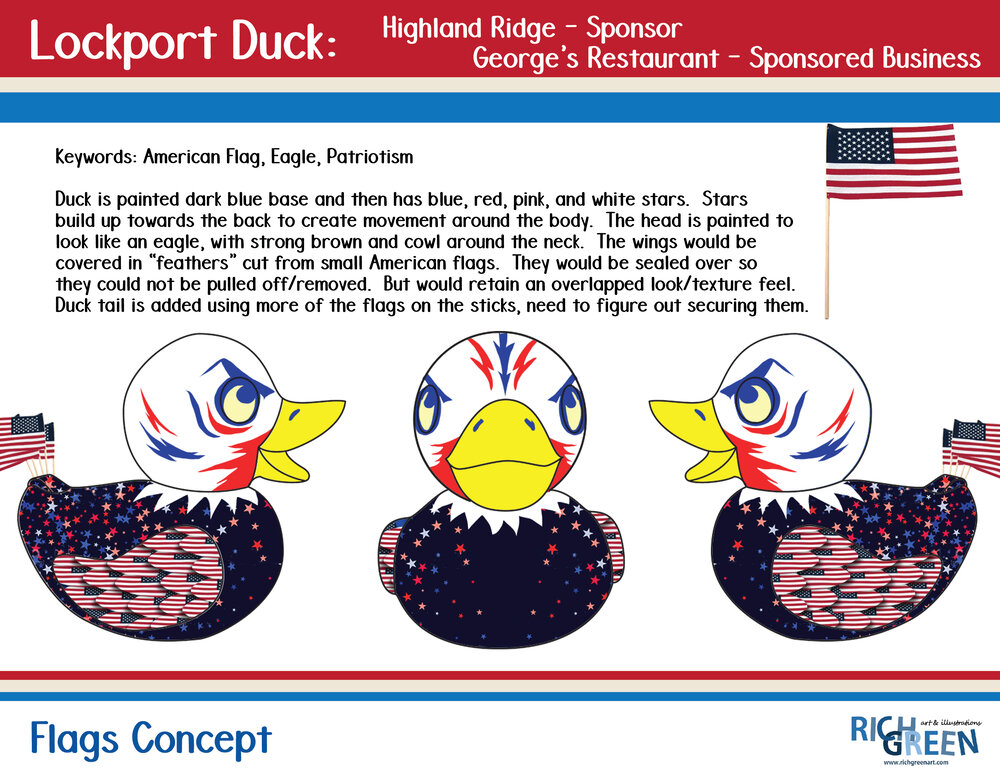
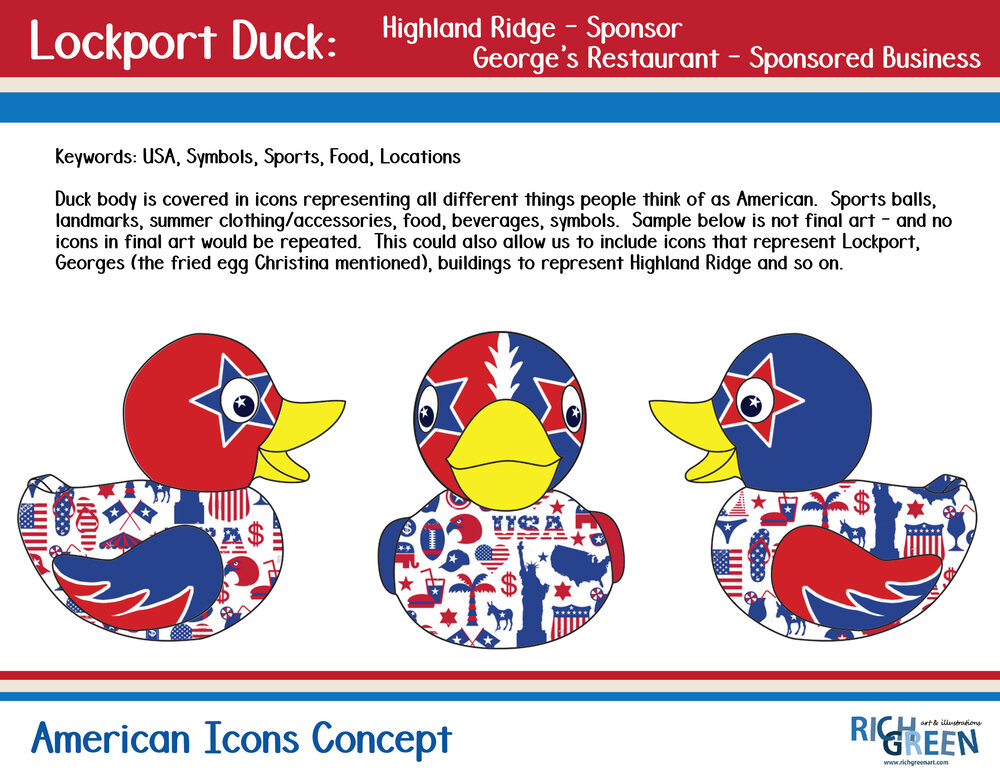
The sponsor asked for a duck that was themed red, white, and blue. They wanted something that would unify and celebrate American in some way.
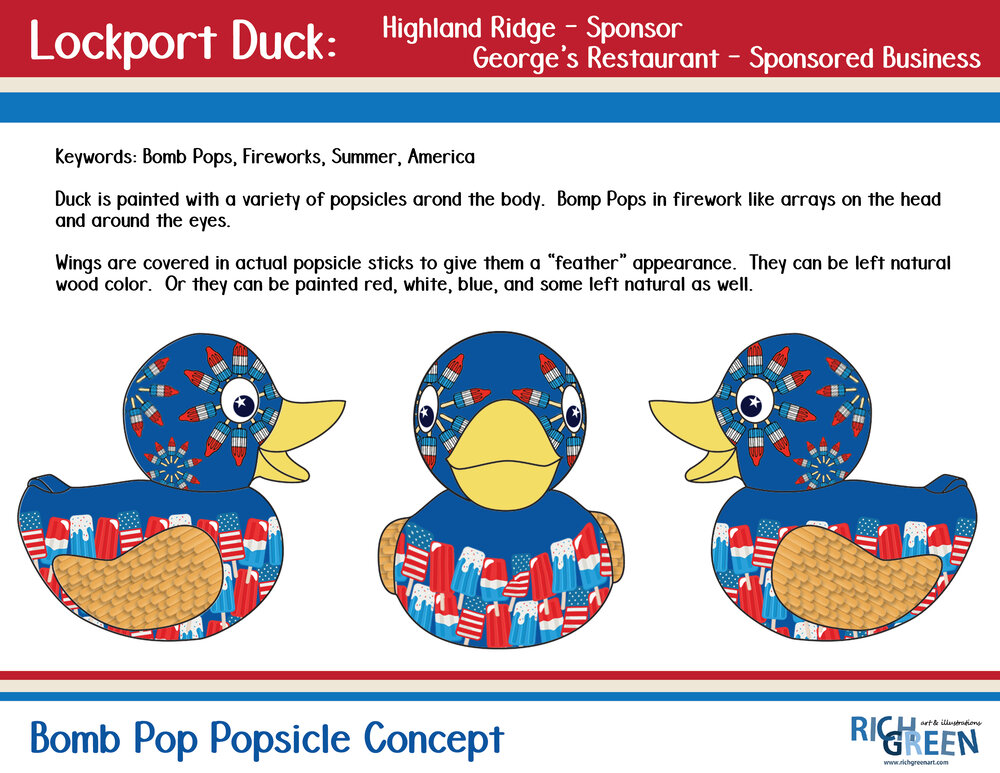
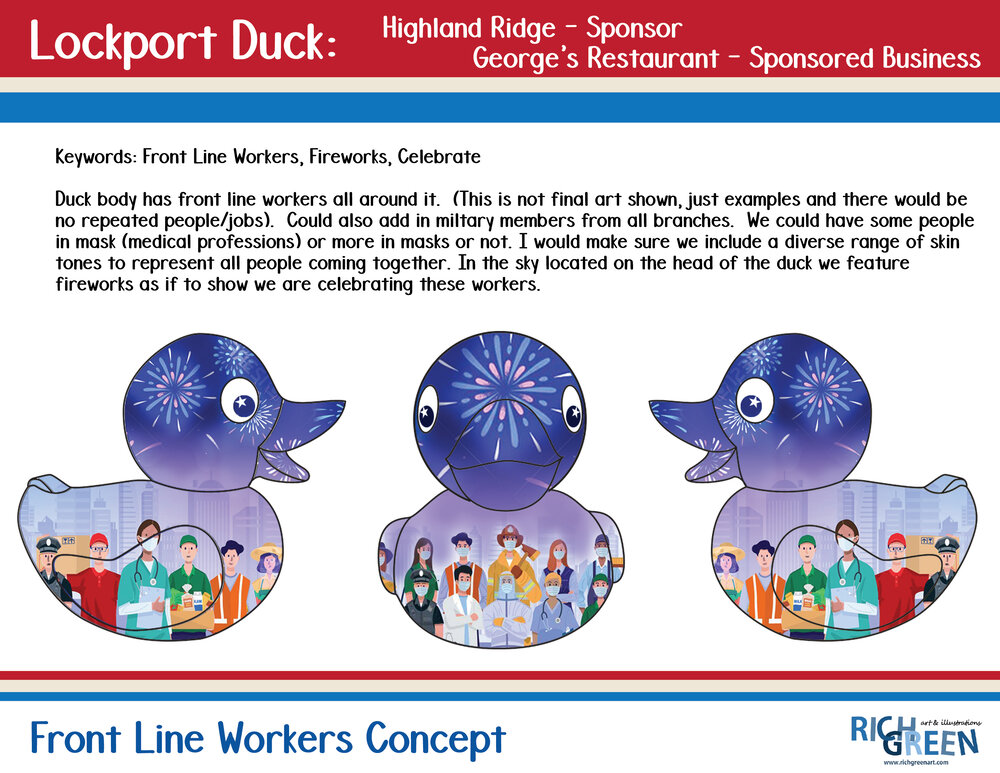
Truth be told nothing came to mind right away and a spent the better part of a week trying to find that spark of inspiration. I turned to my friends and followers on social media and asked them what red, white, and blue makes them think of. The number of responses were fantastic and provided me with the much needed kick I was looking for. The next day I worked on the five concepts below until the very early hours of the following morning.
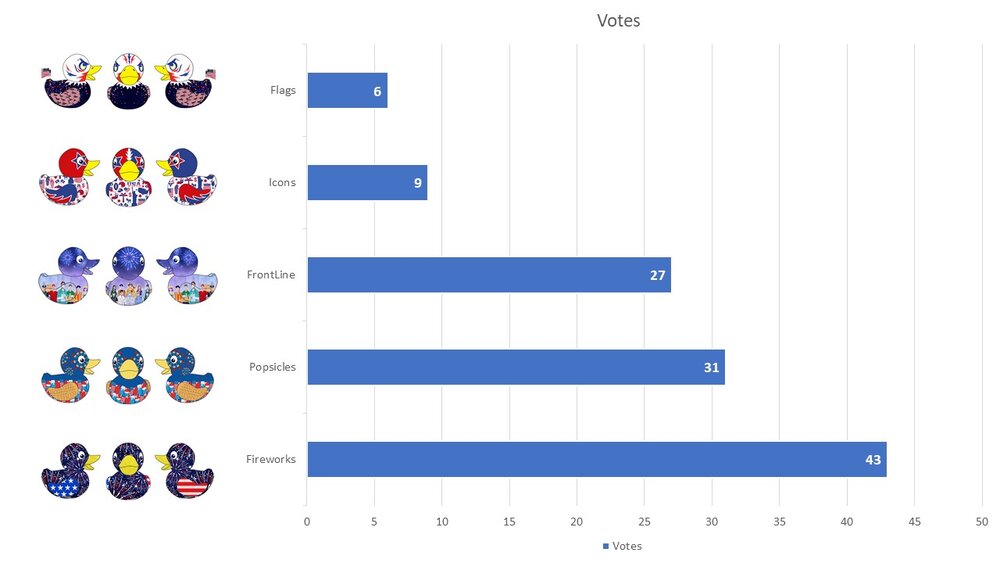
Once I have all five concepts laid out they were sent to those involved in the decision making process and the wait began. Meanwhile, I also shared the concepts with all of my social media friends asking which was there favorite. Something about gathering up data and seeing which concept(s) rise to the top is fascinating to me. And it was also a great way to feel connected with people while we are still living in more isolated pandemic times. This entire project is doing me a lot of good mentally.
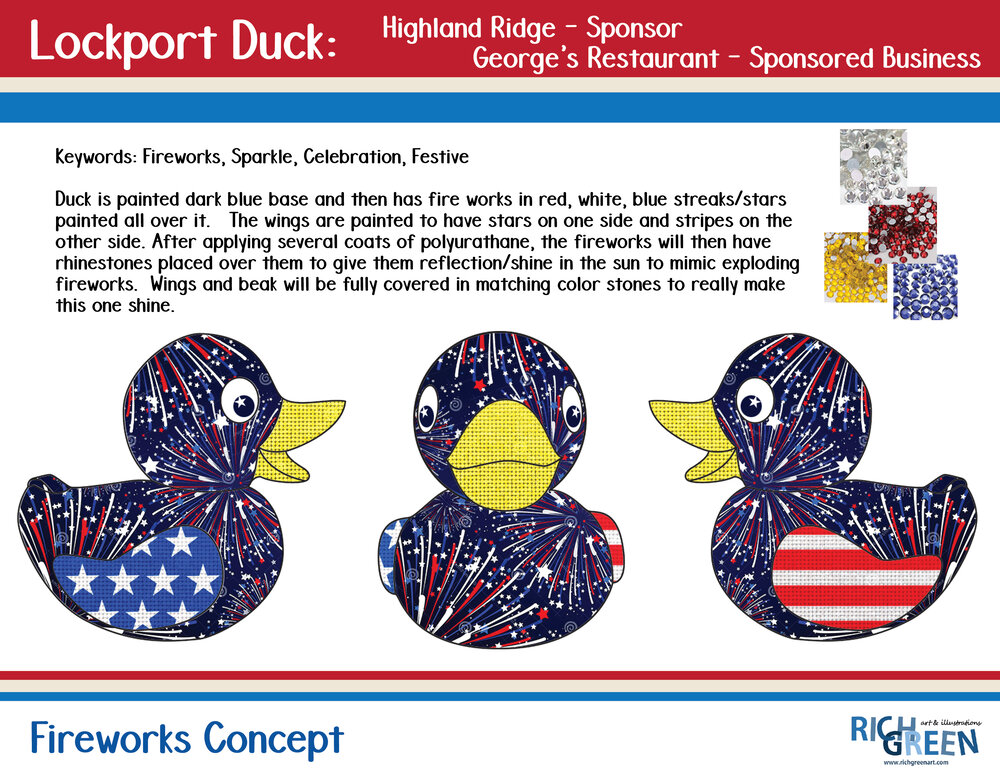
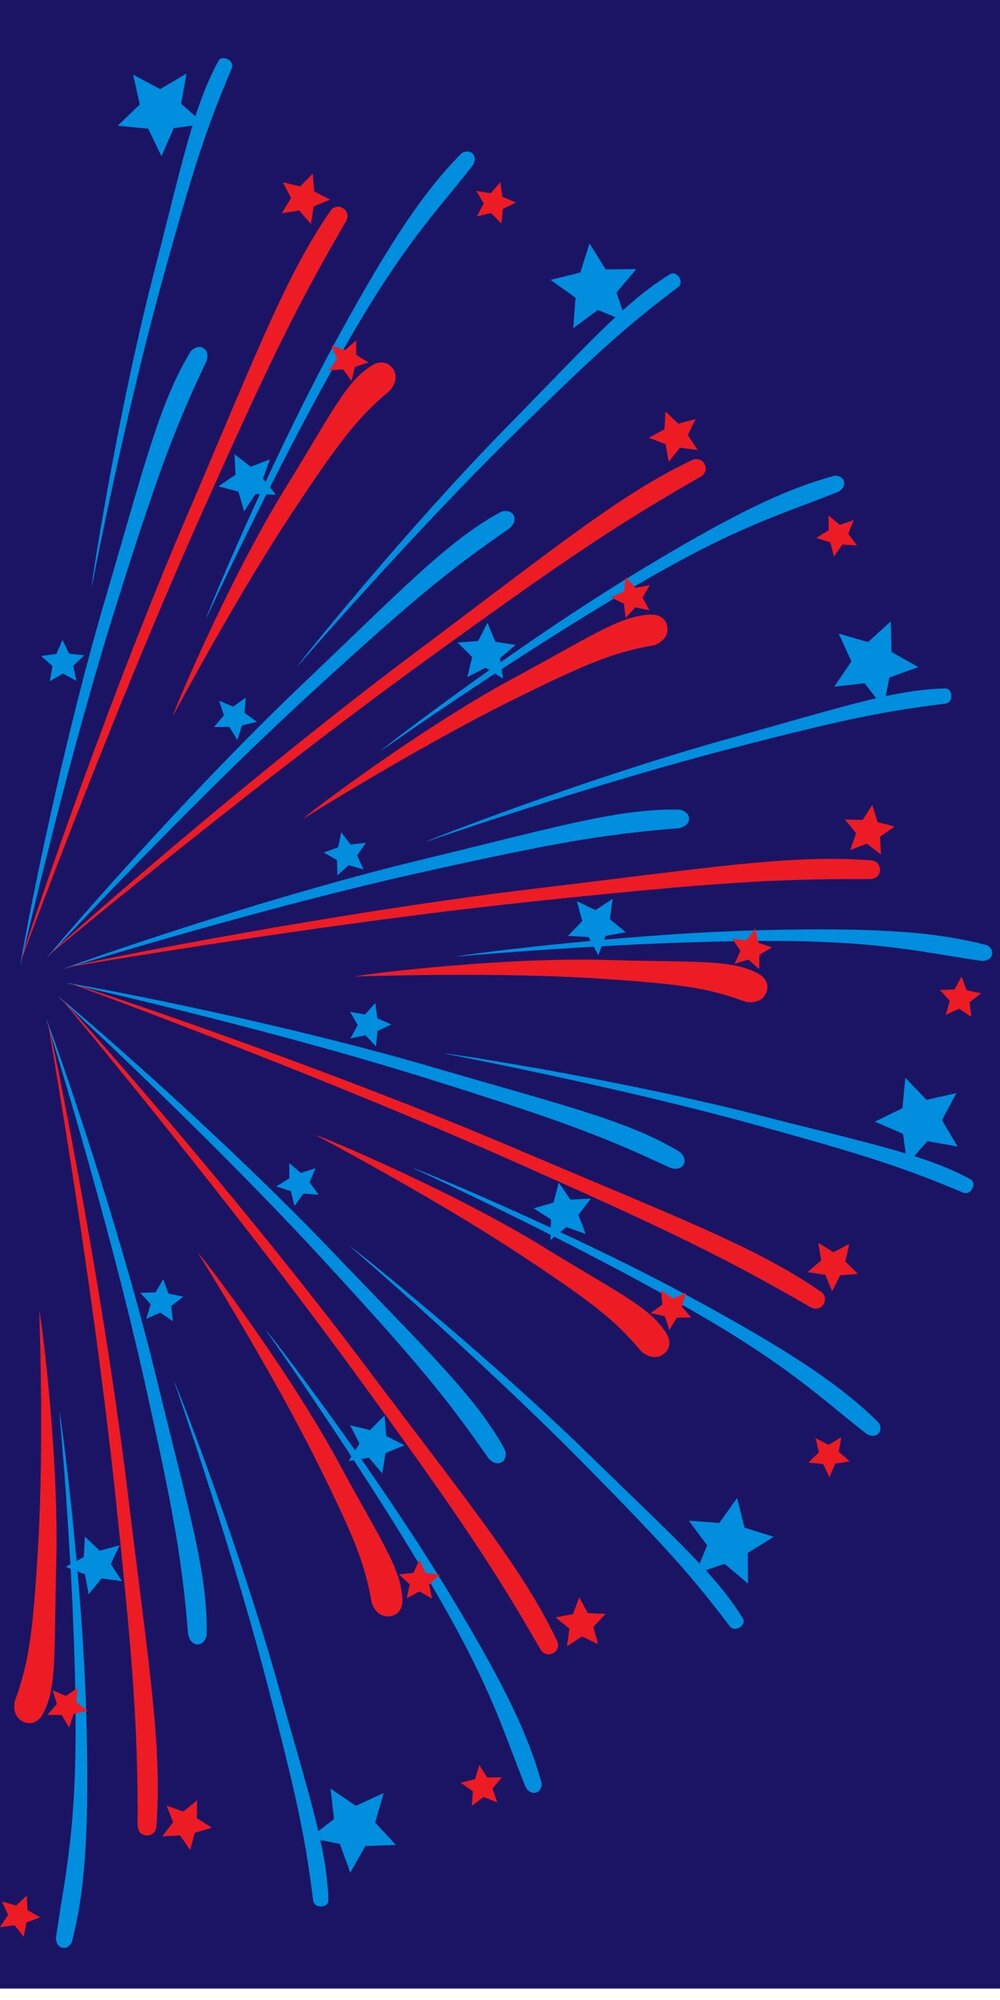
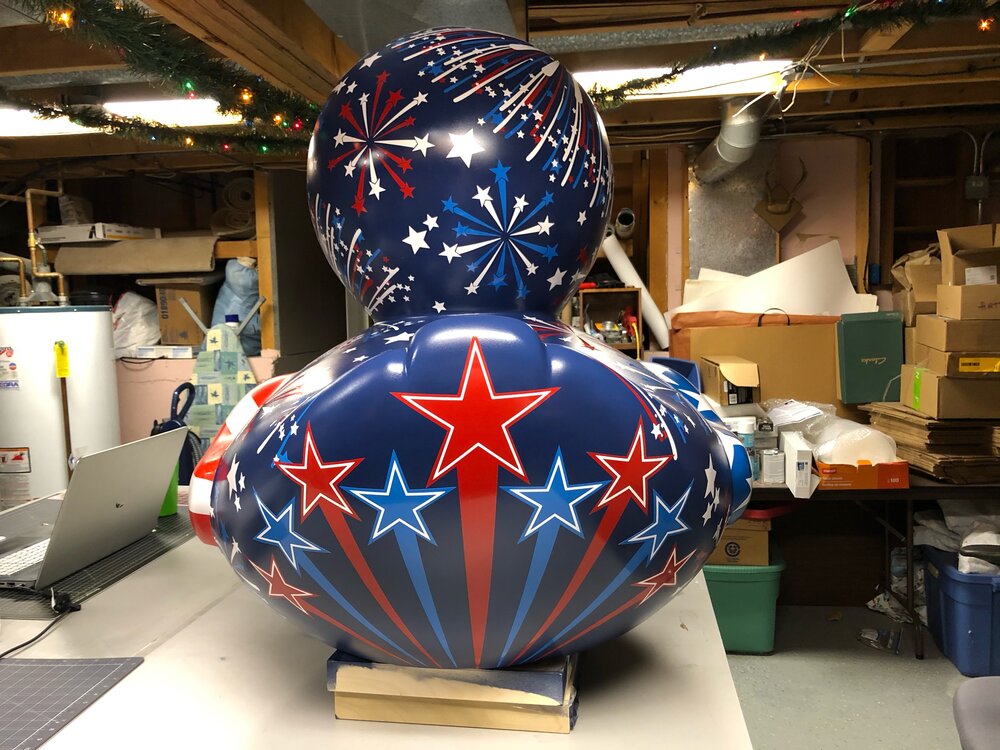
Turns out several of the options were popular and many folks like more than one concept or could not decide. Ultimately it was the Fireworks concepts that rose to the top and was ultimately selected by all involved as the concept I would move forward with. I was so excited as secretly it is my personal favorite!
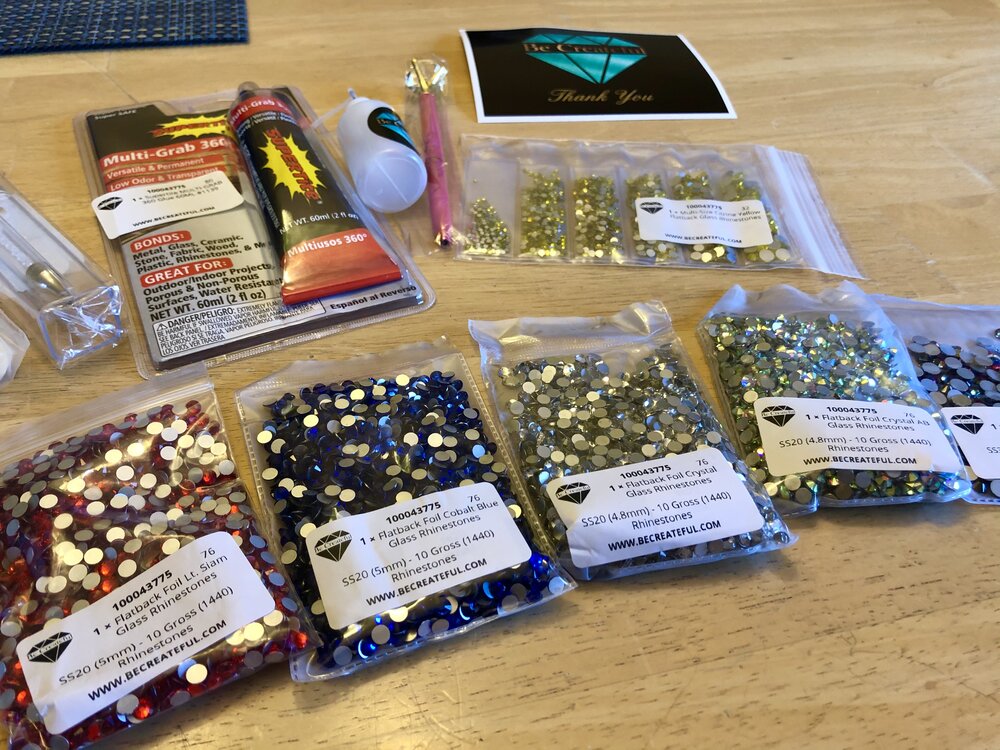
With this concept the one I was moving forward with, I started researching rhinestone suppliers and had so many questions. I came across the site www.becreateful.com and reached out to them via email that night. Annette from BeCreateful called me first thing the following morning and was AMAZING! She had so much excellent information, tips, suggestions, and support for what I am doing here. Sometimes I think things work out a certain way because you are supposed to connect with other people, and Annette is clearly someone who I was supposed to connect with. Could not recommend her more!
After our call I put in an order for smaller bags of some rhinestones and other supplies so I can verify colors, color match paint, and test out adhesives to see which I like working with best.
Next it was onto figuring out what paint I was going to use. When I realized I had some spray paints from a project I did over the summer and a few of the colors were spot on for my needs. They are Behr Aersol Enamel Spray Paint + Primer.
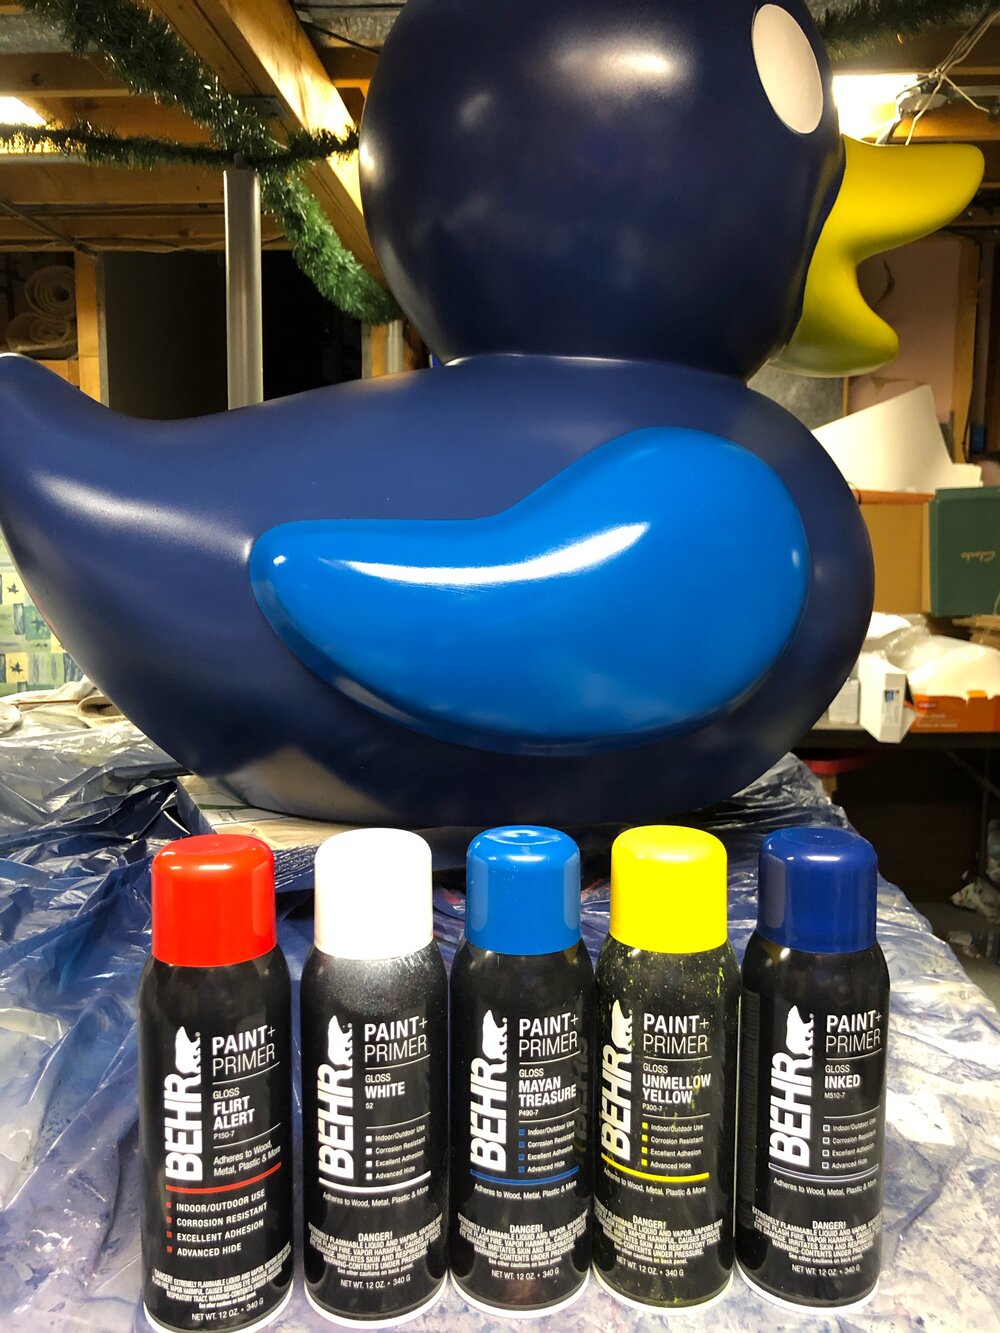
The colors used on this project are:
-
Flirt Alert – Red
-
Mayan Treasure – Med Blue
-
Inked – Dark Blue
-
Unmellow Yellow
-
White
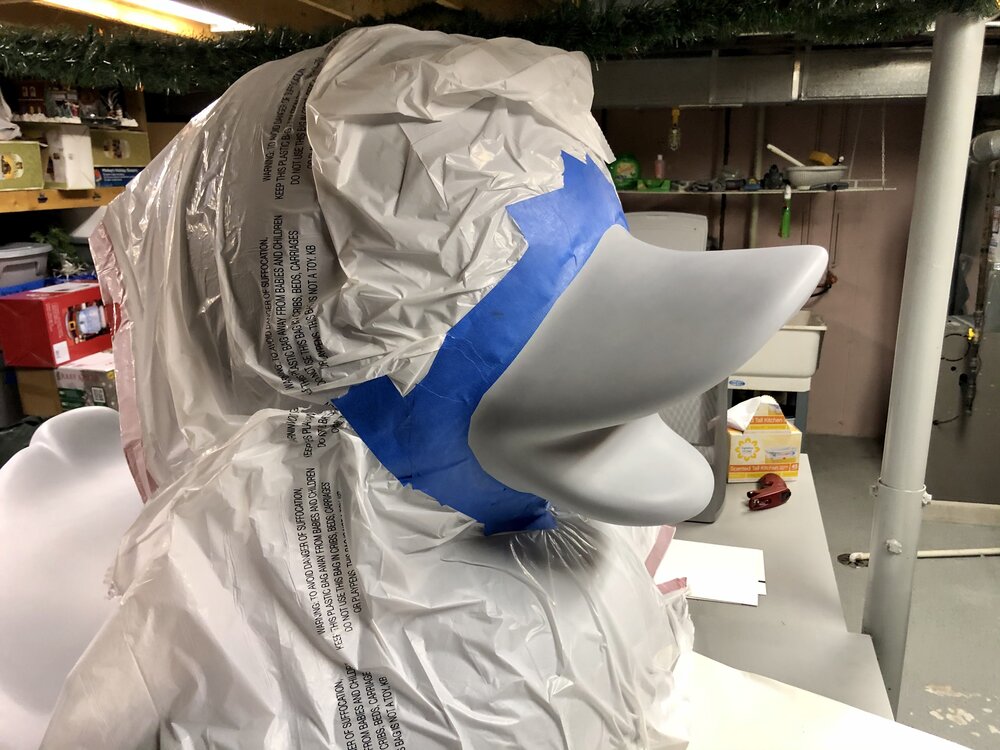
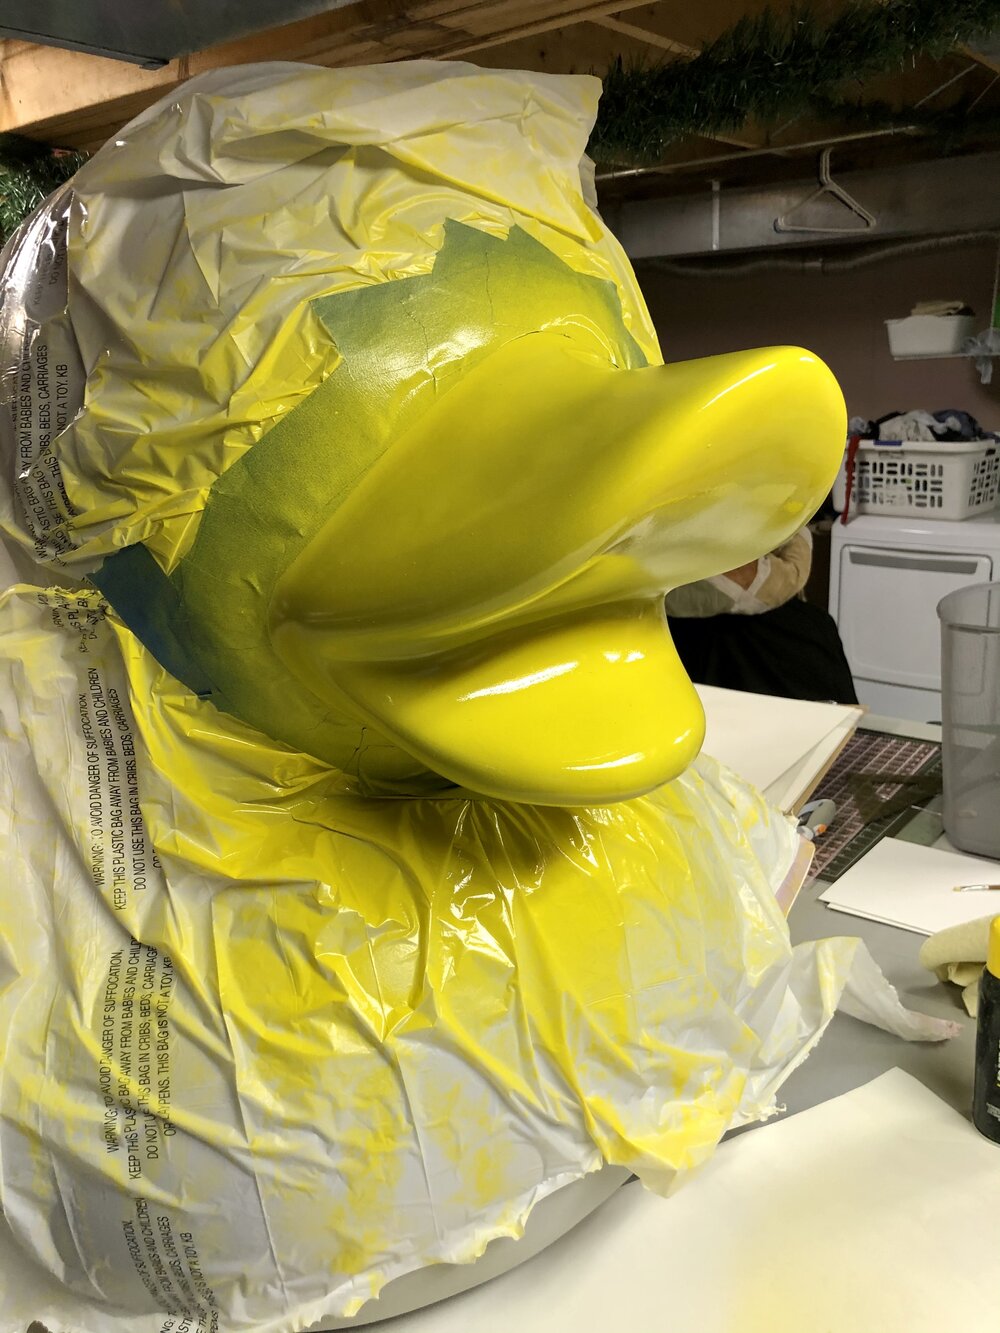
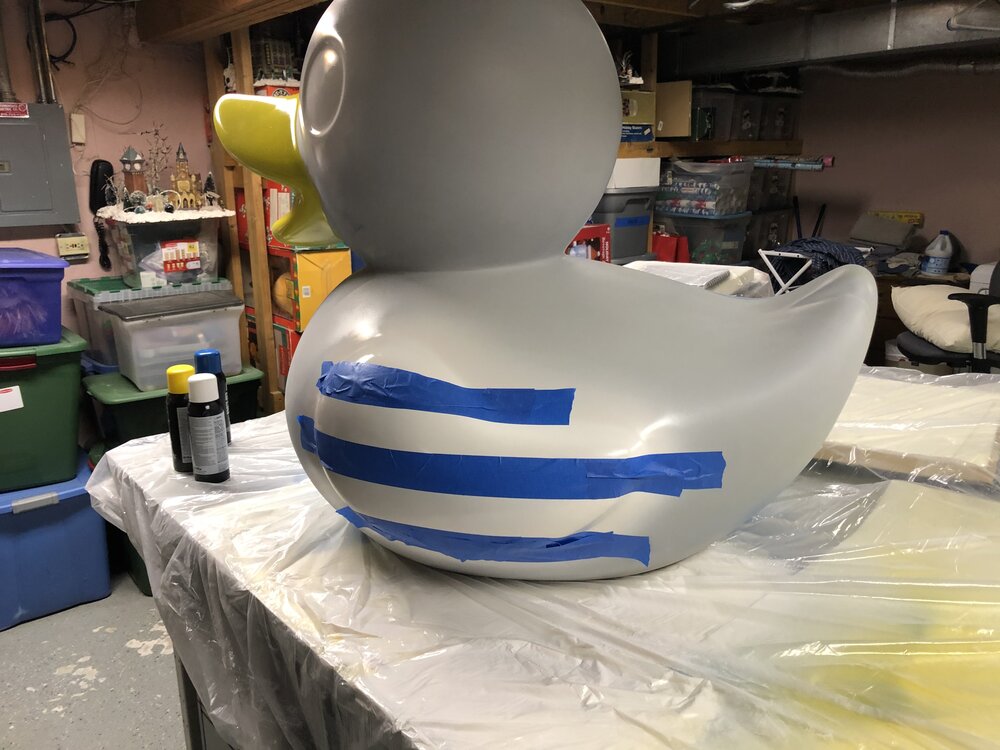
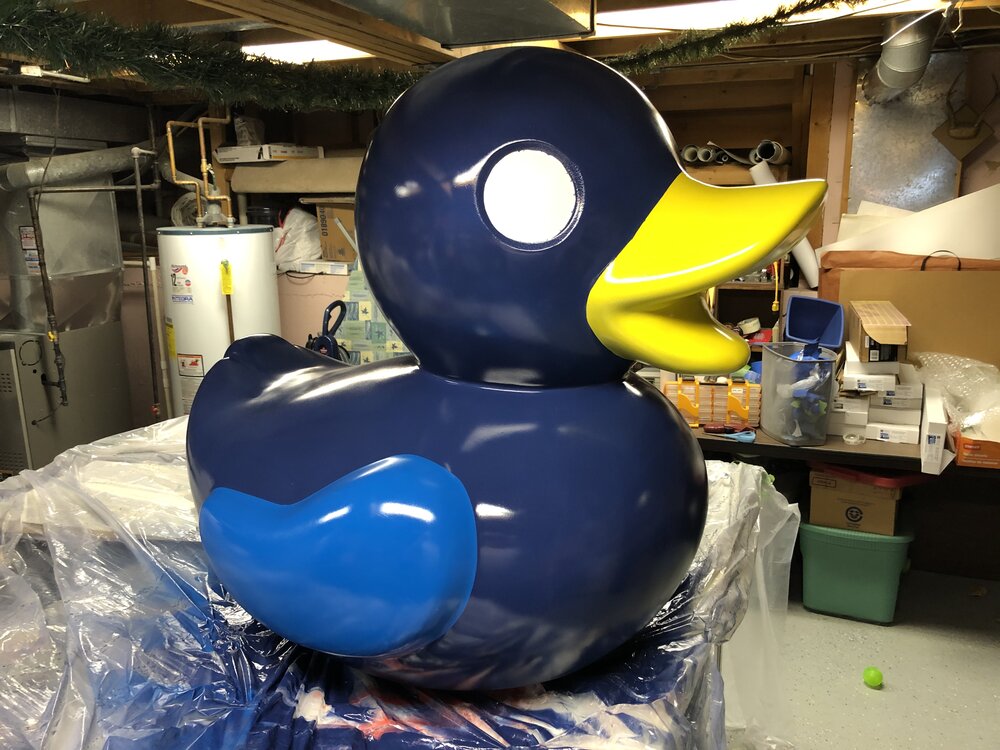
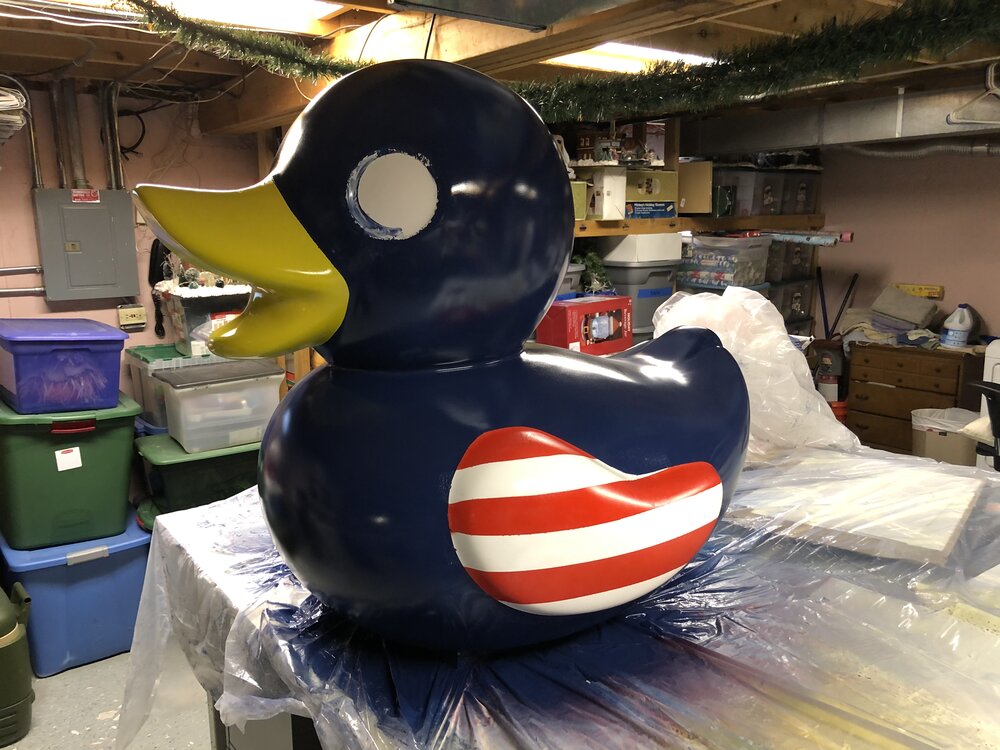
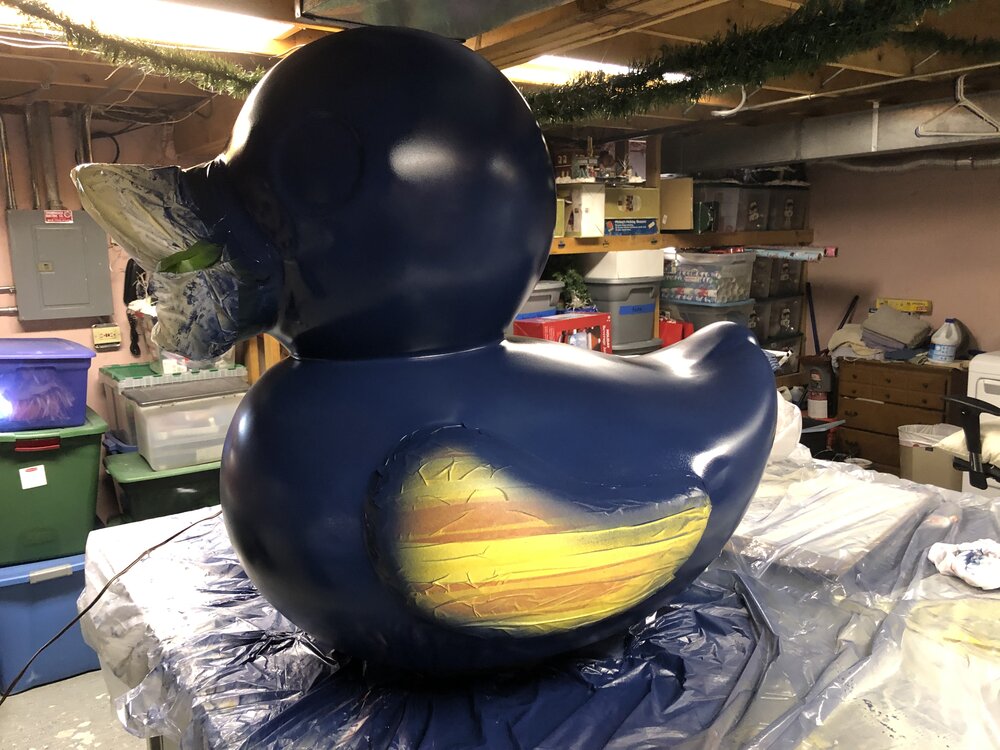
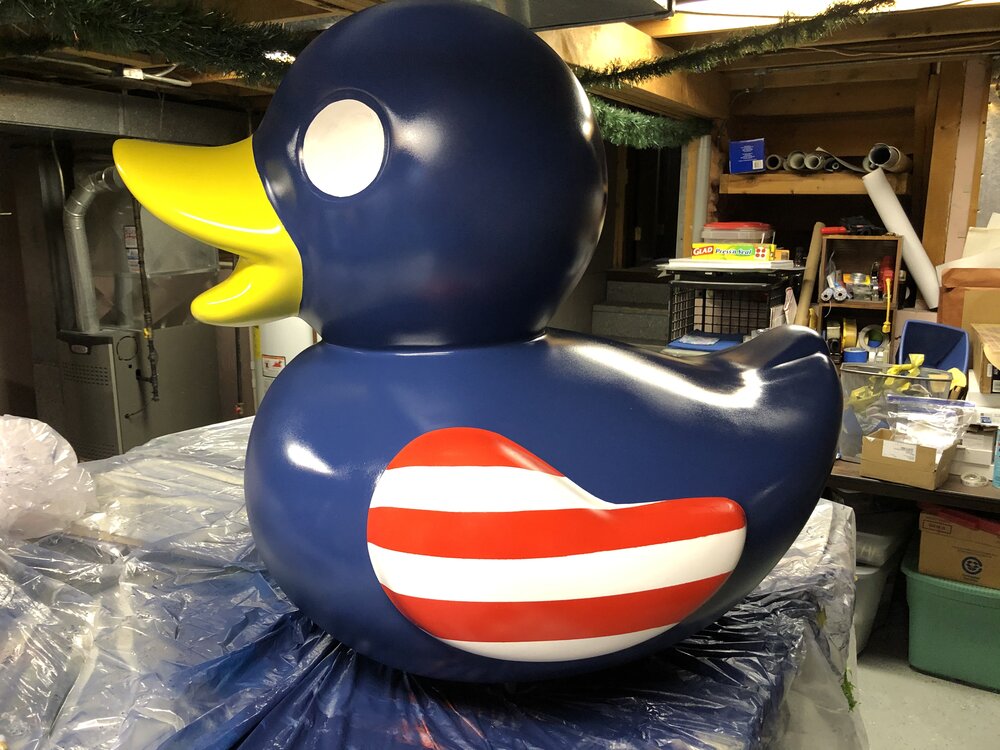
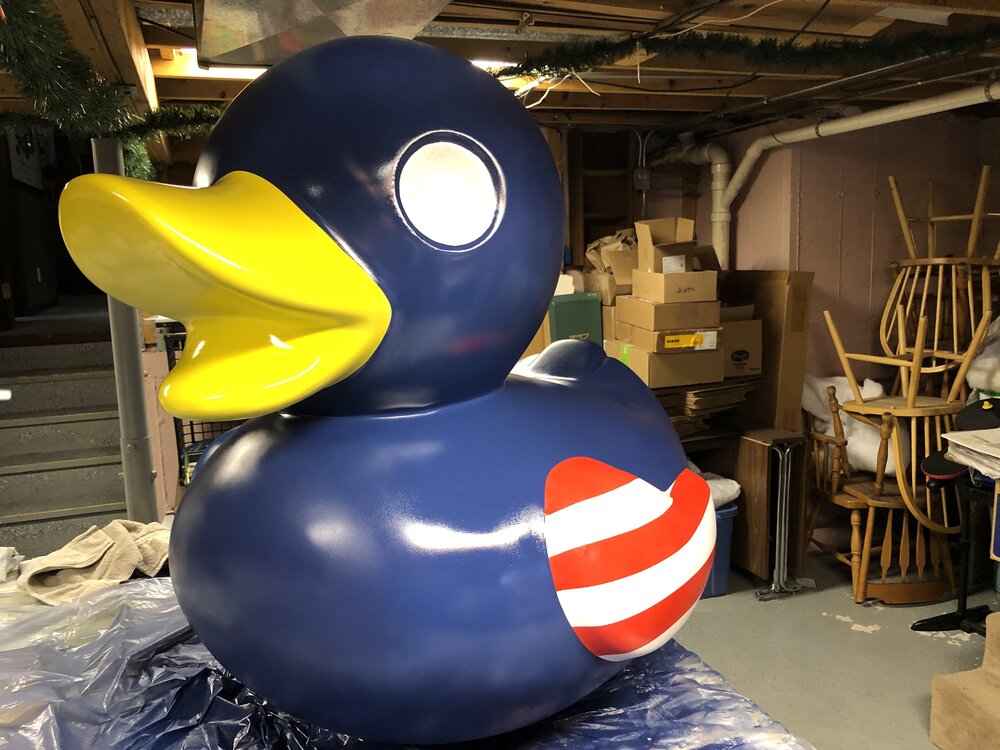
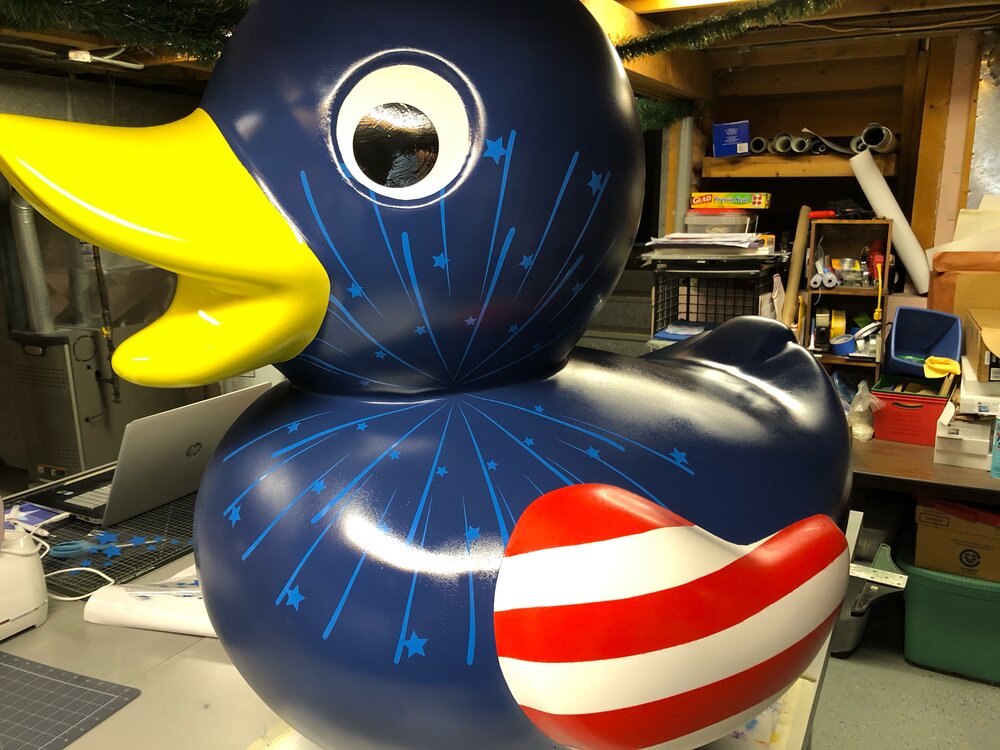
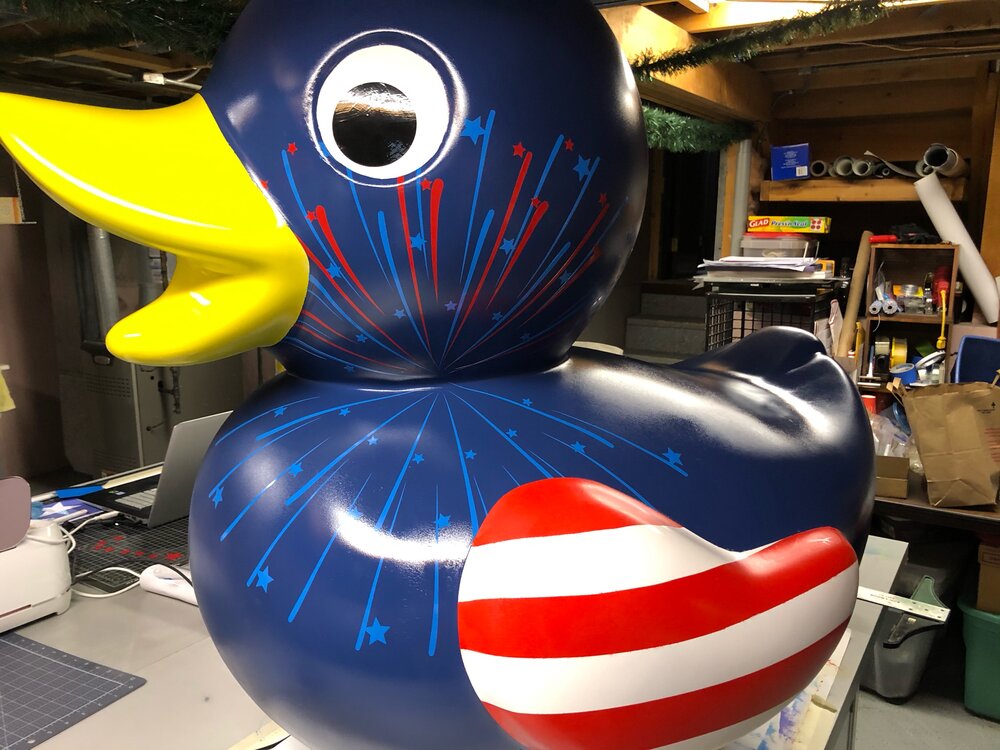
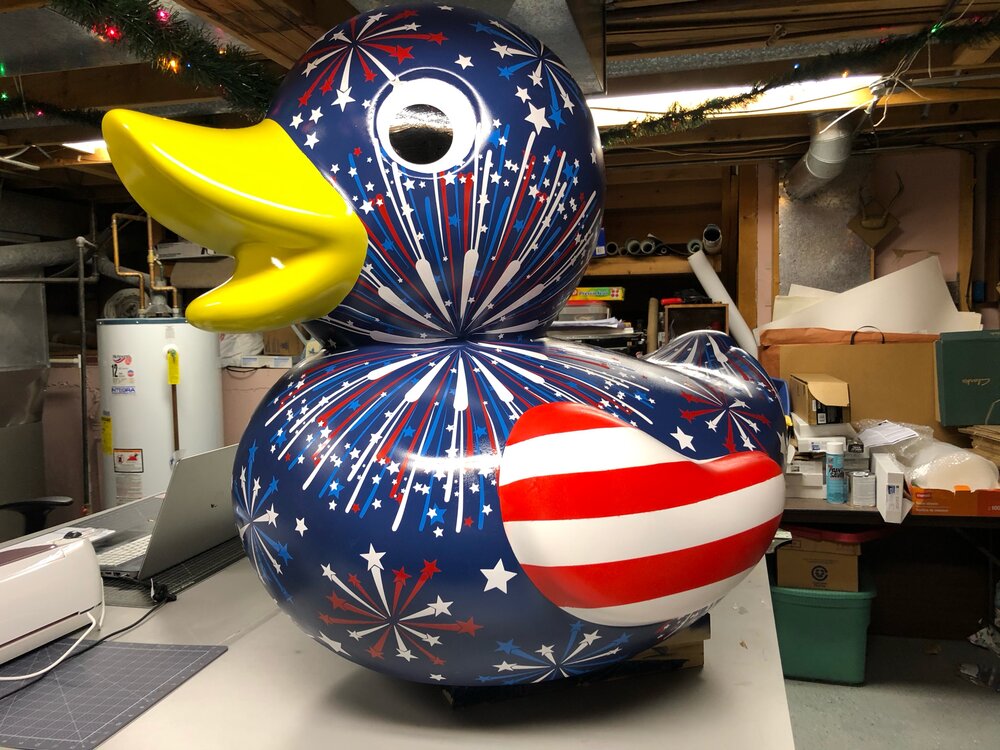
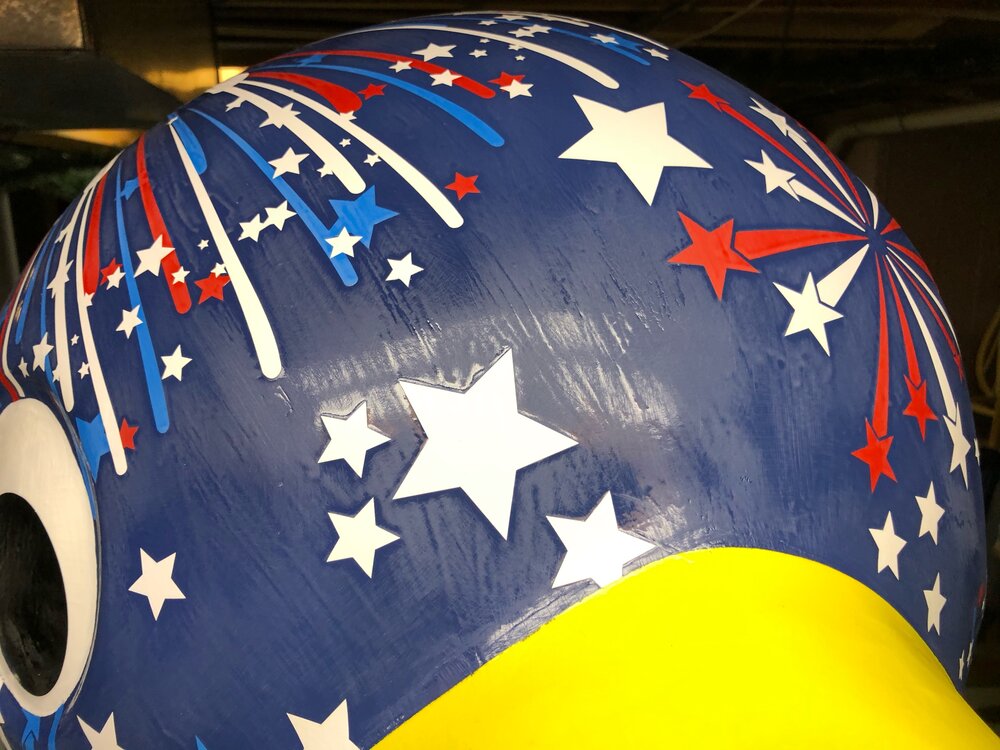
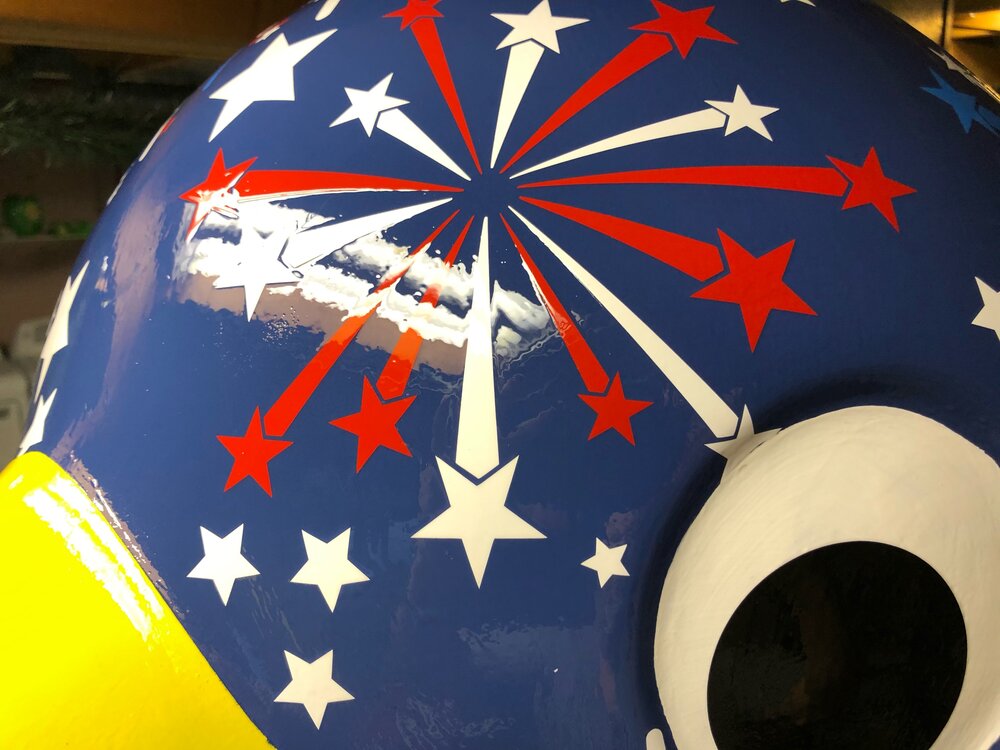
I started with masking off and painting the beak. Then I moved onto the blue wing. Next the white for the eyes and the other wing. When everything was dried I then masked off the strips on the white wing and applied the red.
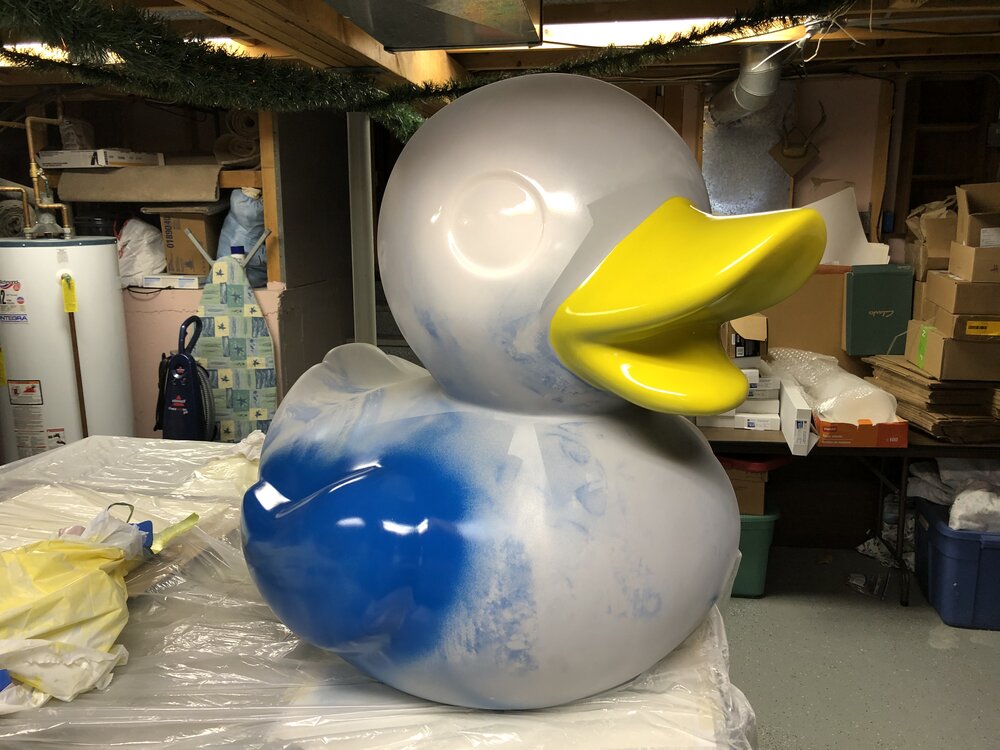
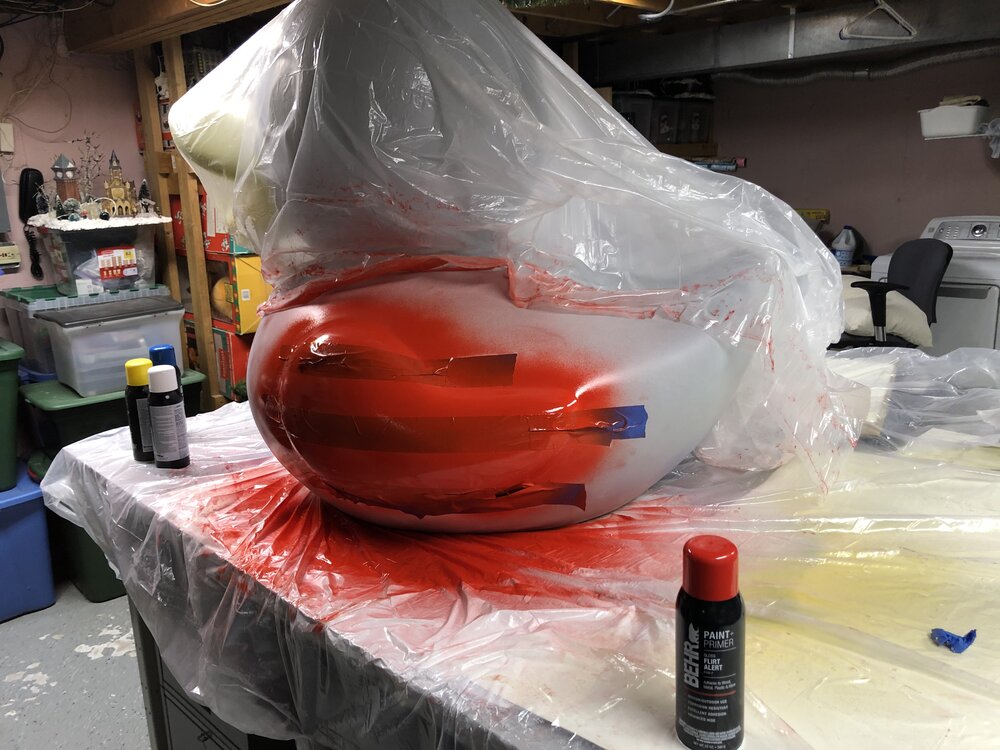
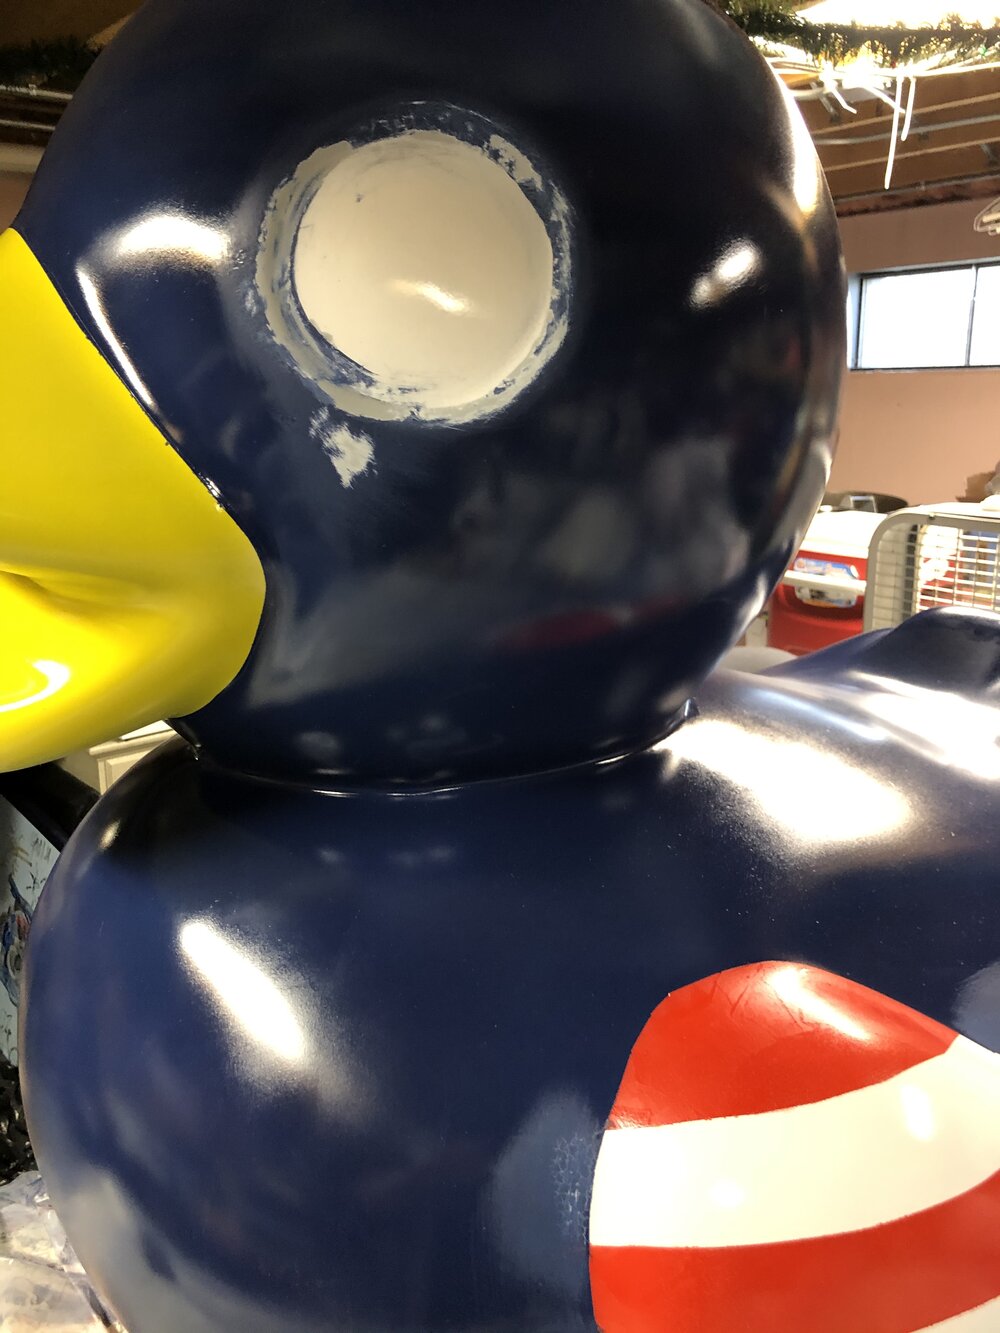
After all of this was dry I masked off the beak and wings – so I could apply the dark blue base to the body of the duck.
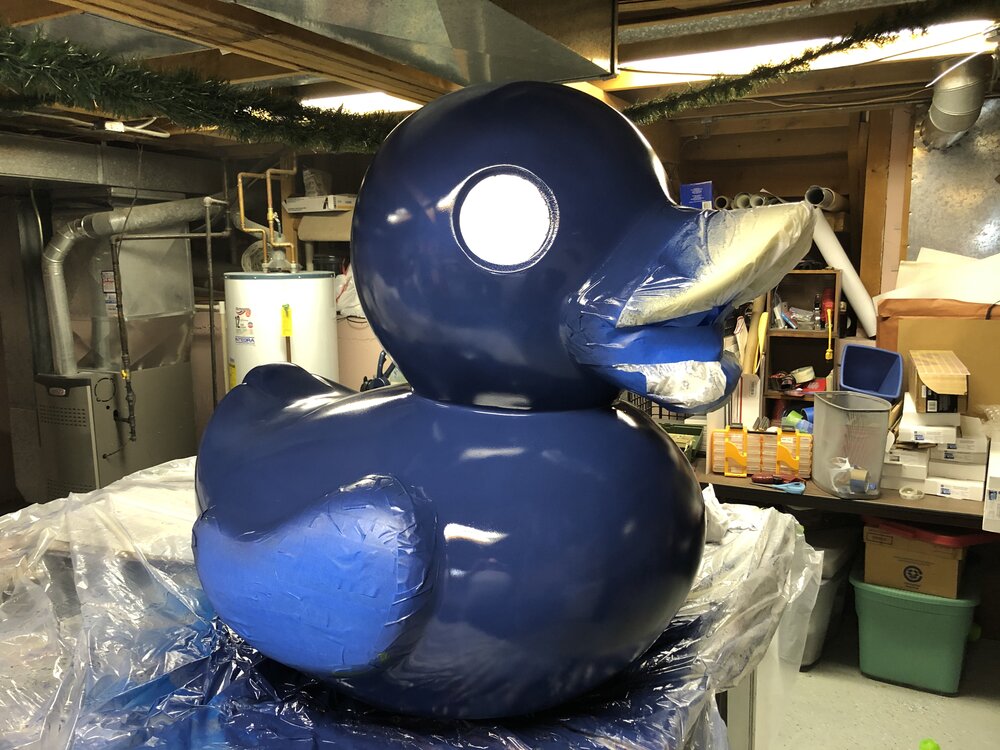
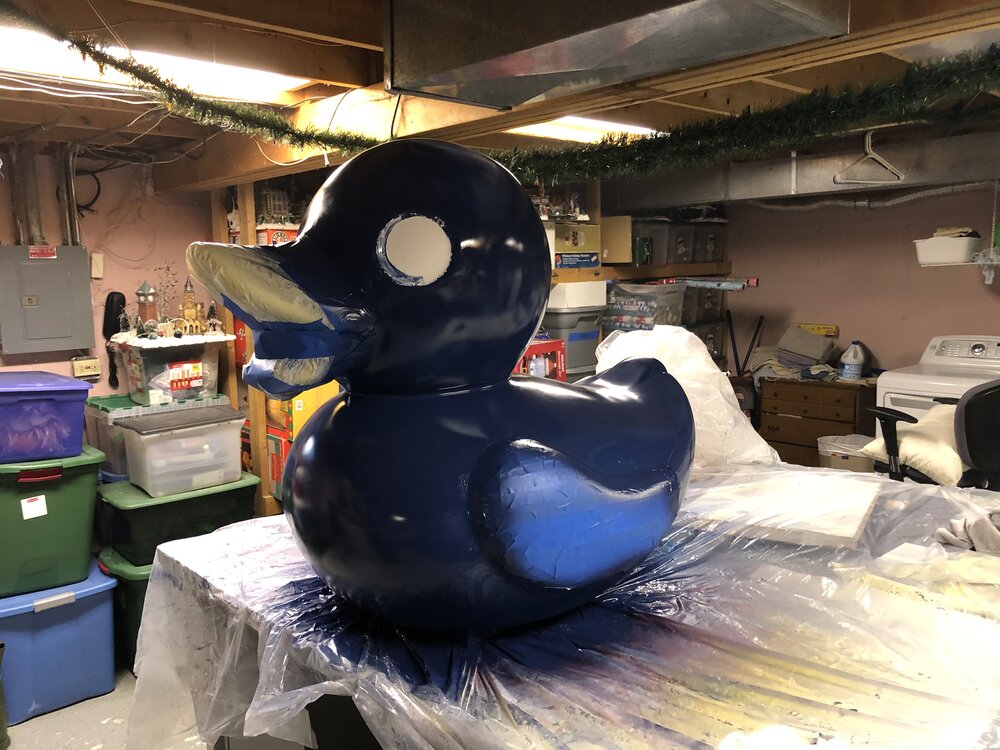
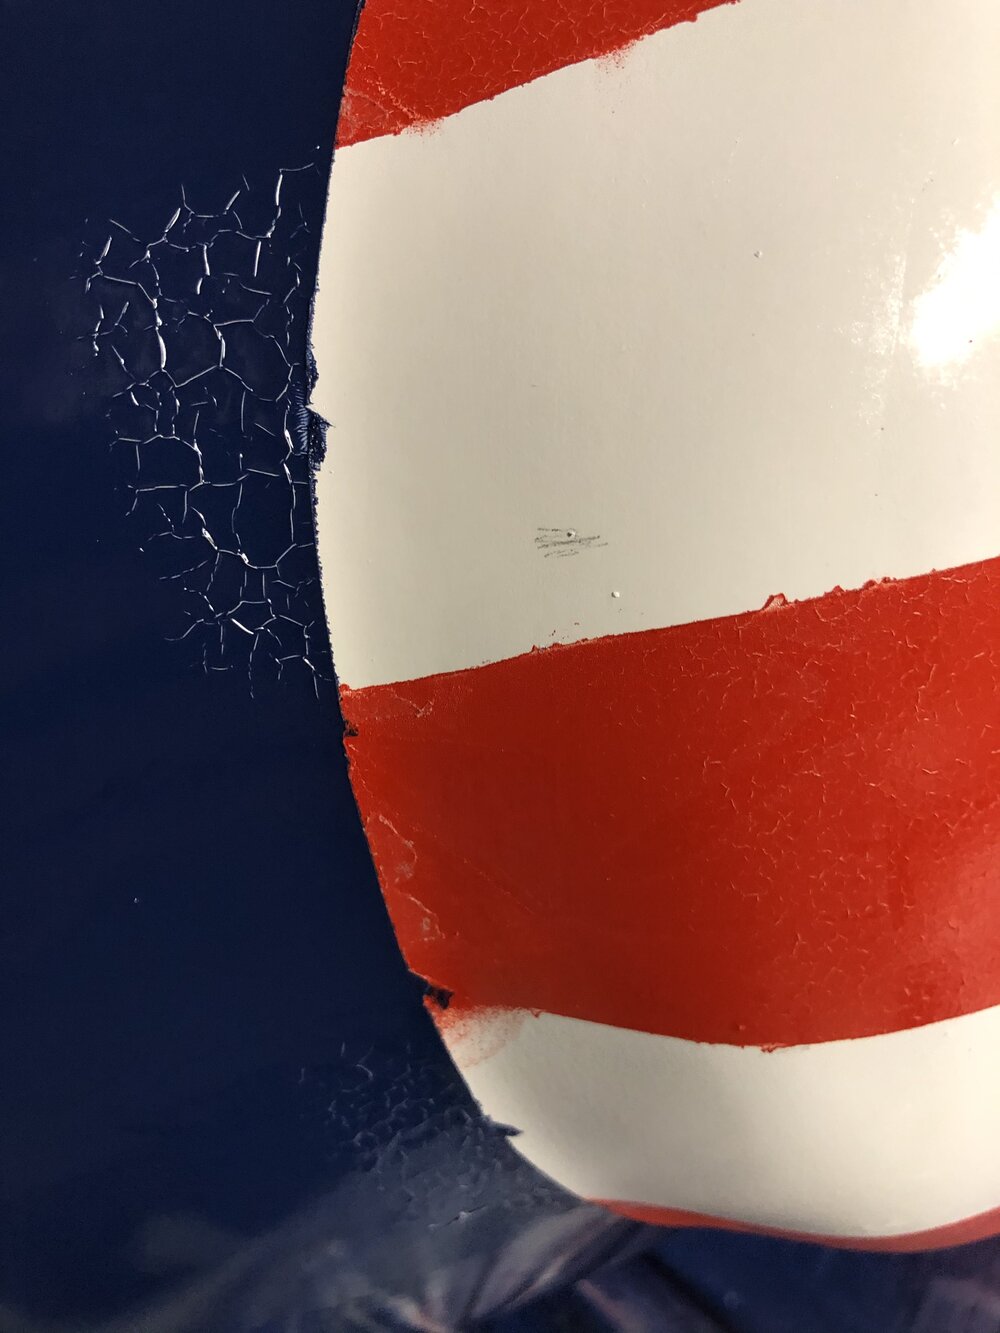
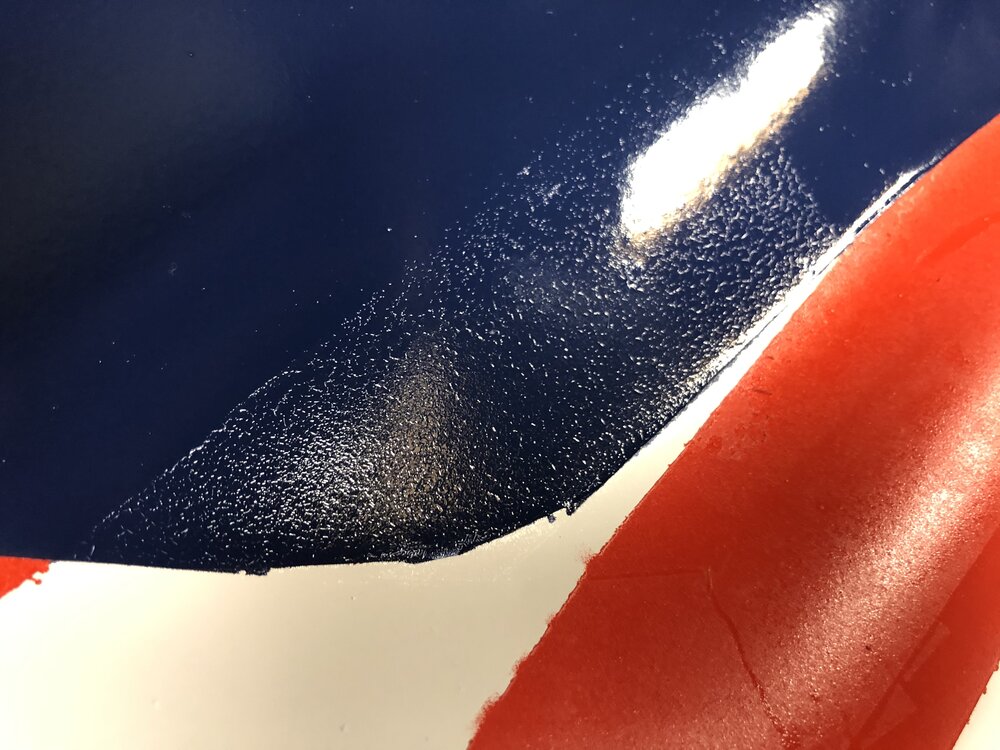
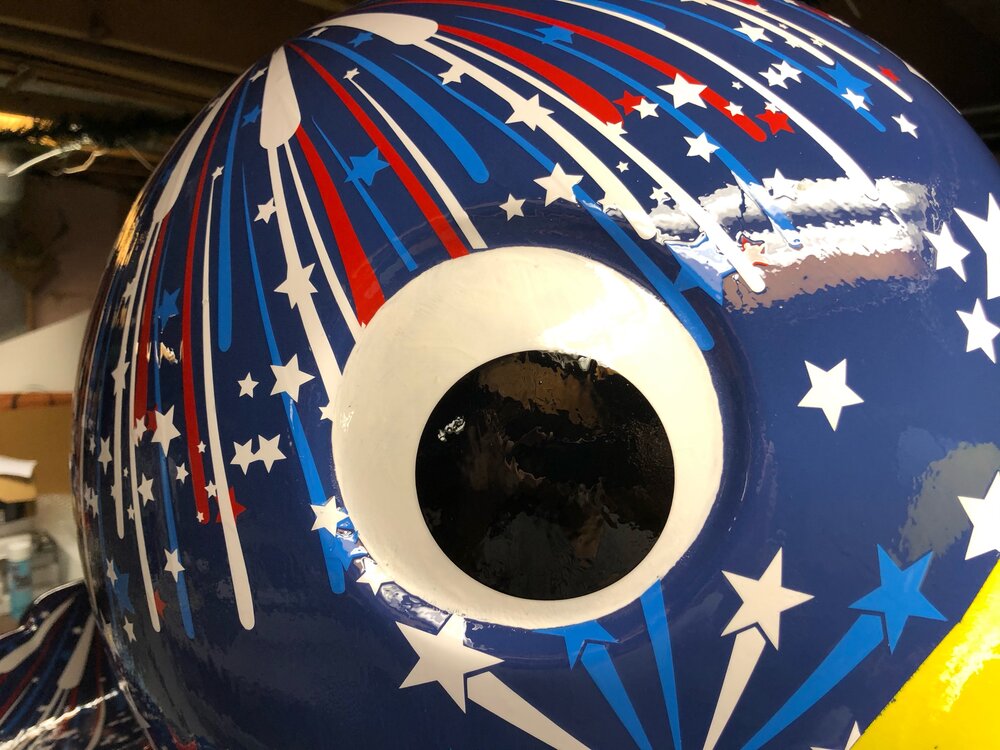
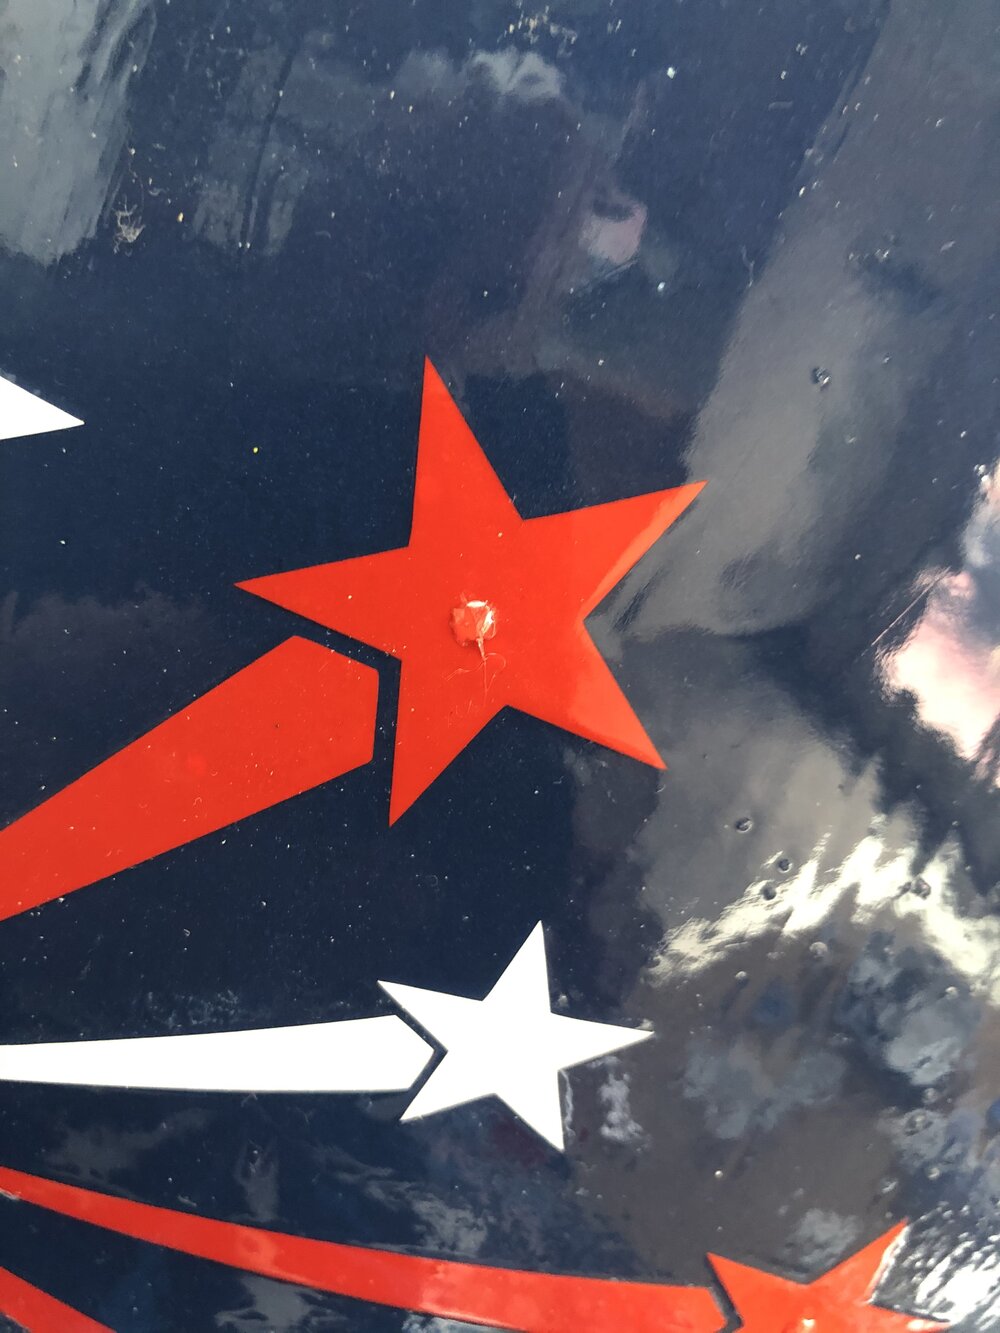
Unfortunately I discovered an issue with the dark blue paint cracking in a few areas around the edges of the eyes and by the red/white wing. So I had to wait for them to fully dry. Then sand them down in those areas in preparation to repaint them. Not ideal to be hit with a setback but luckily I was able to get it corrected pretty easily, just took some time and patience.
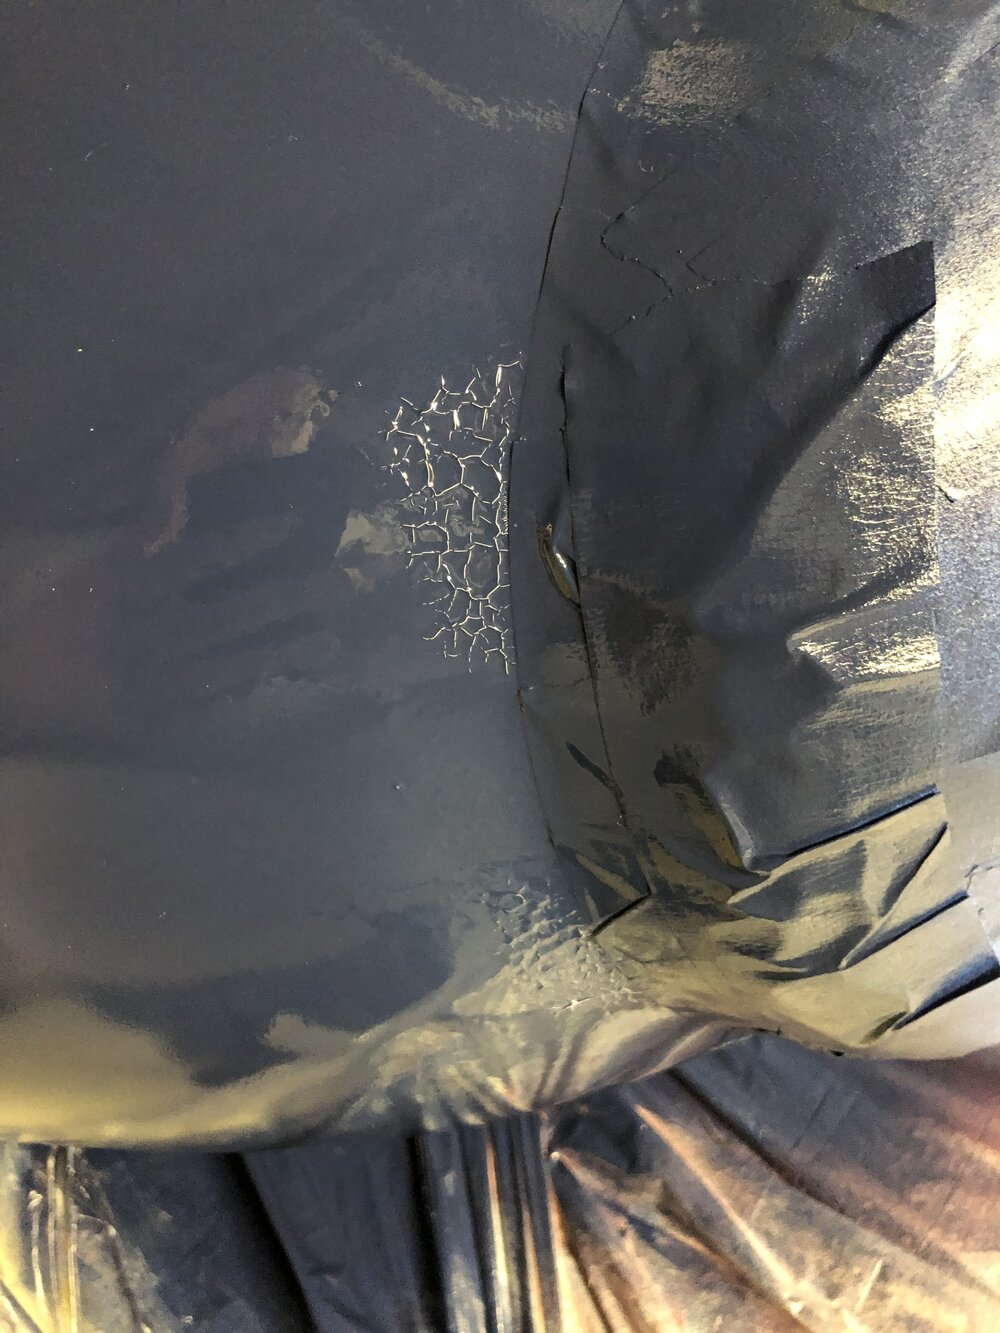
Also as I was preparing the duck for the re-coat of the dark blue, I found that Frog Tape makes a yellow tape for delicate surfaces (i.e. recently painted surfaces). So I used that to mask off the wings and it was a dream to work with around the curves and edges. And when I peeled it off later, it came up easily and left a flawless masking line. Highly recommend. Only tape I will use on painting projects going forward, it is great stuff!
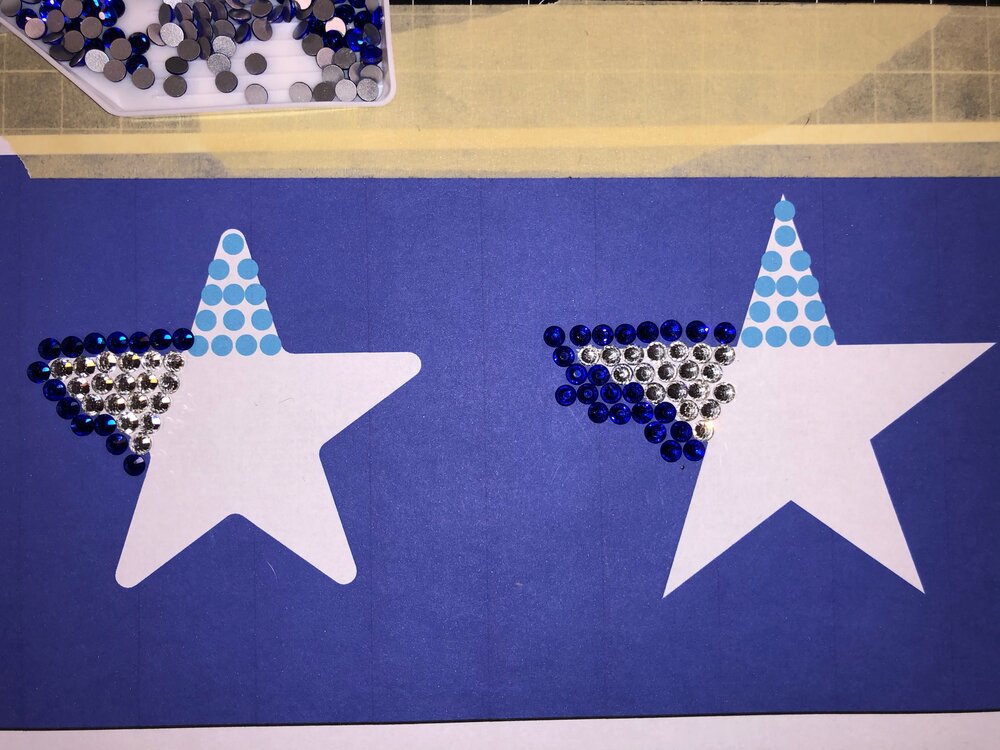
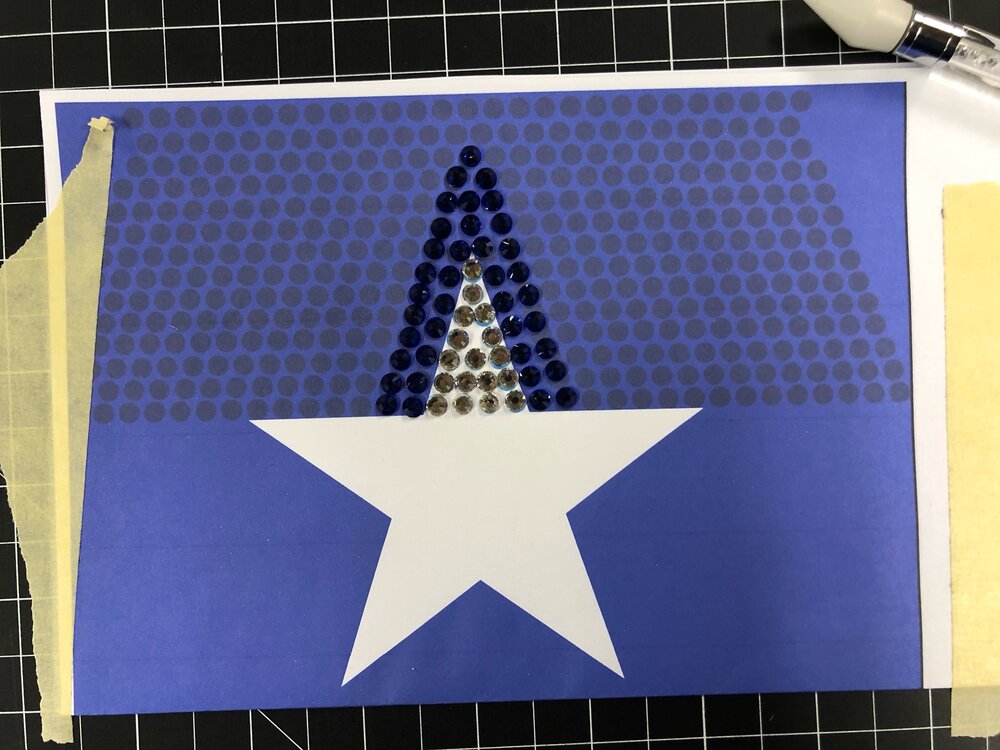
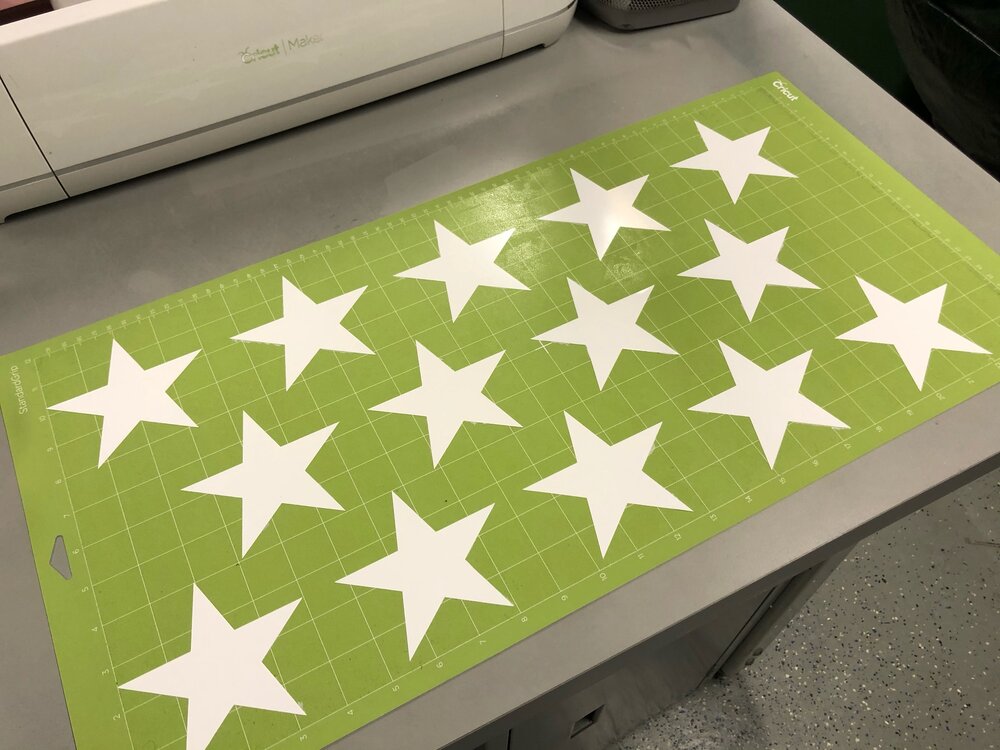
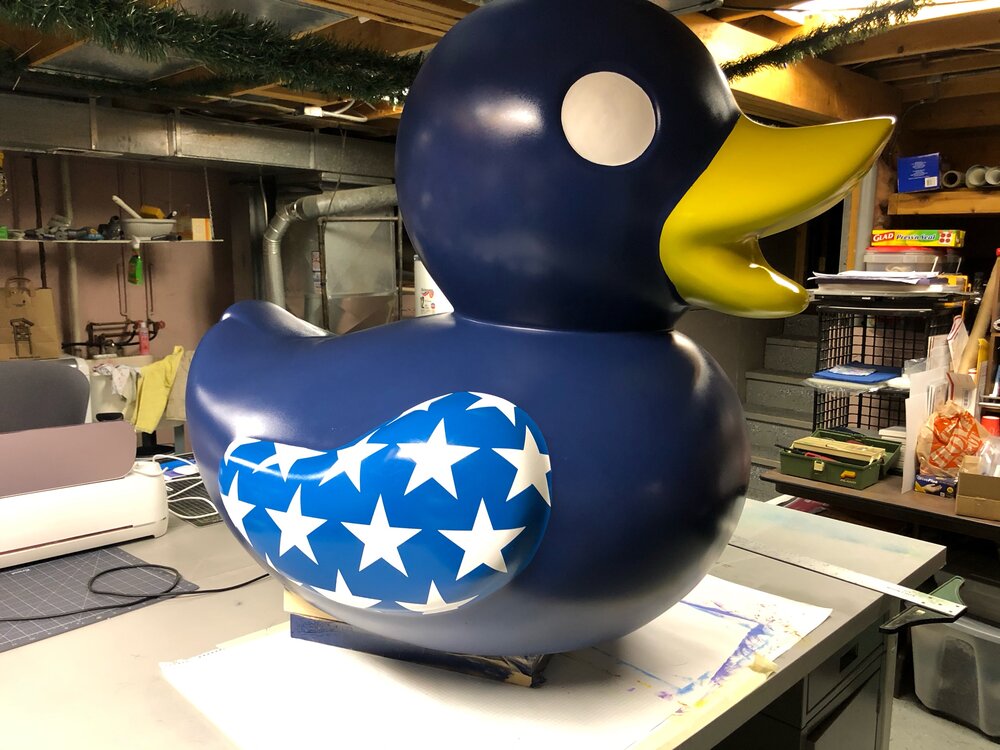
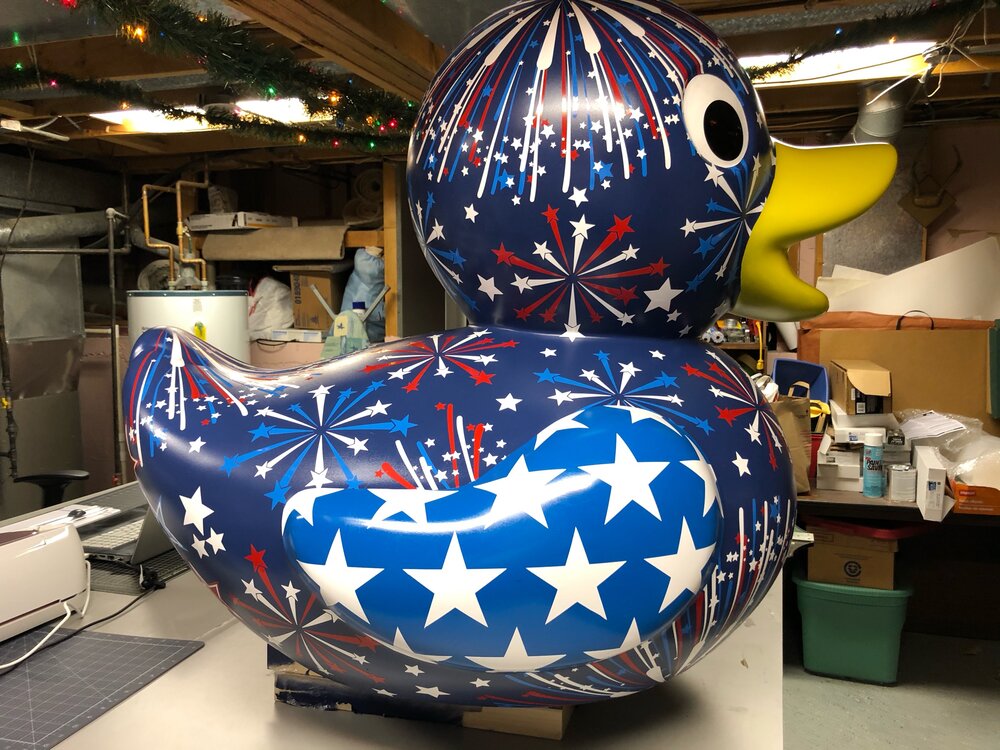
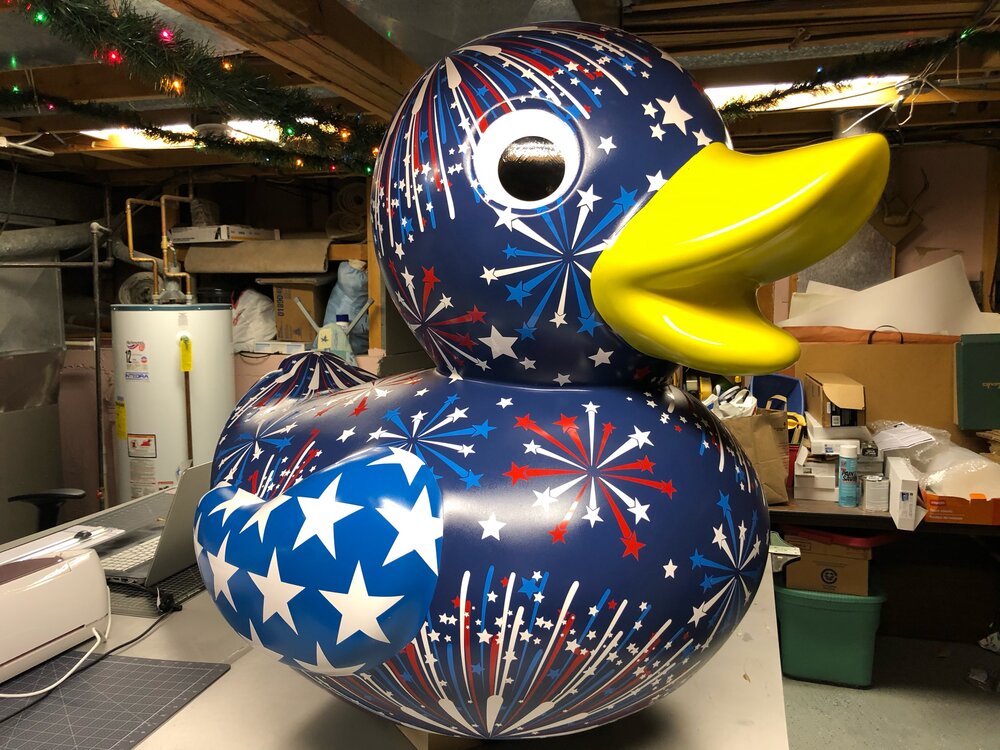
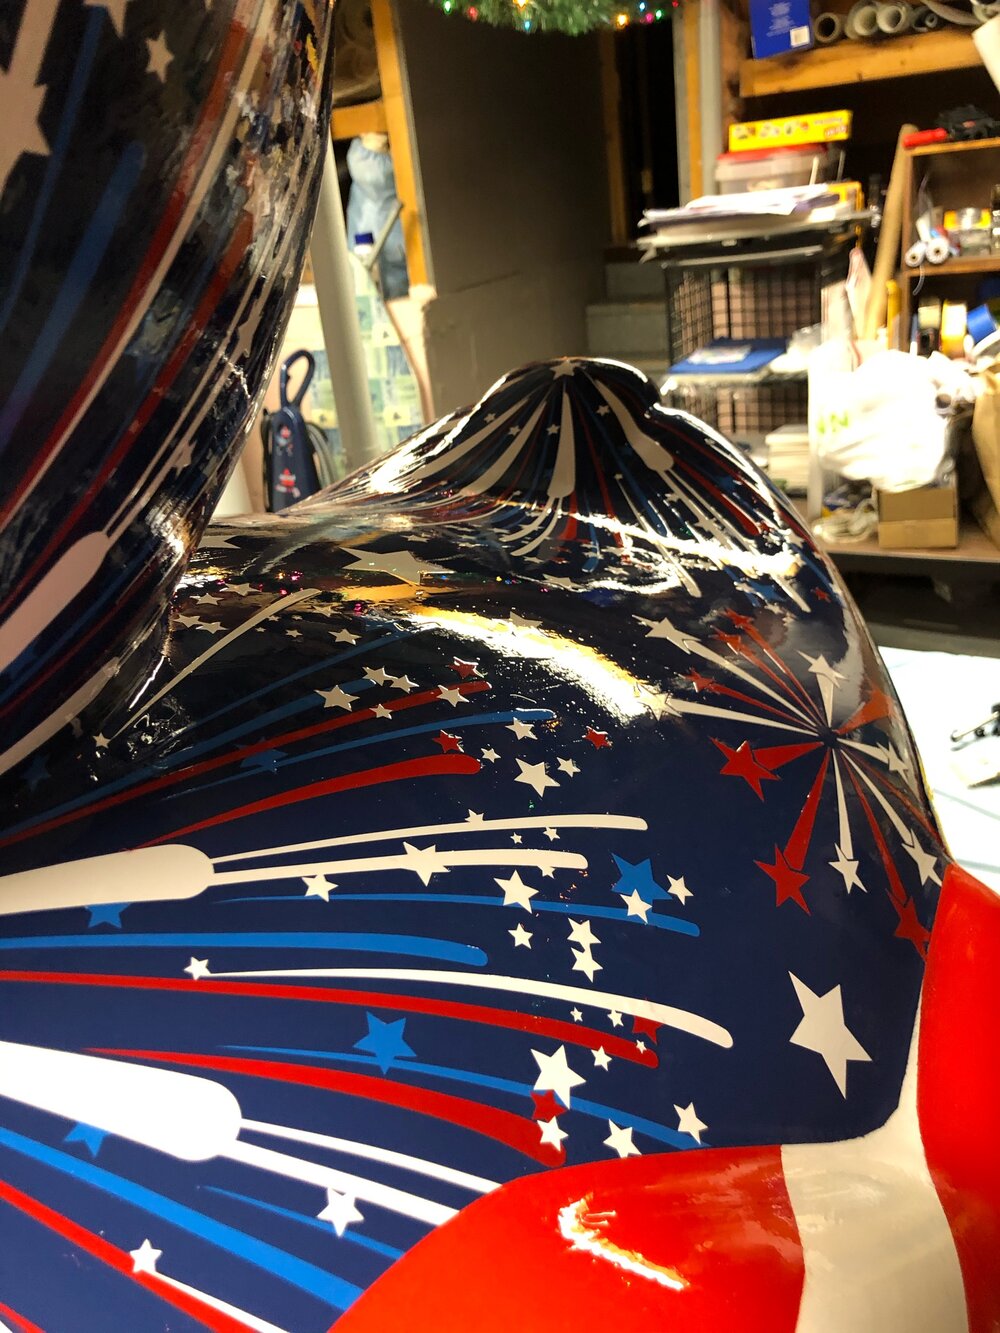
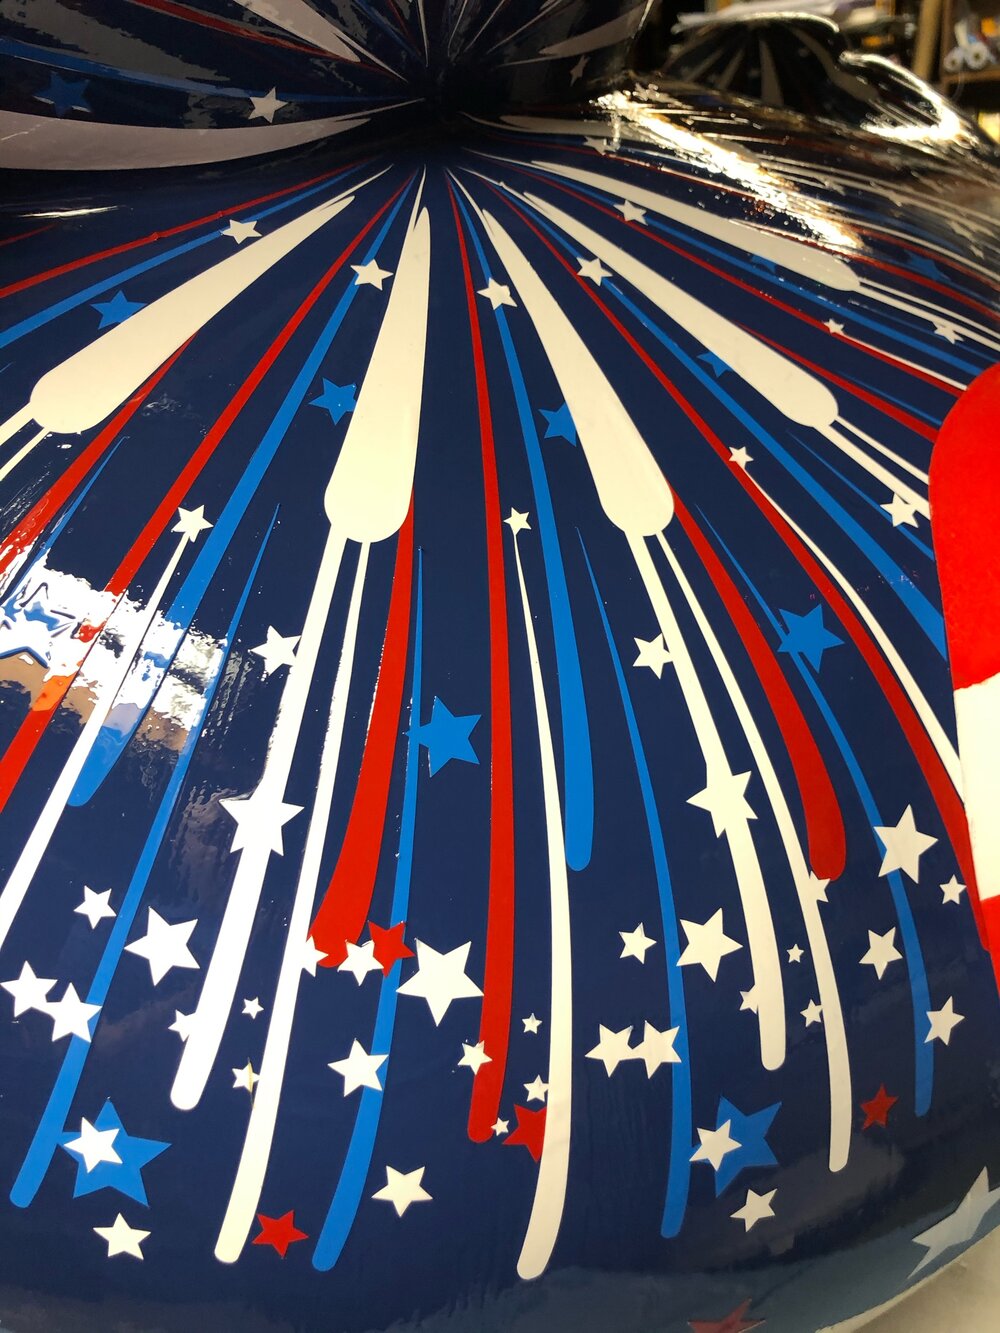
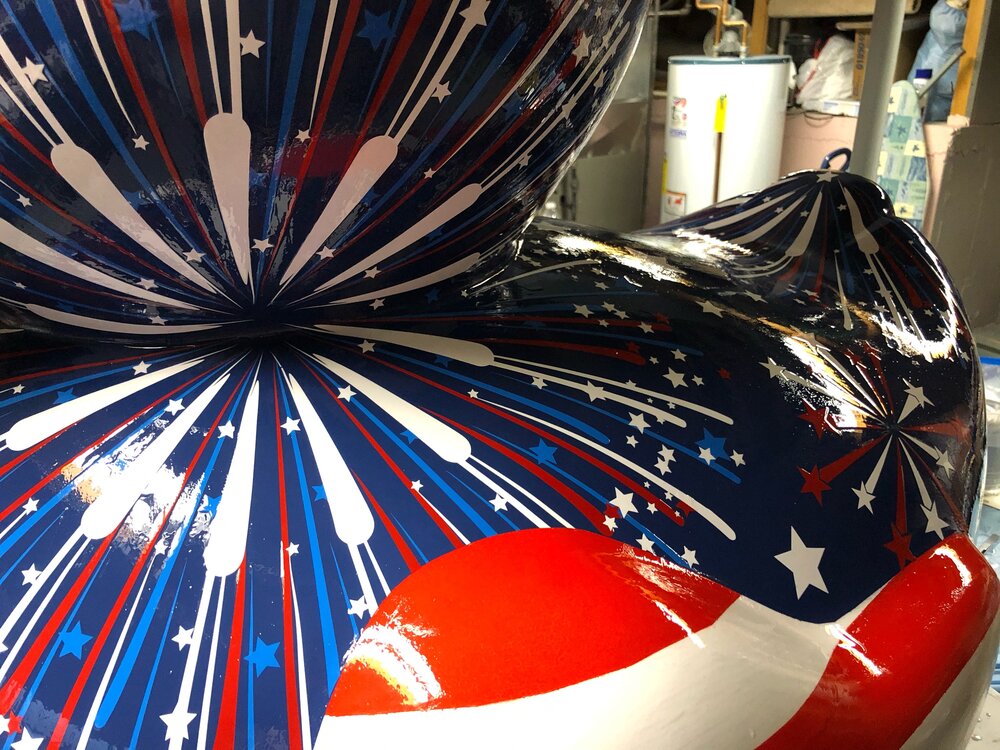
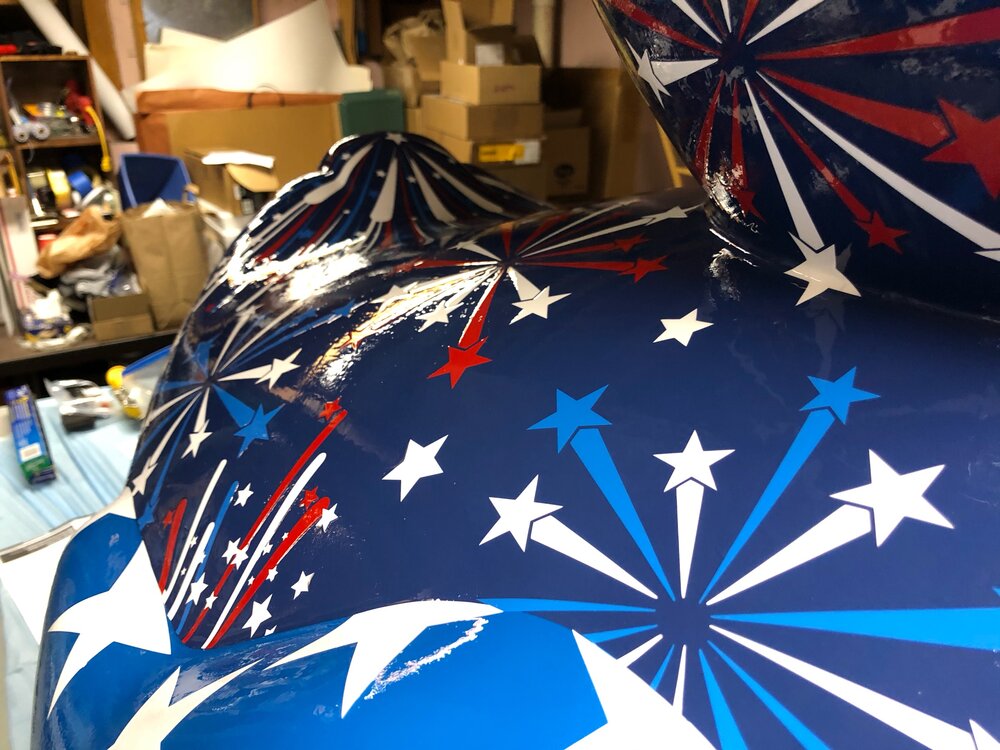
After the painting phase was completed it was time to move onto the next phase which was creating the artwork which would be transformed into vinyl decals I would apply onto the duck. I begin in Adobe Illustrator and create the various shapes, patterns, and designs. First was the stars that would go onto the blue wing. Because I know that these will eventually get covered in rhinestones, I printed out different star shapes/sizes until I found the size that would work best with the rhinestones in a layout I liked. Because once the vinyl is set and protected under clear coat there was no going back. I take my designs (saved as SVG files) and bring them into Cricut Design Space. Once there if you want to keep your layout spaced properly be sure to select everything and choose “Attach” and then the Cricut Maker will cut them out exactly has you had them in your design. This was helpful for the stars, but absolutely critical when it came time for the large fire work bursts that were layered in blue, red, and finally white. The larger fireworks were created in two halves – spanning 12 inches tall and 24 inches wide per half – so they would fit on the Cricut Cutting mat and within the Design Space size requirements.
The colors of the Cricut Permanent Vinyl used were: White, Black, Med Blue, and Tomato Red. I was so lucky that Joann.com was running a sale (half price) on all of the Cricut vinyl when I went to purchase it, as that was a huge savings between all the rolls of vinyl and the rolls of transfer tape I needed!
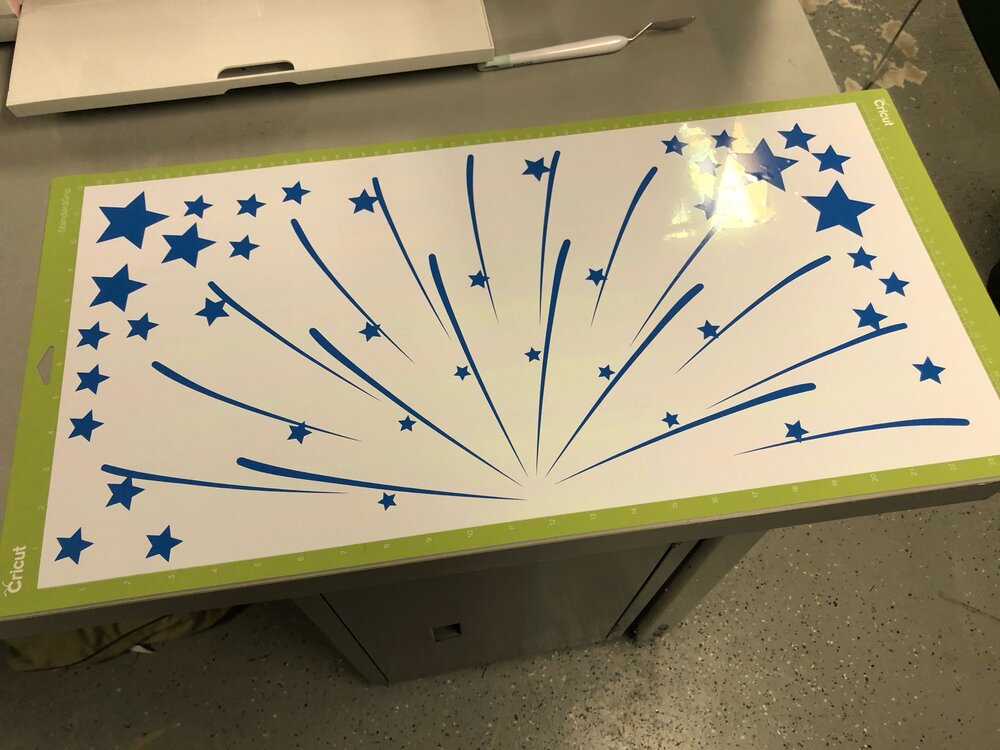
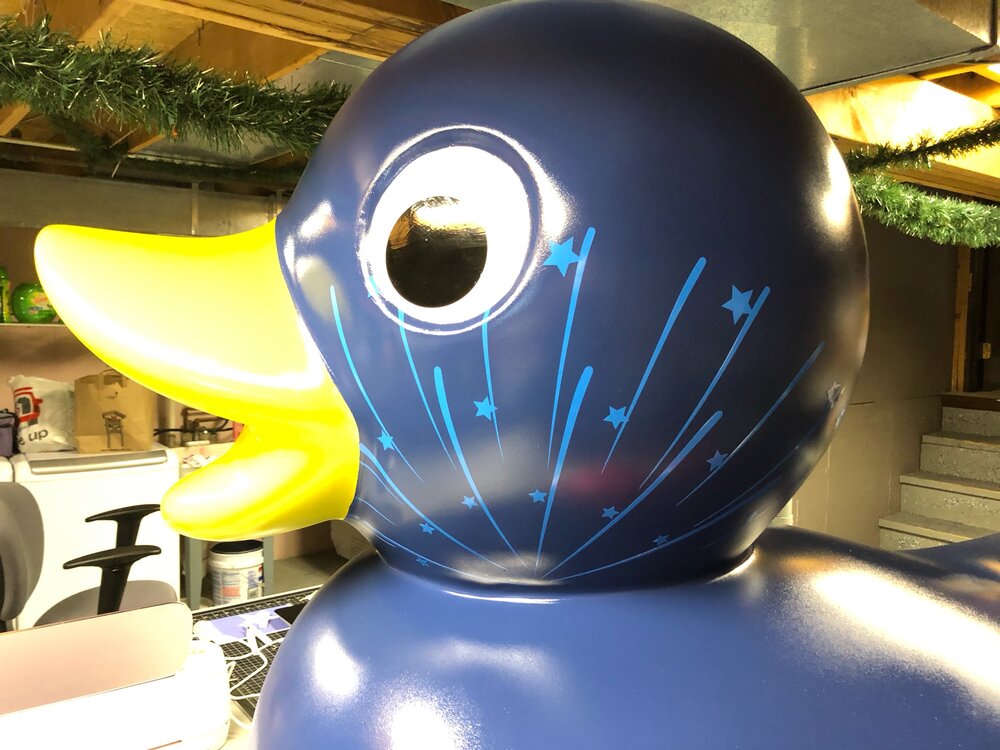
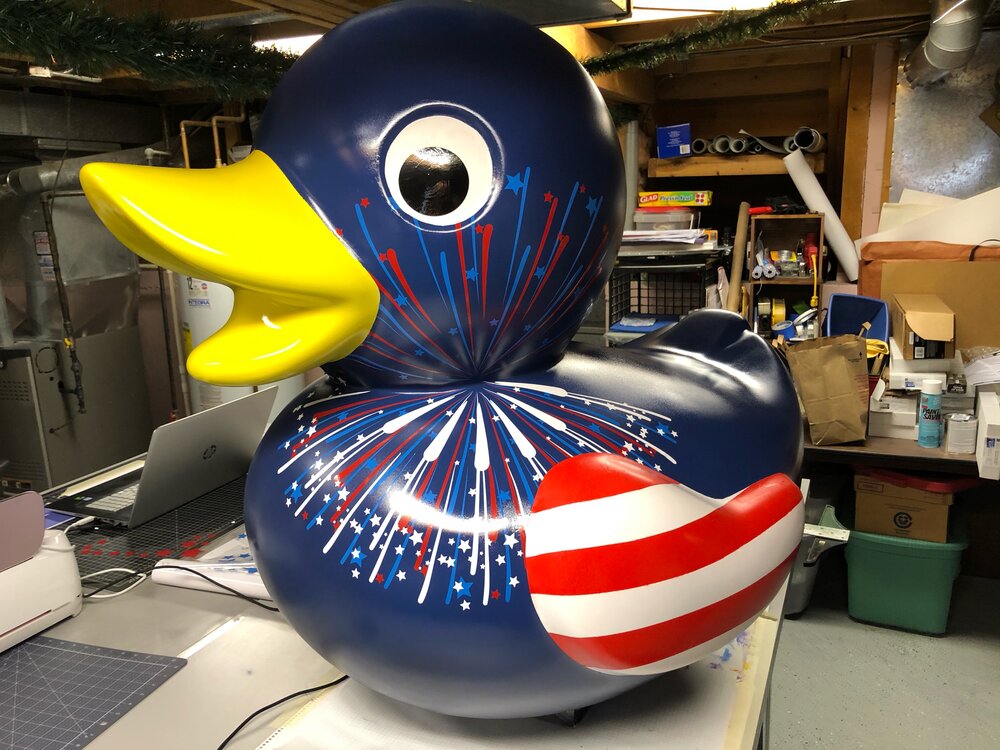
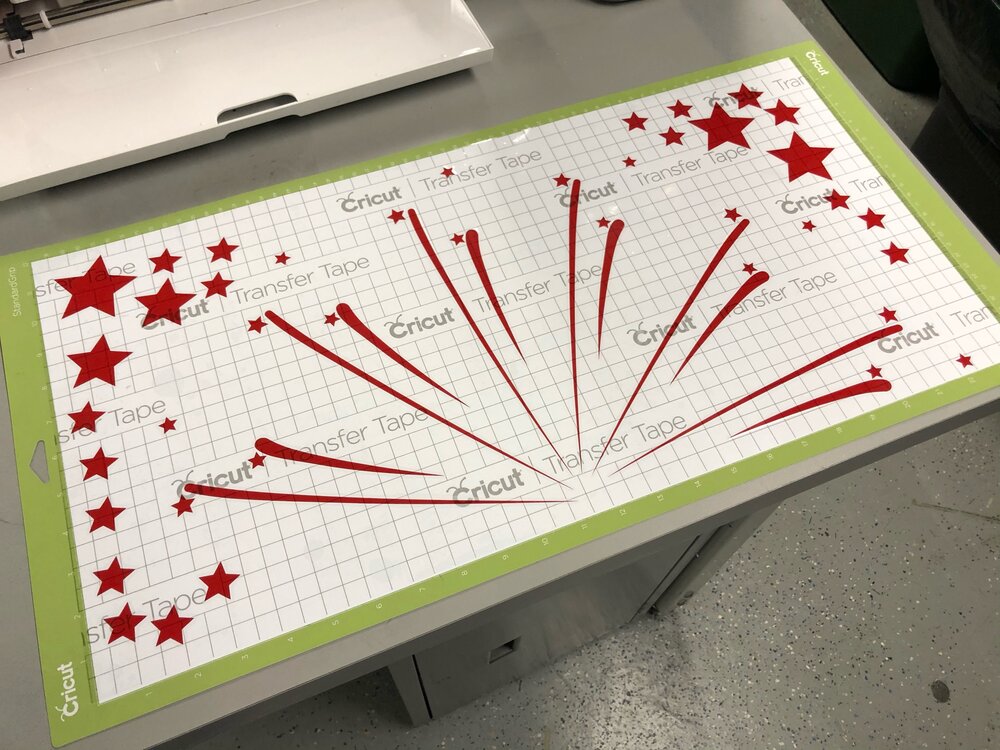
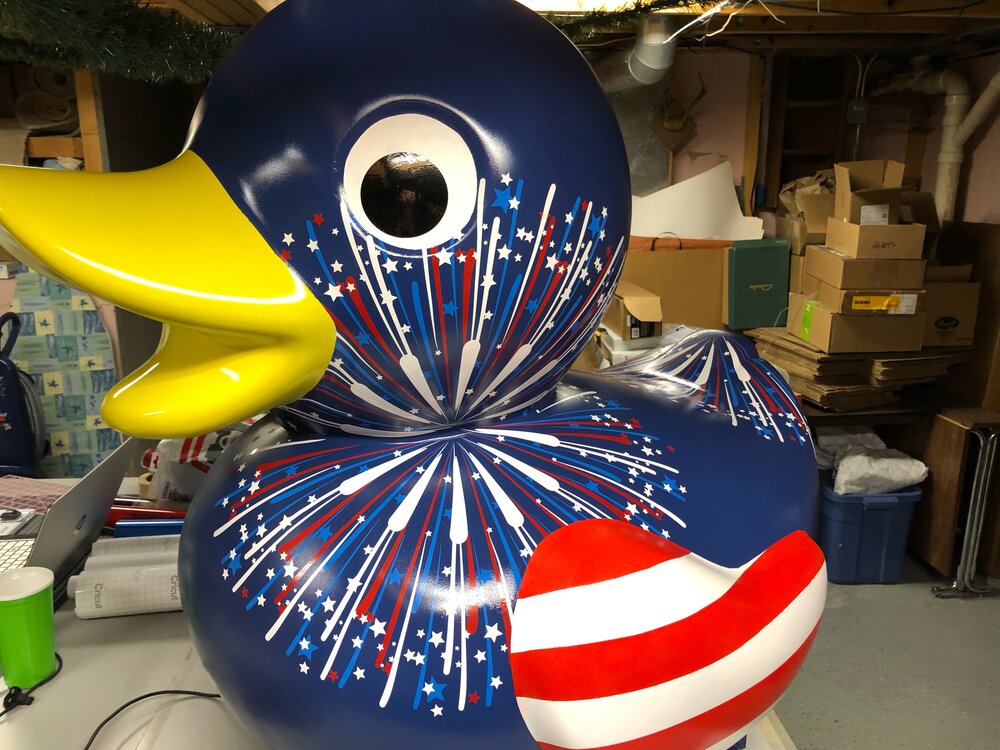
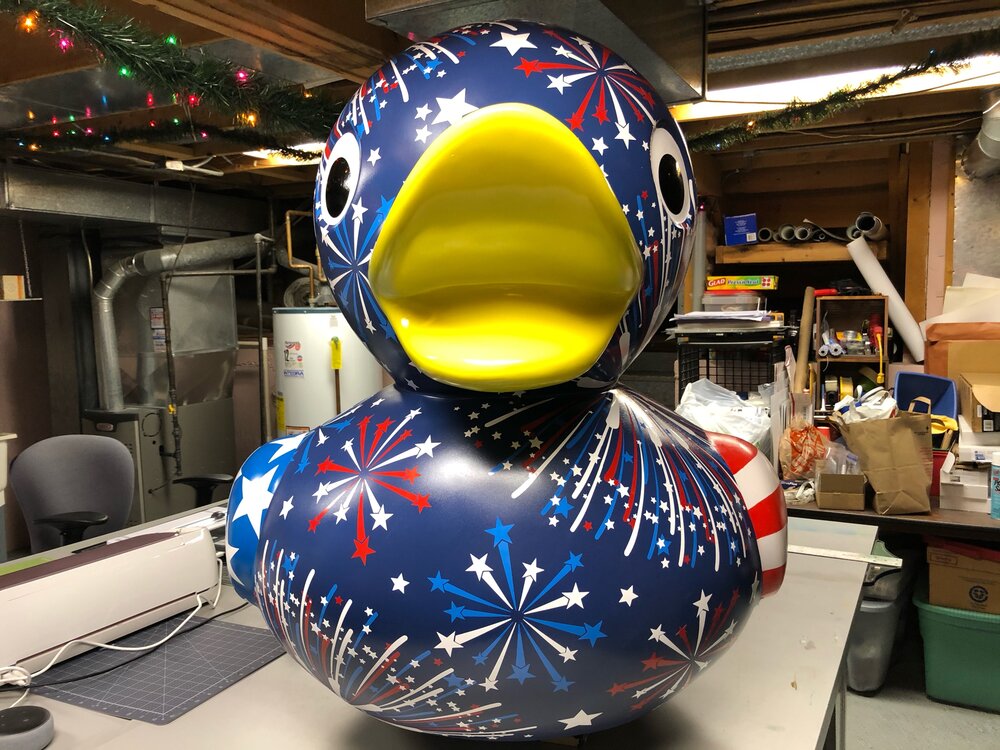
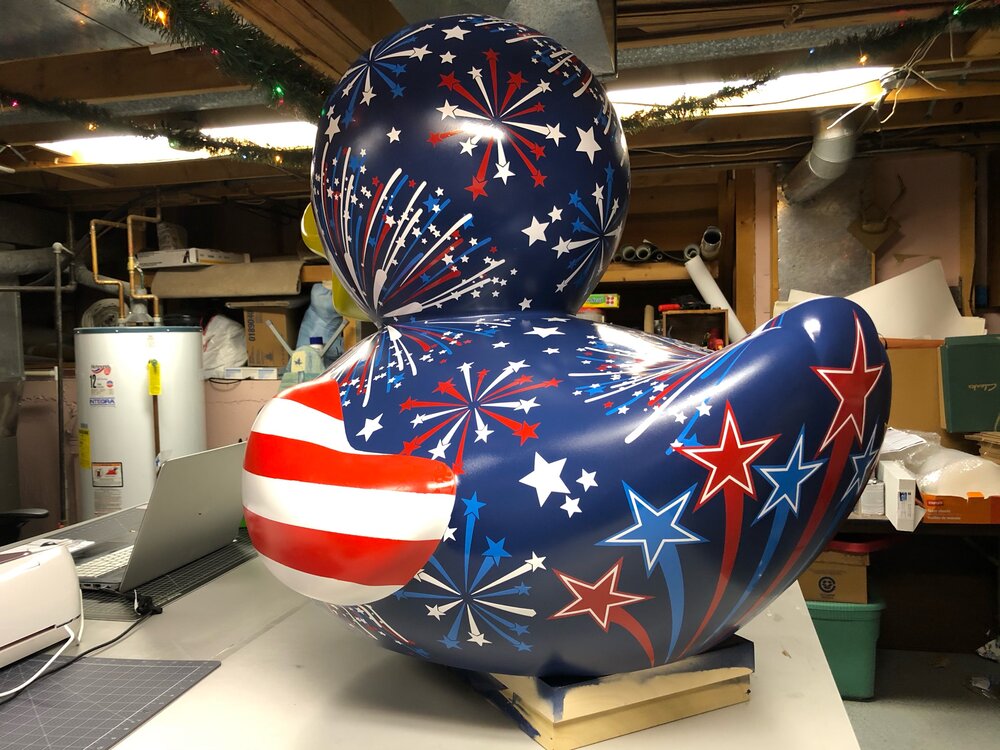
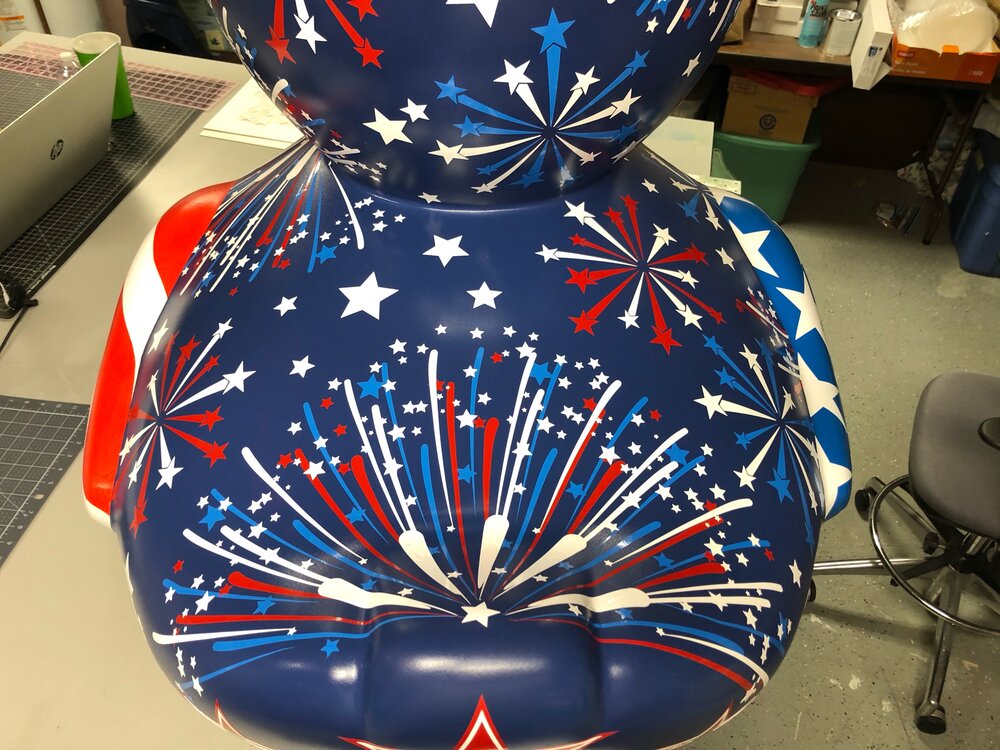
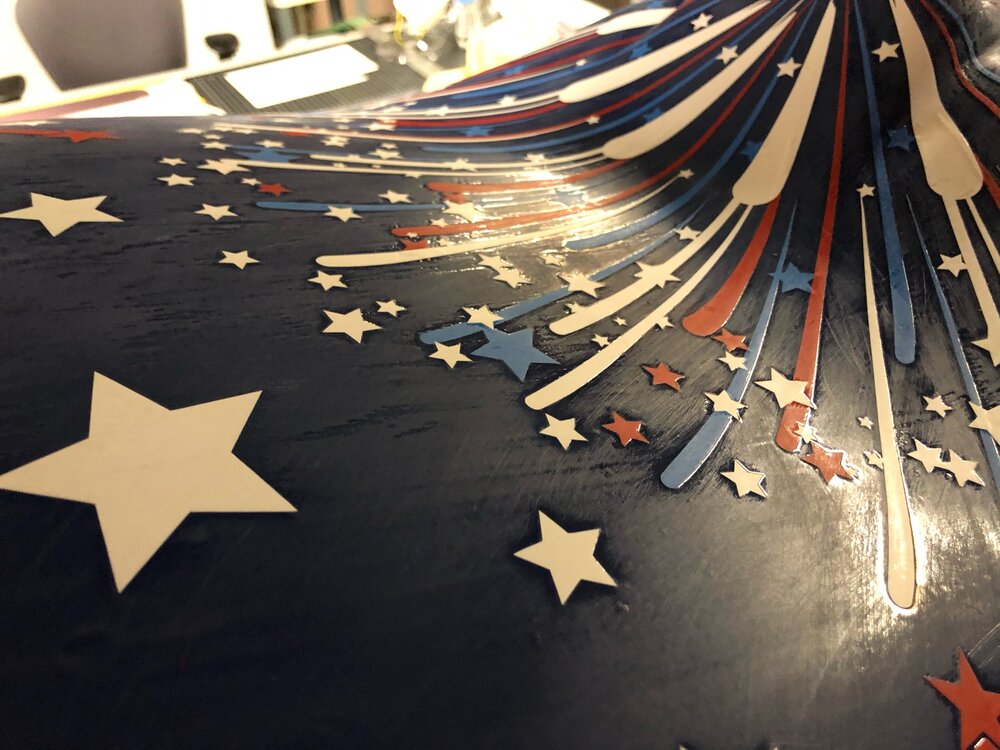
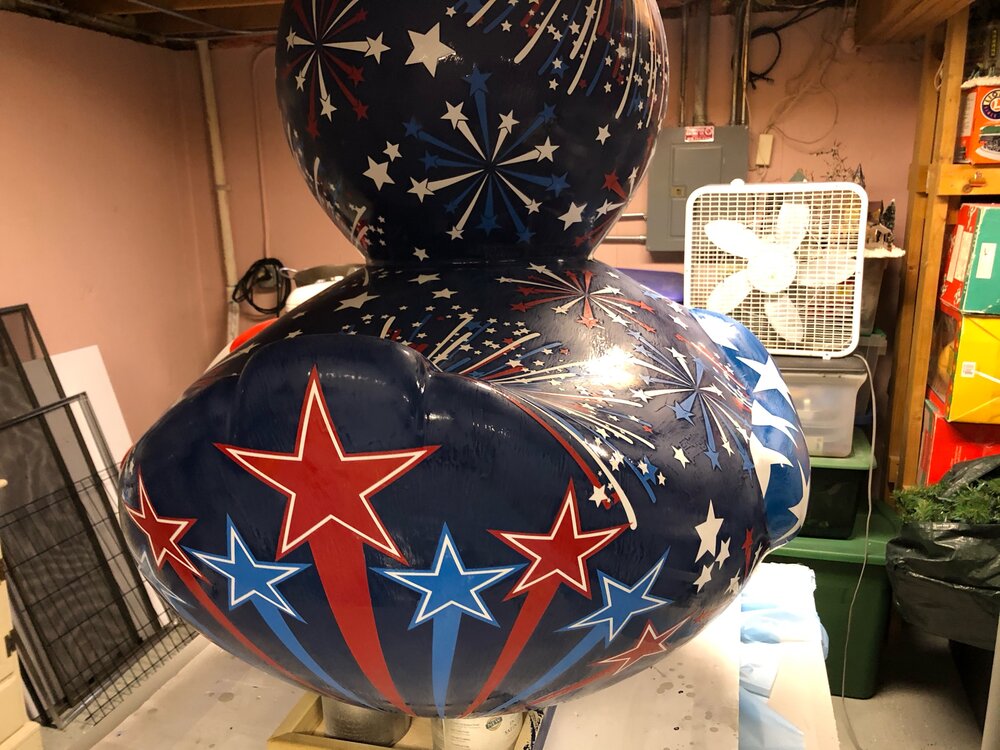
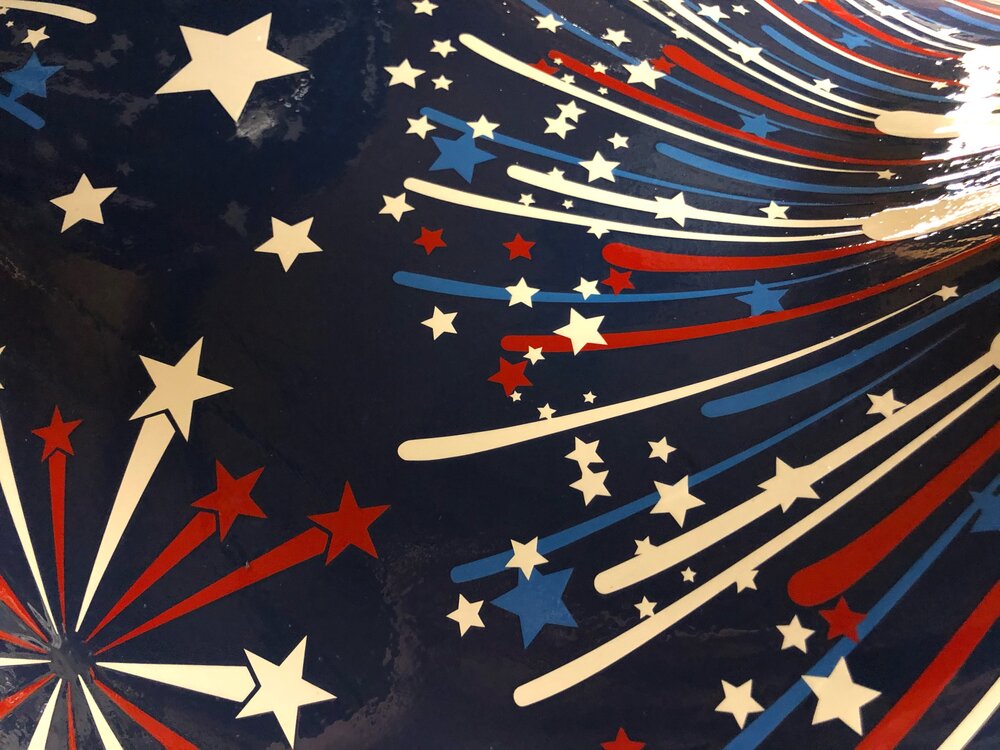
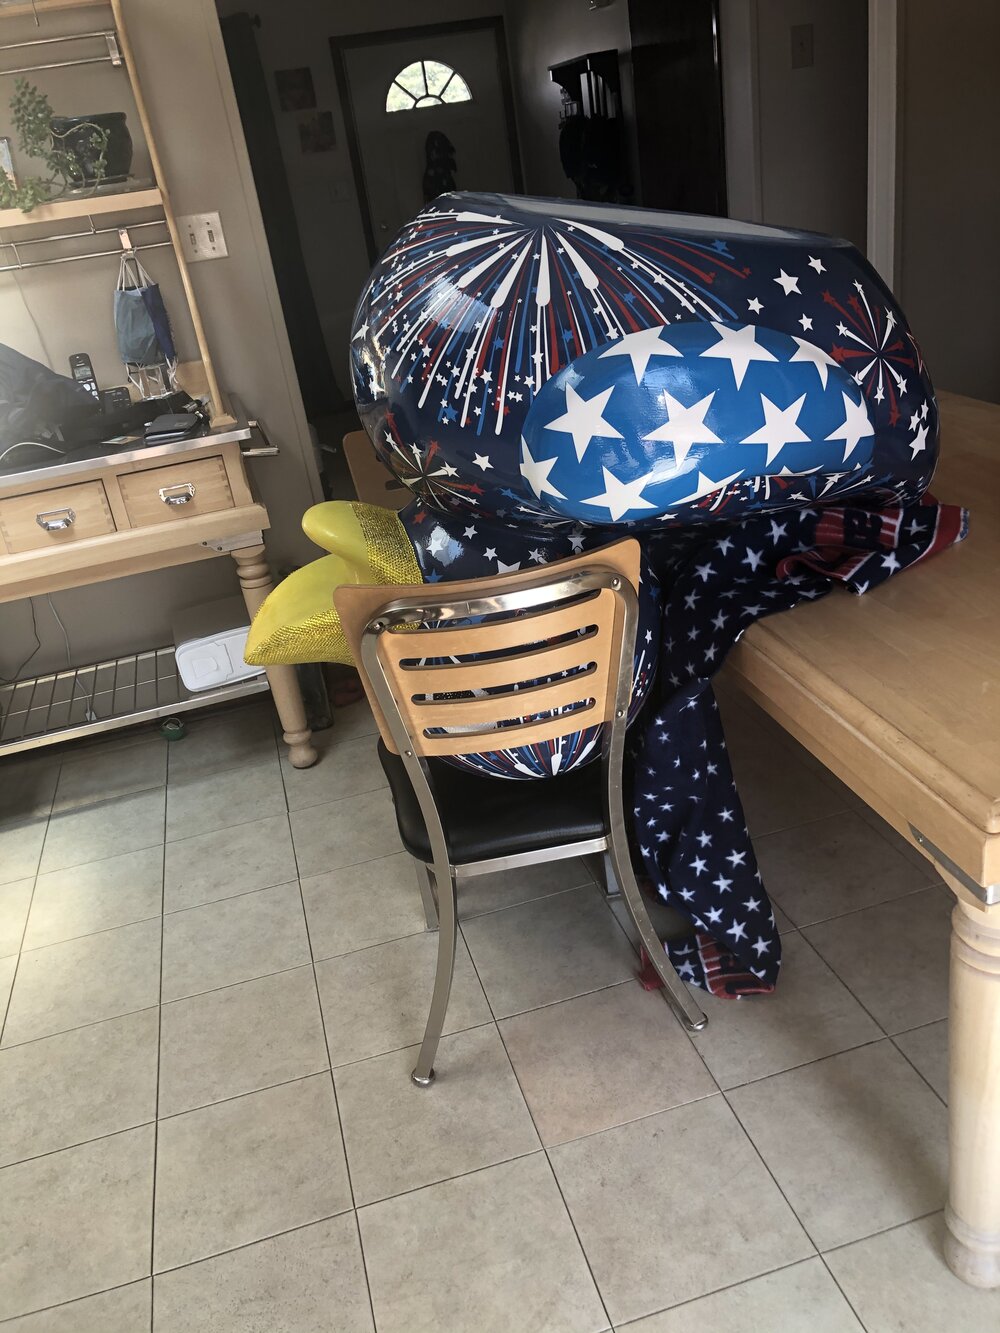
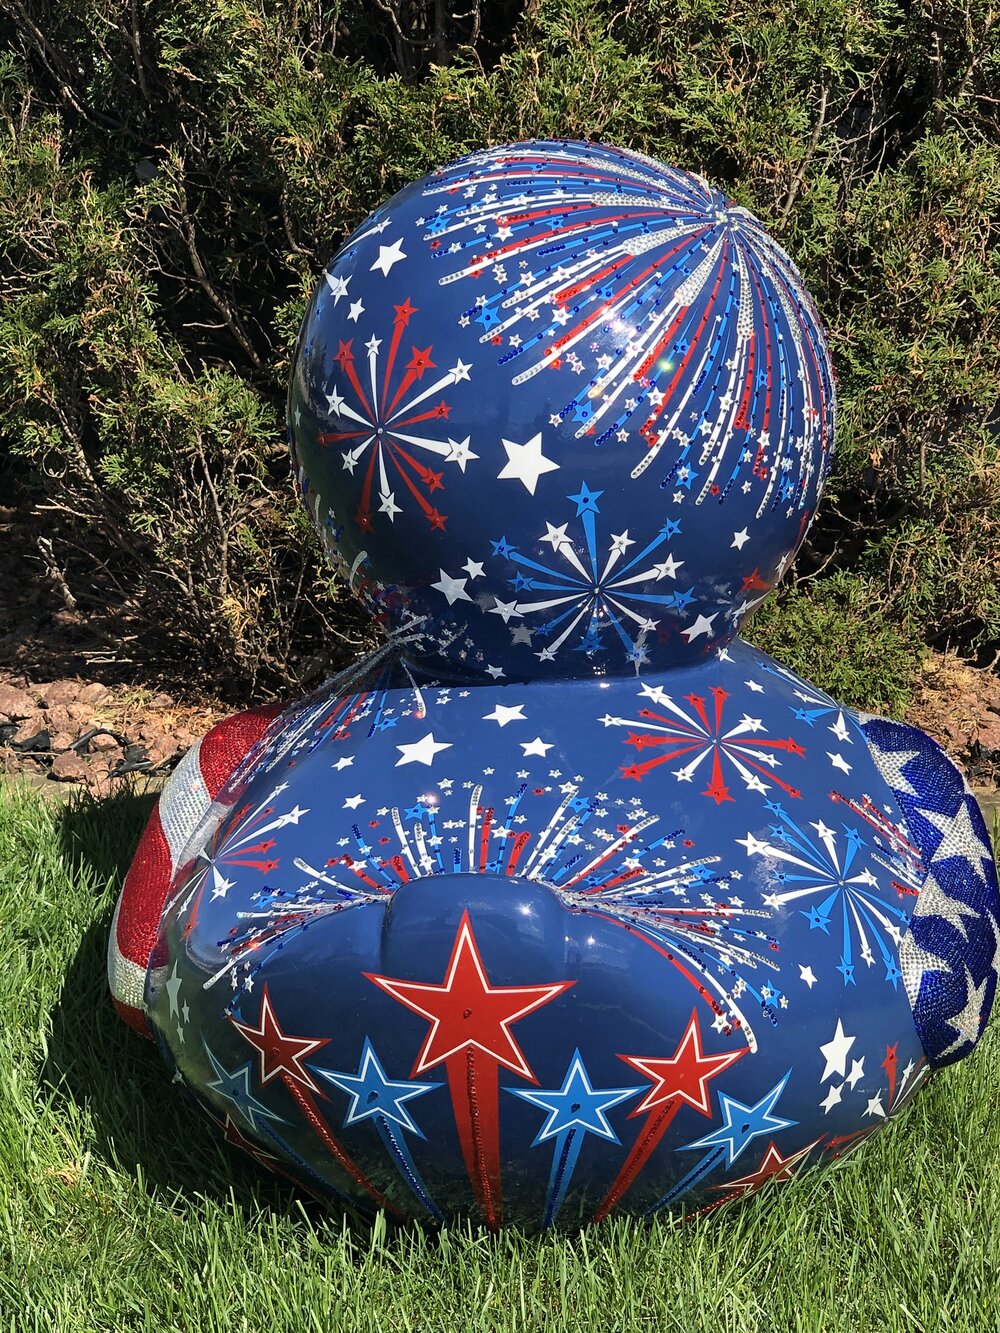
I also created smaller fire work bursts using a combo or blue and white or red and white to add some extra pop. And then finally created a fun shooting stars design to go on the back end of the duck. The permanent vinyl was a bit tricky to weed/pull up in such complicated patterns but it went onto the duck so nicely. I could not be happier with how this went.


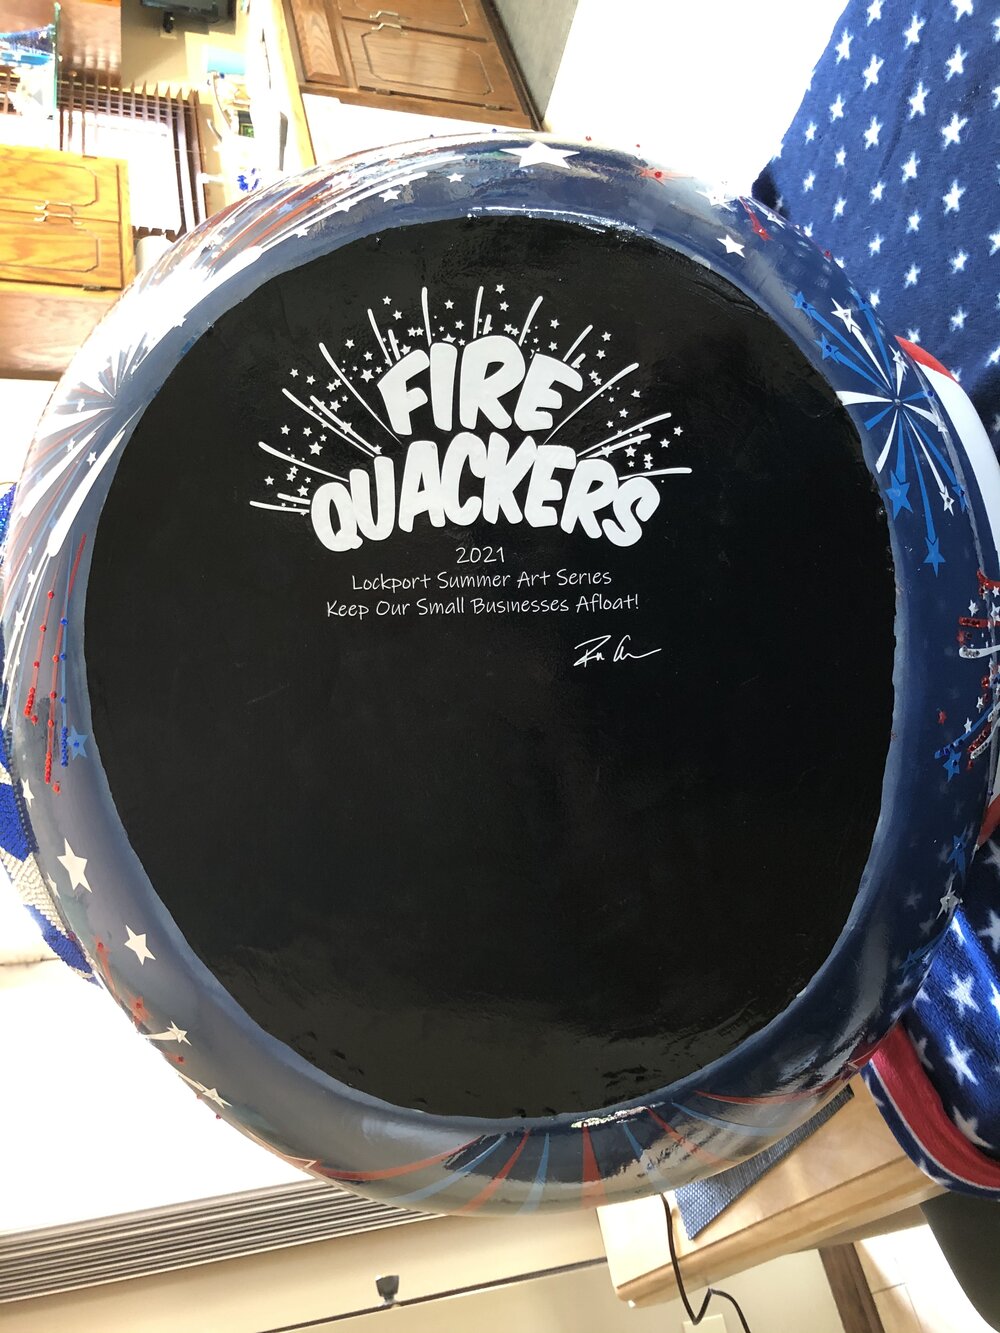
One fun detail that will probably never be seen by anyone is the name of the duck FIRE QUACKERS that I created a logo of and cut out of vinyl for the base of the duck. I also included the name of the event it is part of and my signature as well.
With all of the vinyl in place and after another day of letting it set and really bond to the surface (while also letting my body rest as I was sore from all of the bending/hunching over I had to do for hours on end working on this!). Next it was onto phase 3 – the clear coat.
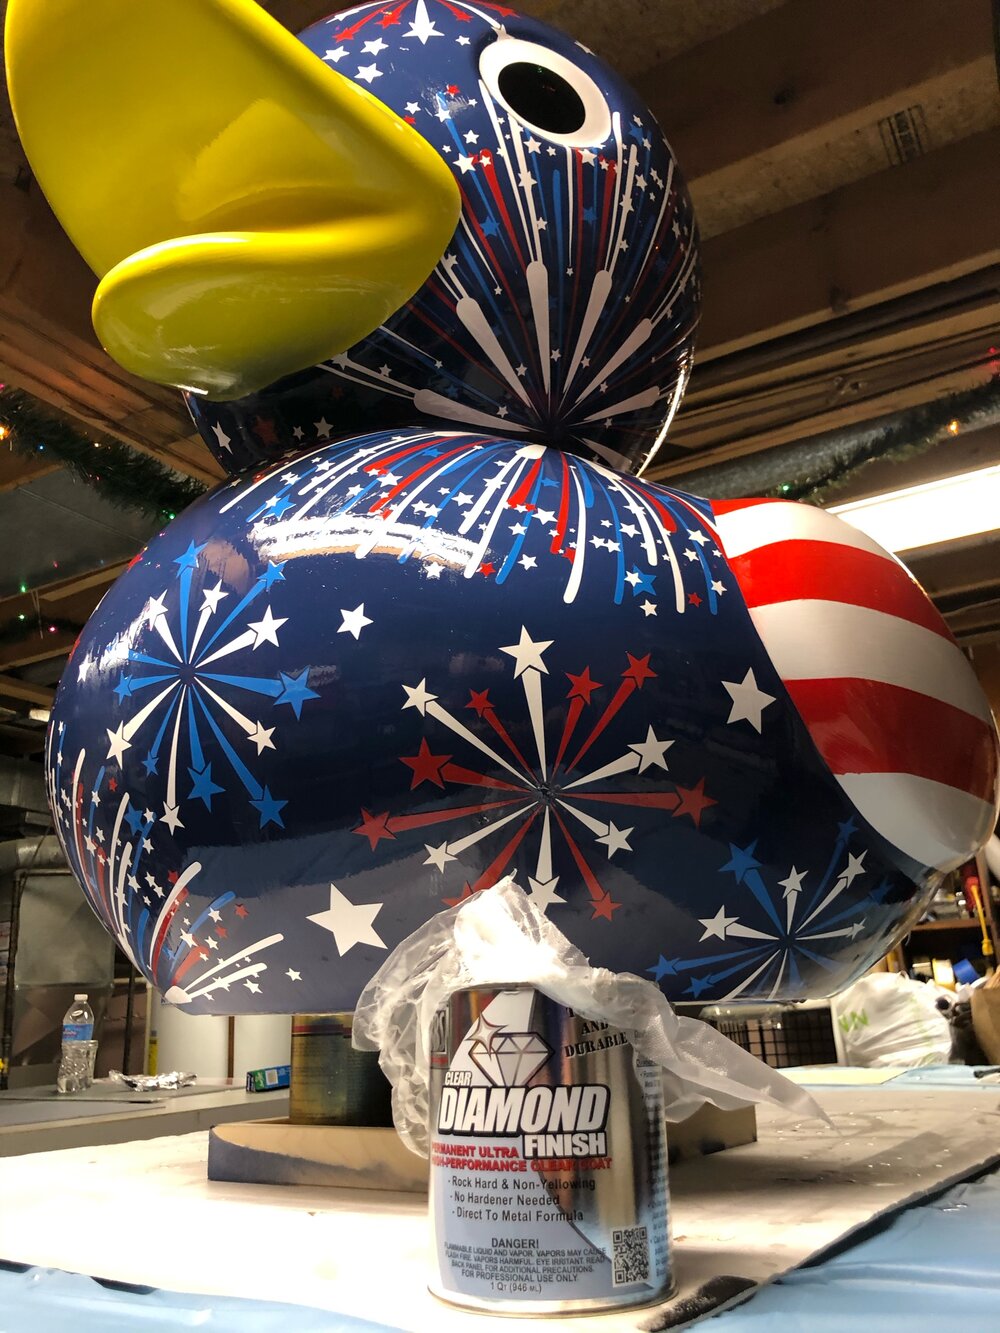
Because the duck will be outside, it is recommended to use an automotive grade clear coat. I reached out to my friend and fellow artist Erika Vanzanna, who has done countless public art sculptures over the years. She gave me some really helpful advice and suggested a product called KBS Clear Diamond Finish. It is an automotive grade clear coat, but it is solvent based – so you do not have to mix two components together to get it to cure. It can be applied by brush, roller, or sprayer. I reached out to the manufacturer with some questions about being able to adhere rhinestones onto the clear coat once it had set up. They quickly replied back saying that once cured, I should use some sandpaper to scuff the areas where the rhinestones will go to give the glue something to grab onto. So I put in an order for a quart and it arrived right away.
I was super nervous applying the first coat, since I had never used a product like this before and there were a list of instructions to follow. The first coat went out pretty well – the goal is to try not to over brush (or brush back over an area you have already applied it to, to avoid brush marks when it dries).
After the first coat was ready (you can touch it without leaving a fingerprint), I applied coat two. But I noticed that the brush was leaving all kinds of brush marks no matter how careful I was being.

So I let that coat dry the full 24 hours they recommend – and then carefully sanding it down as smooth as I could get it. And let it set until the following day to make sure it was ready for another coat.

Since this product is solvent based, it needs some humidity in the area in order for it to dry. So I brought a little temp/humidity gauge I have down into my basement to ensure it was humid enough. And then I rolled on coat number three. Followed by coat number four. And they both looked good.
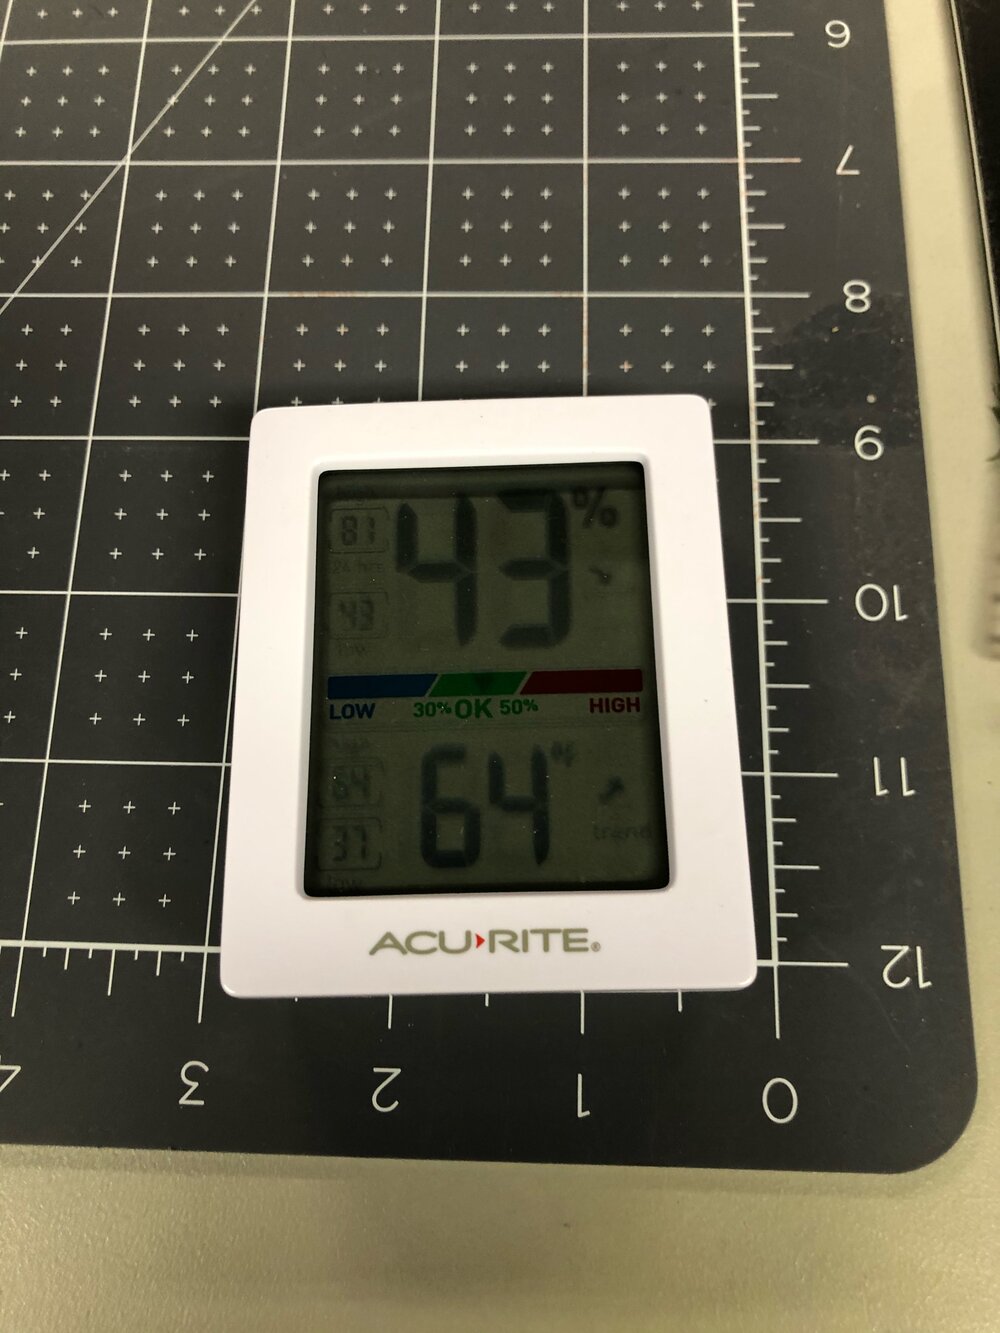
To ensure there was some moisture in the air I used a little vaporizer I had to add a little steam nearby while the duck cured for the first few days. And then I just let it set for a full week before going onto phase four.
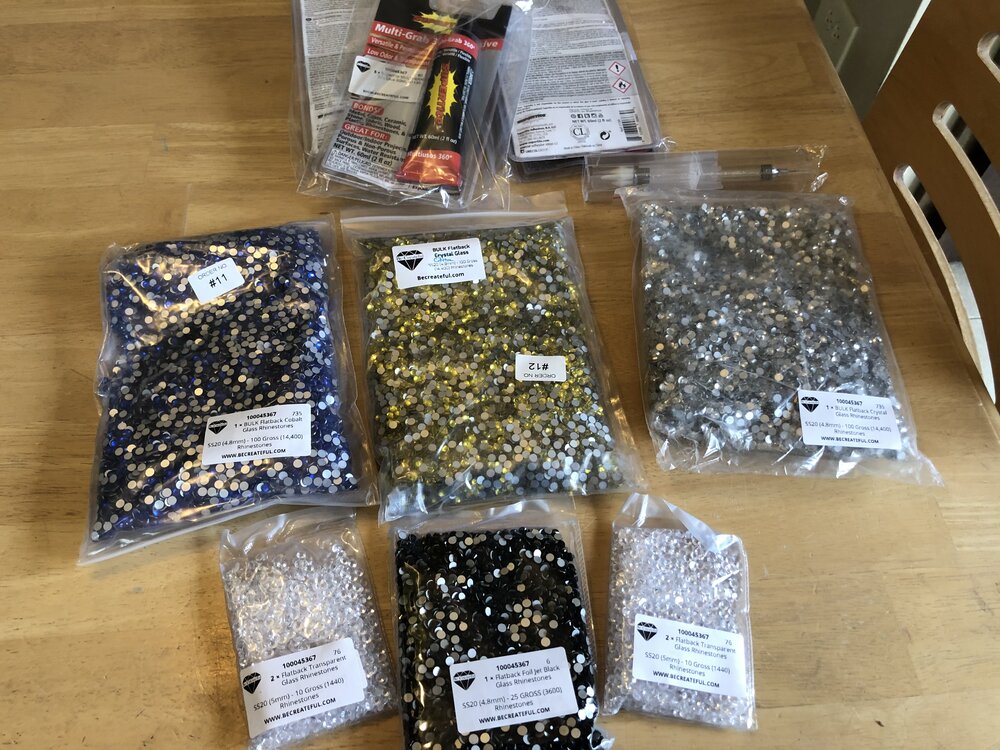
As I mentioned earlier I had placed a sample order to ensure I was picking out the right color and sizes of rhinestones from BeCreateful. The first bulk order arrived and it had the Cobalt Blue, Citrine (yellow), Cyrstal Clear, Clear, and Black rhinestones in it, along with the SuperTite Multi-Grab glue etc. Now it was time for the fun part to begin!
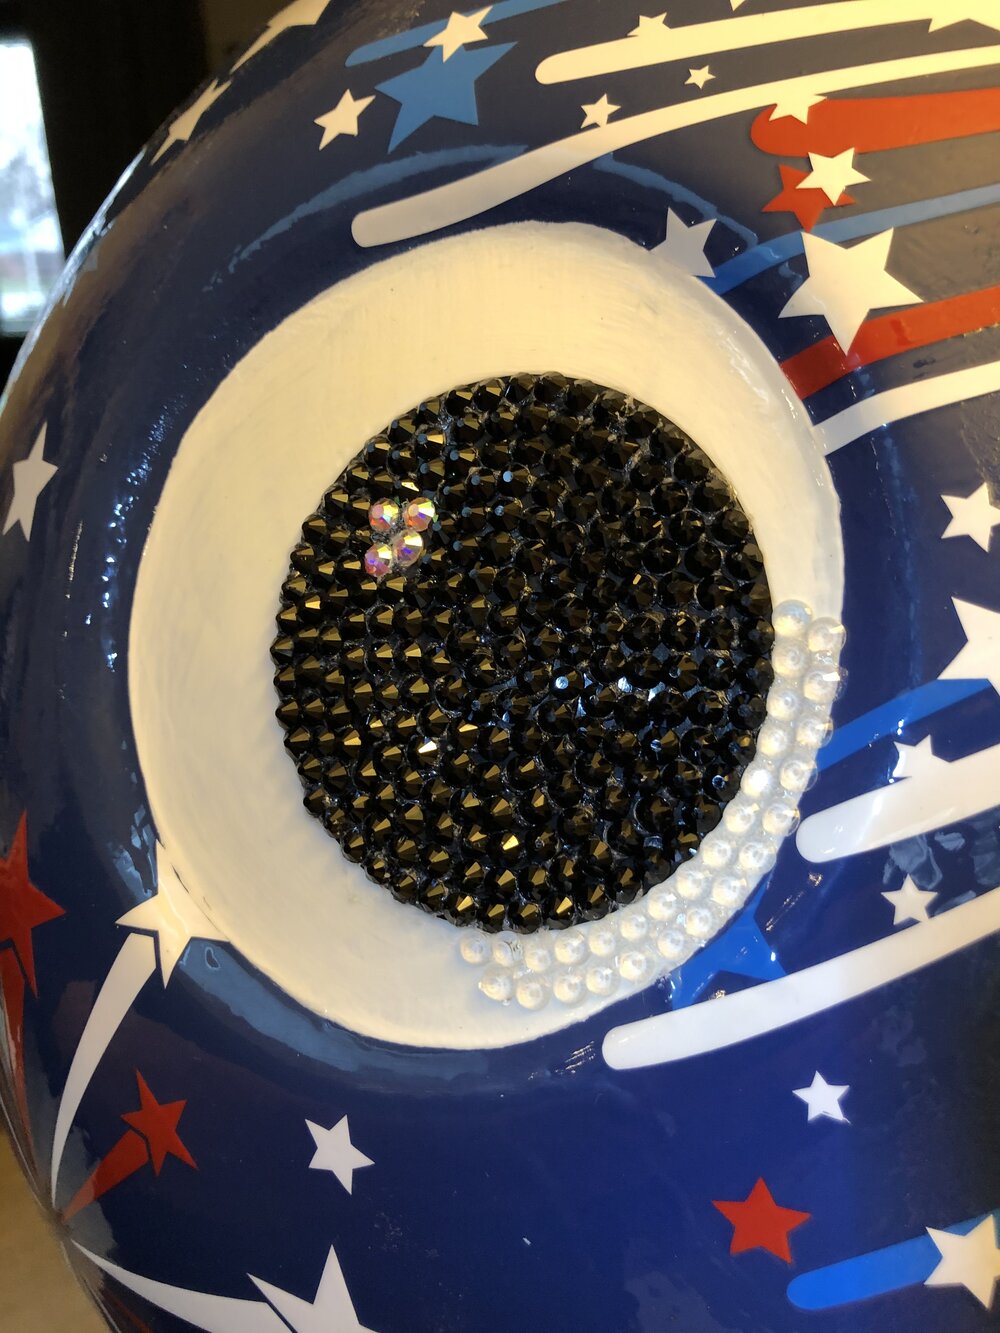
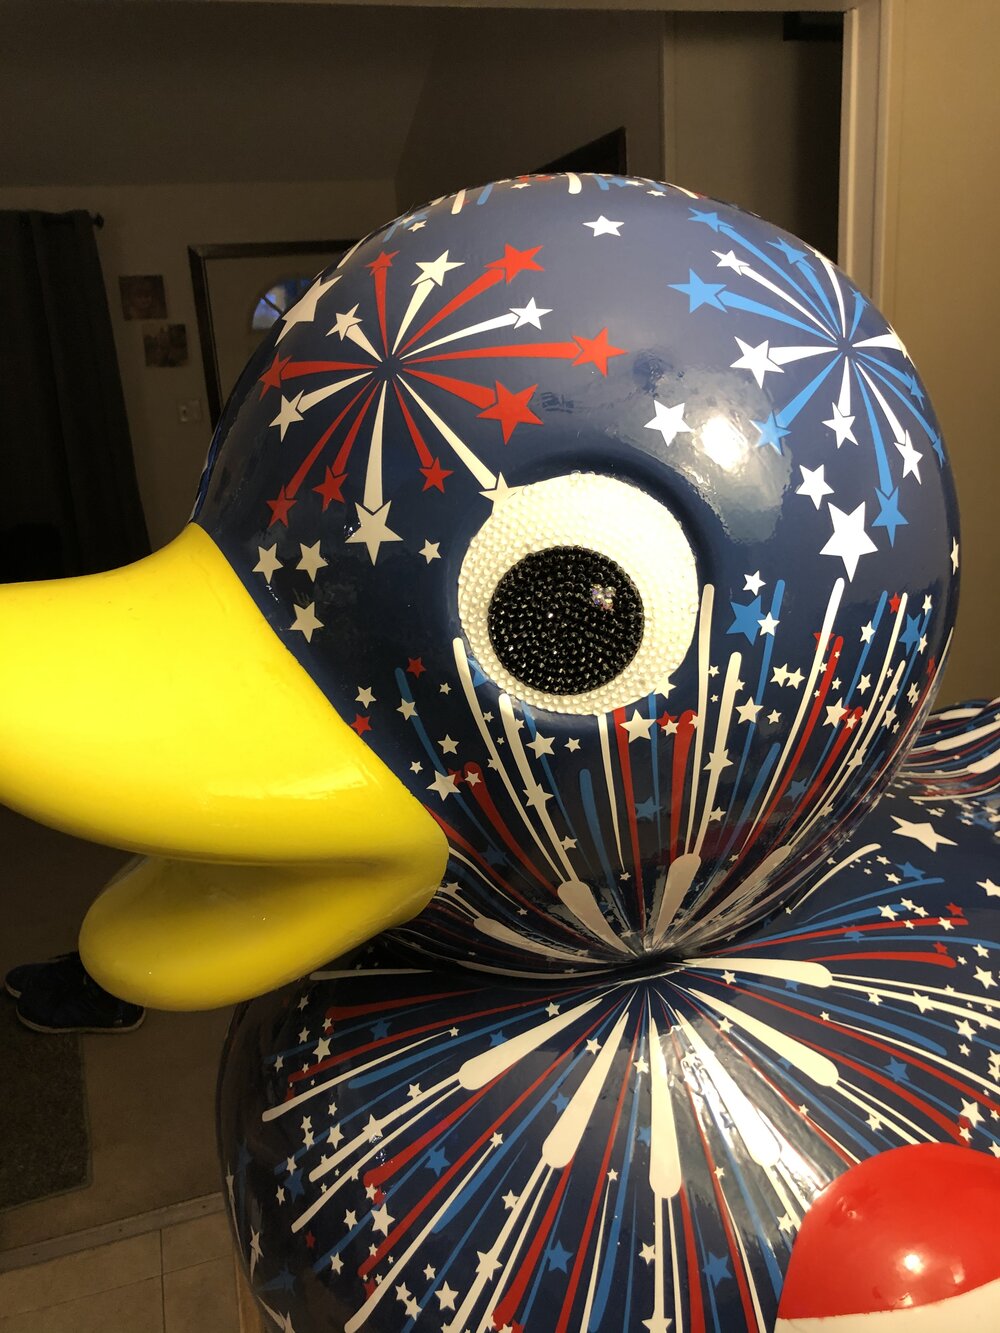
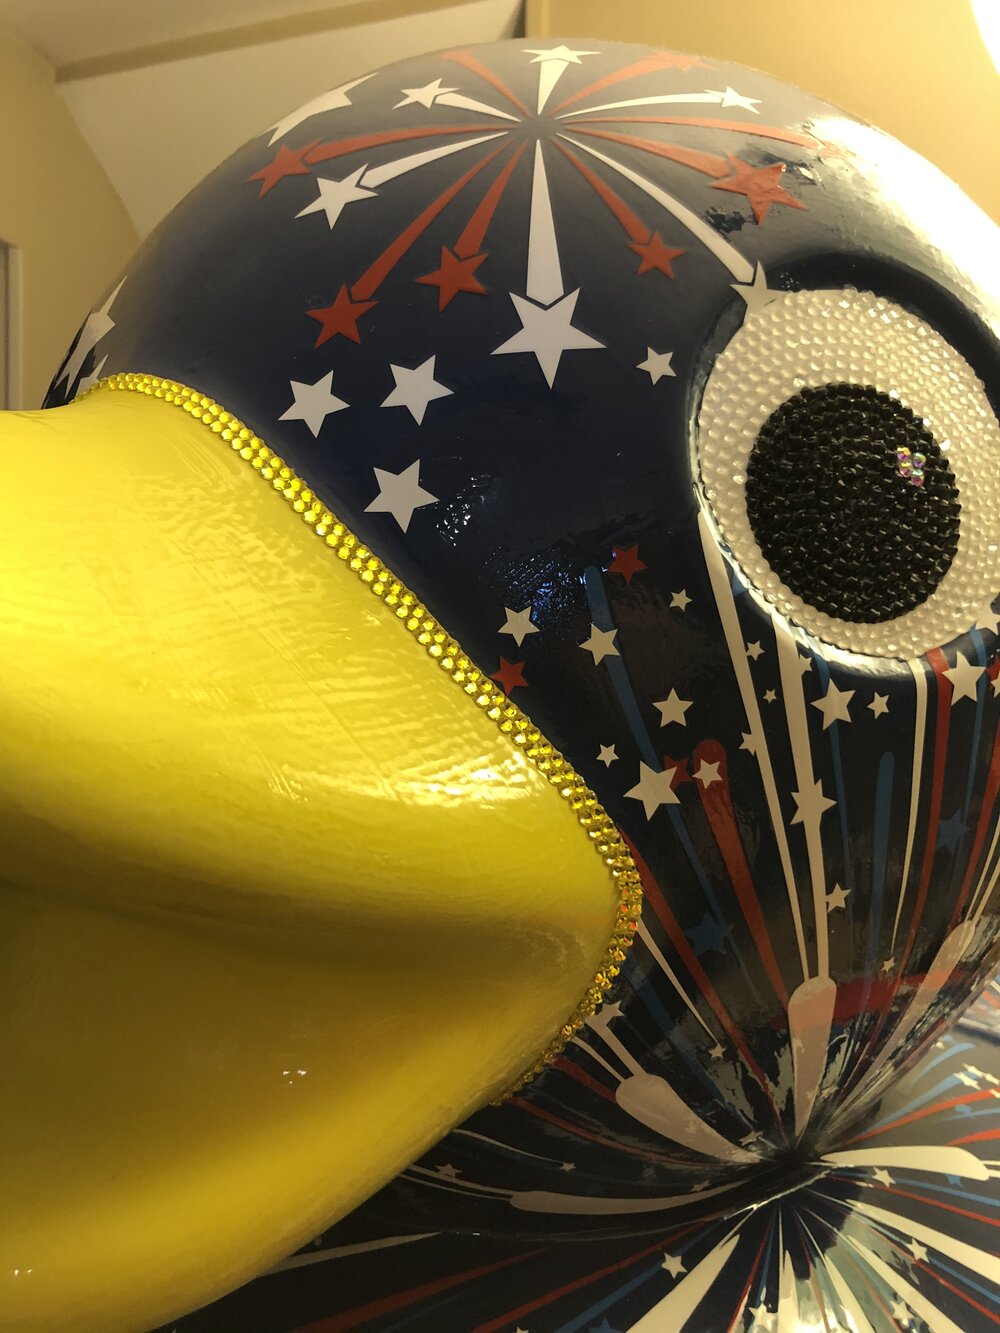
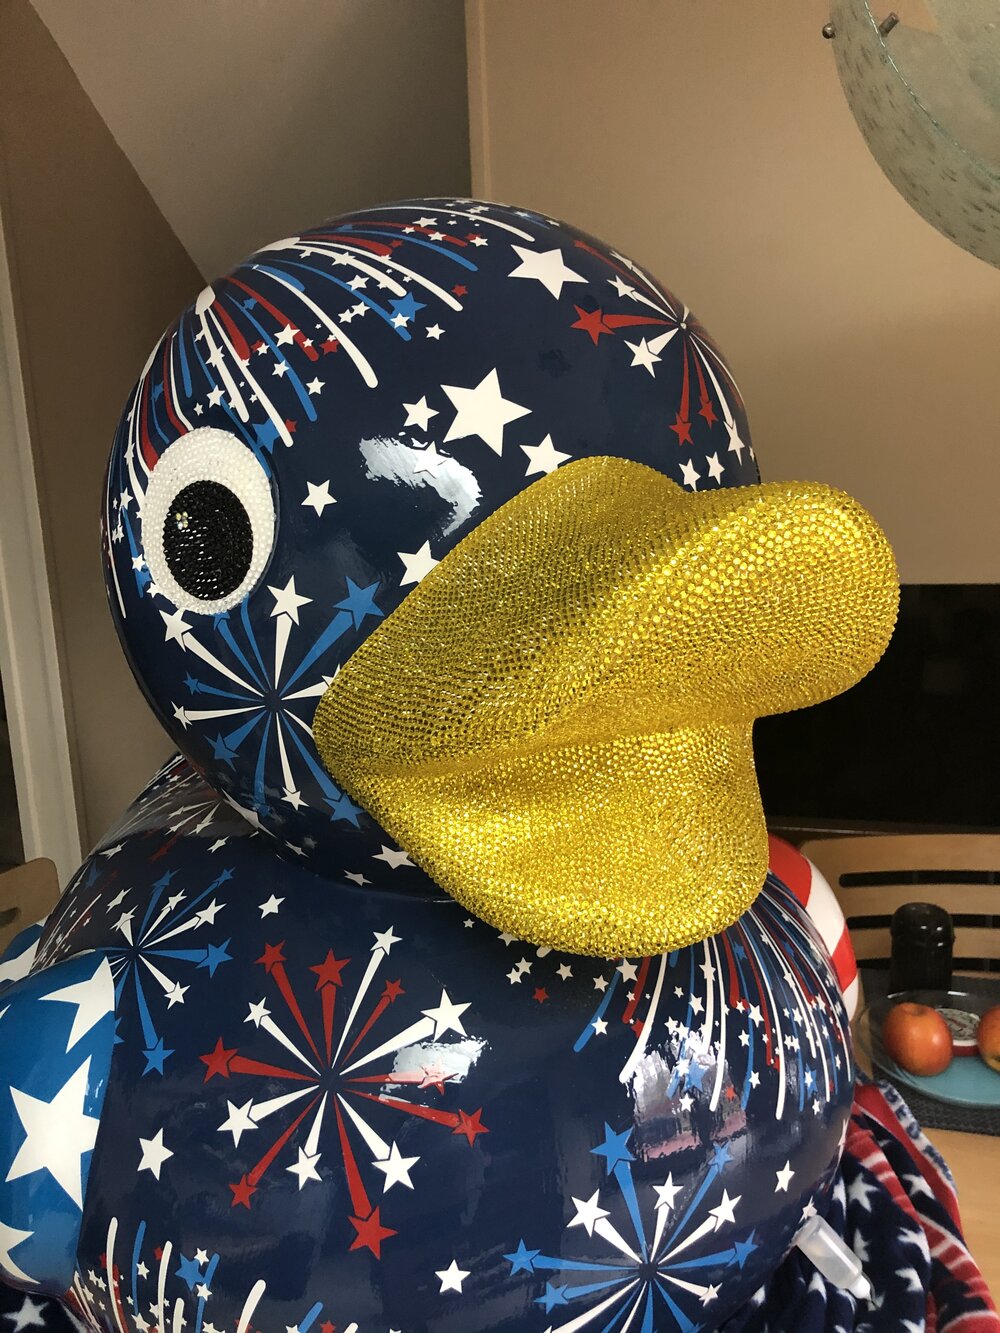
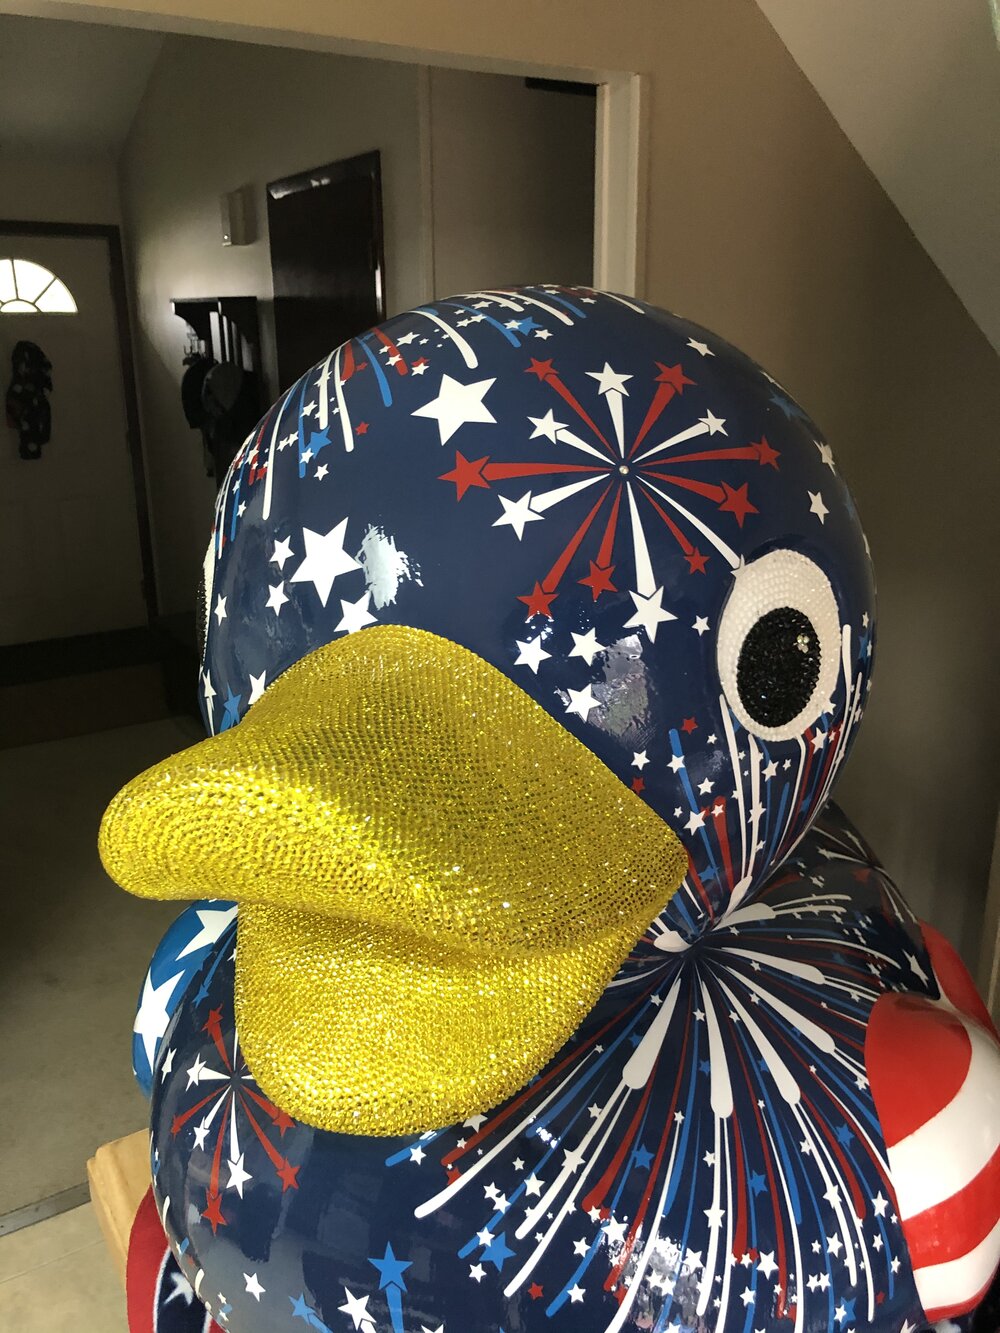
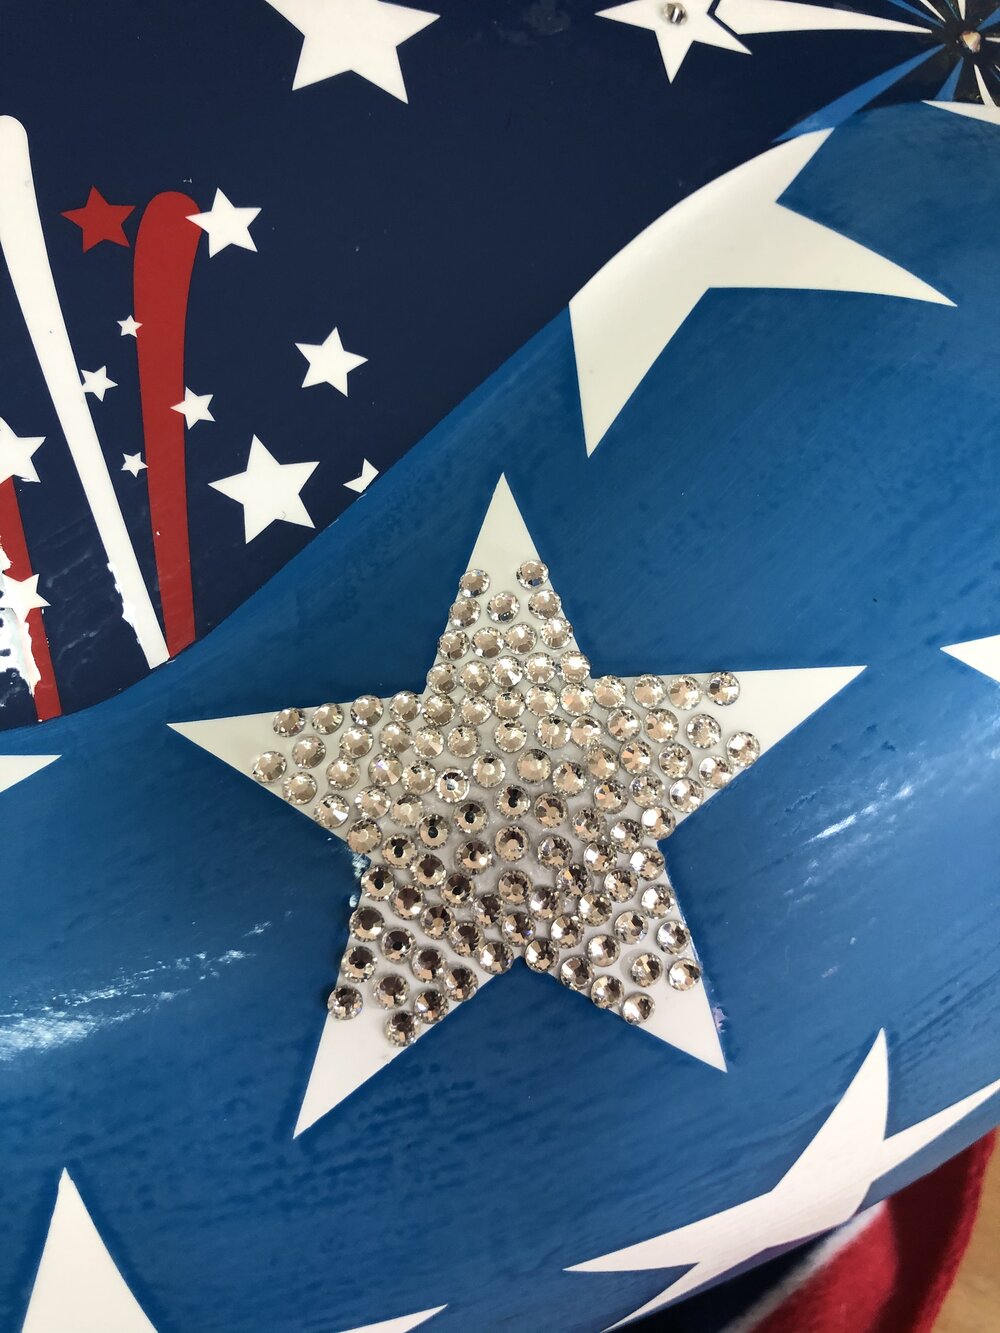
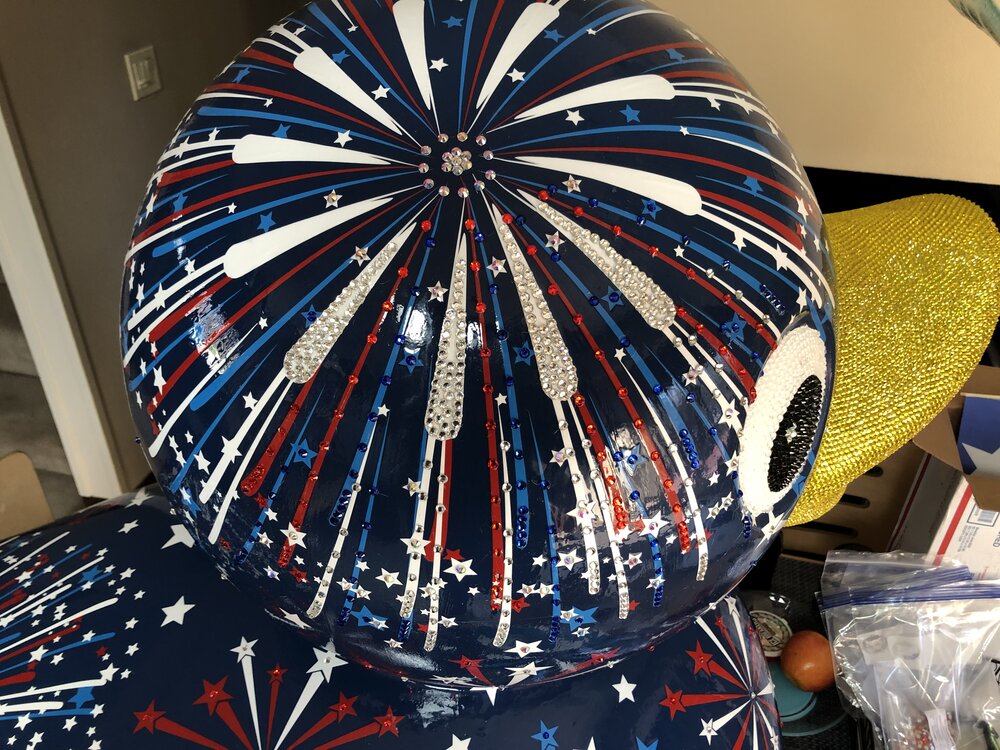
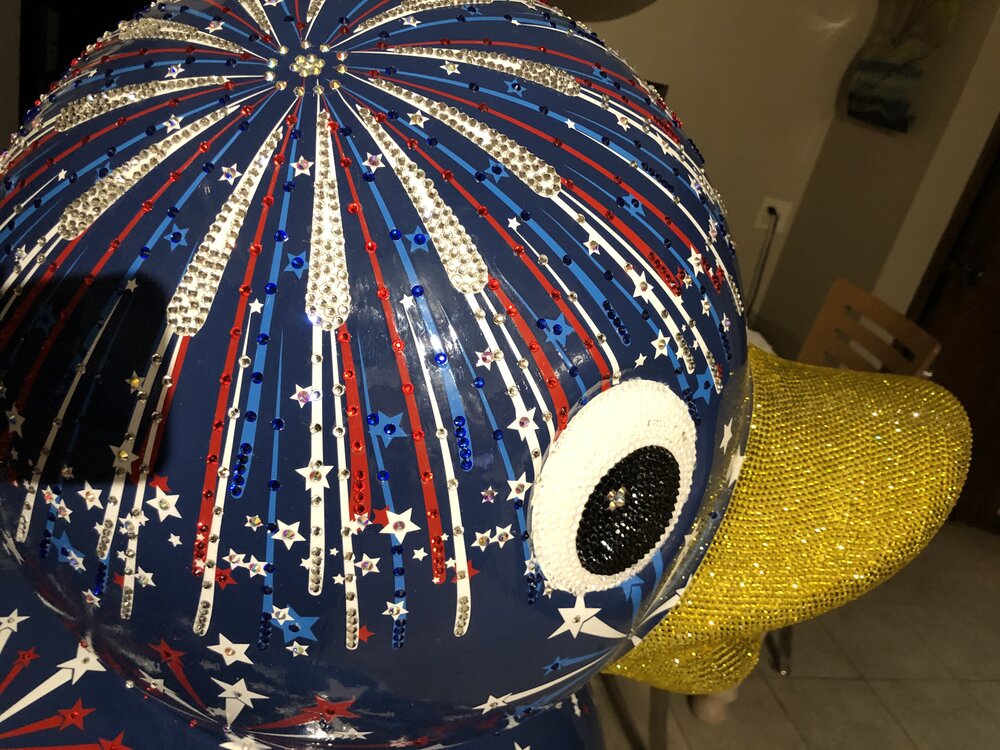
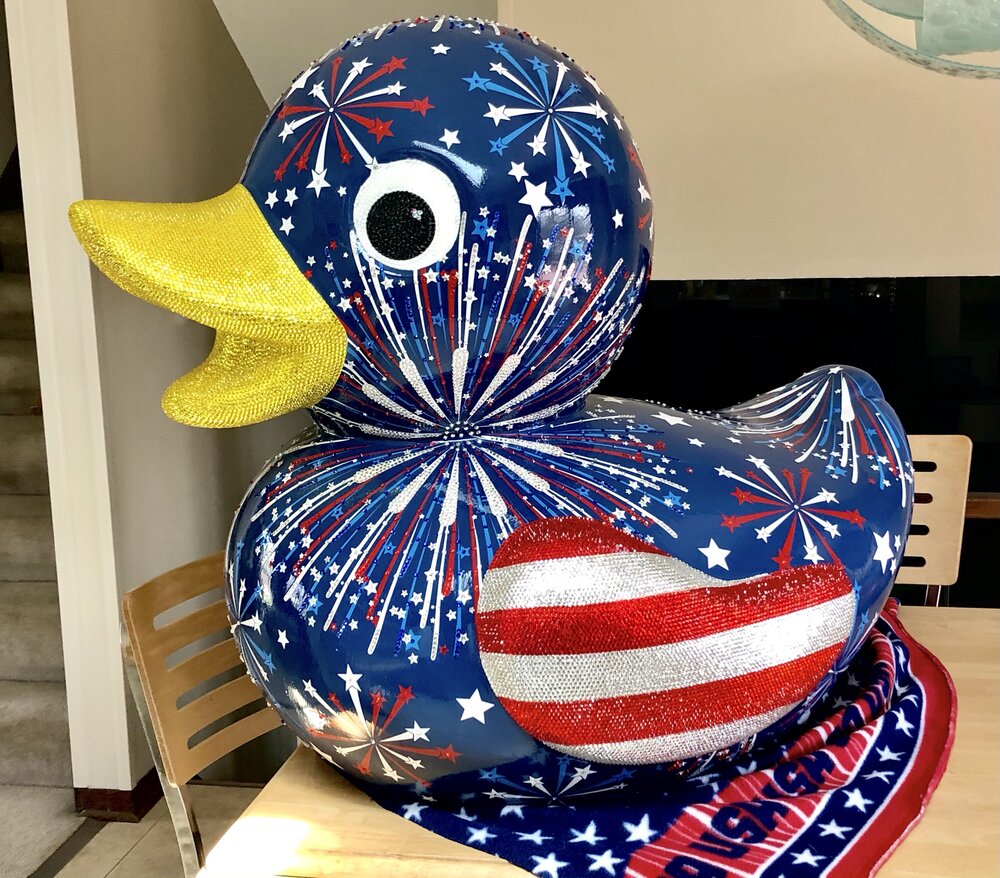
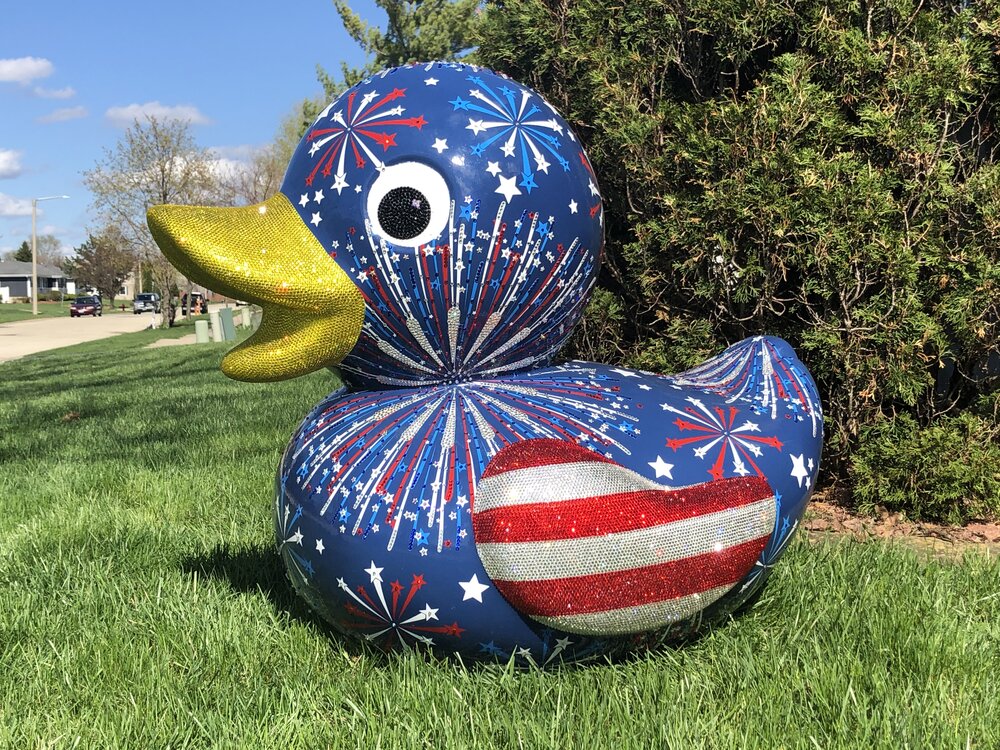
I started with the eyes. I applied the black starting at the outer ring of the eye circle and working my way in. I used a few Crystal Clear AB rhinestones (the AB stands for Aurora Borealis – which has a multi-color effect) to create a shine in each eye. Then I applied the clear rhinestone in the white area filling in the rest of each eye.
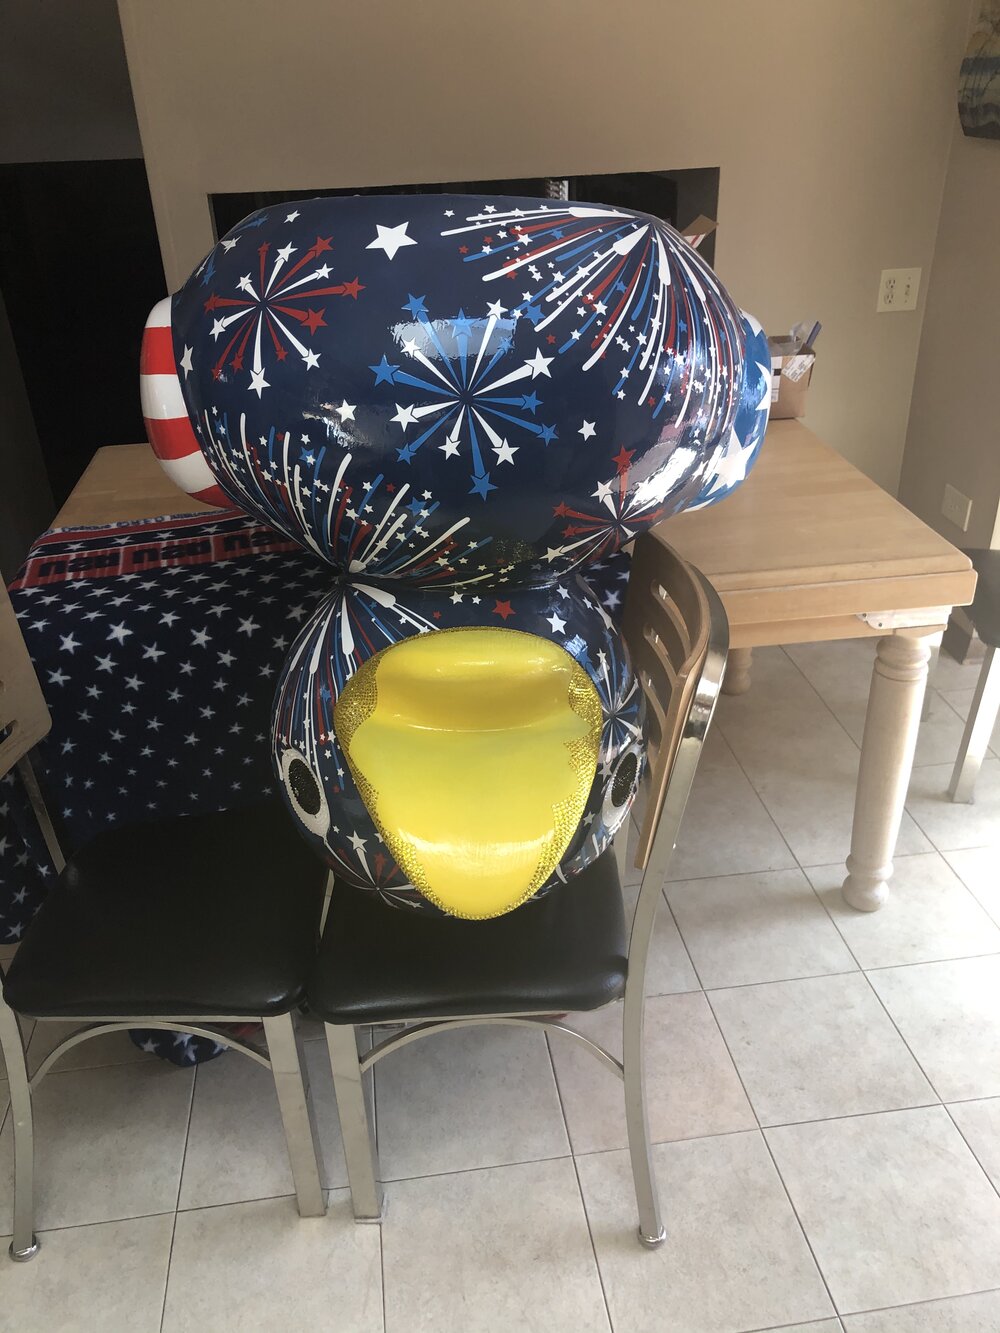
Next it was onto the beak. I began with a complete outline on the outer edge of the beak (where it attaches to the head) and went all the way around. I continued to go row by row out from the head. I was happy to have a running head lamp flash light as it came in handy working on this late into the night. And eventually I had to flip the duck upside on my kitchen table and rest the top of its head on a chair, so I could work on the underside of the beak and the area inside the mouth. I felt like a duck dentist! The pattern that was created by creating those rows and allowing them to carry over and under in an arc like pattern in the mouth is one of the coolest details you begin to pick up on. And the photos just don’t do justice to how much this thing shines and sparkles already at this point.
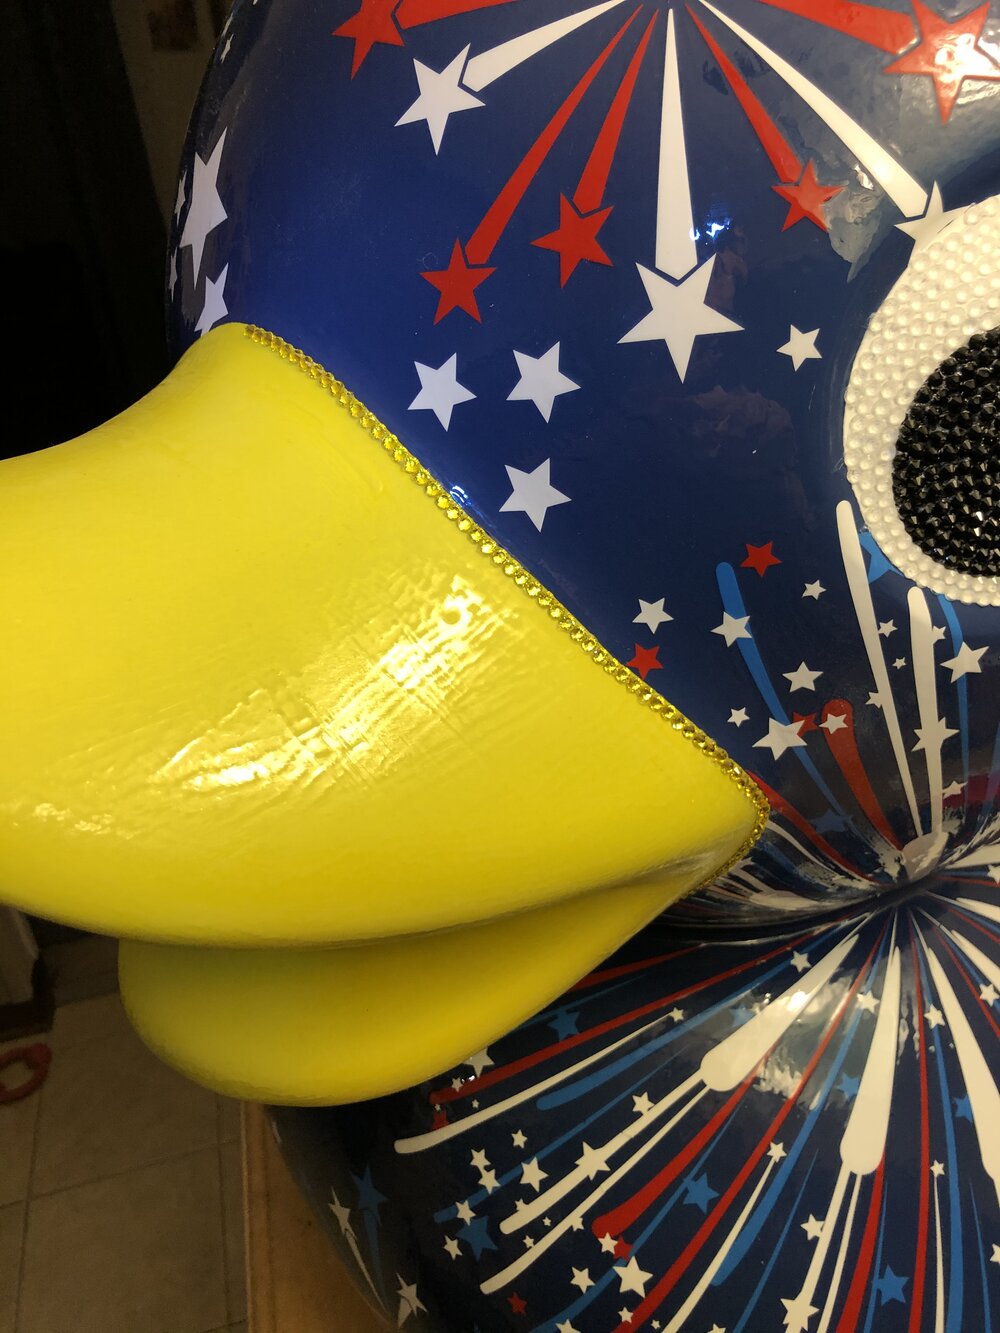
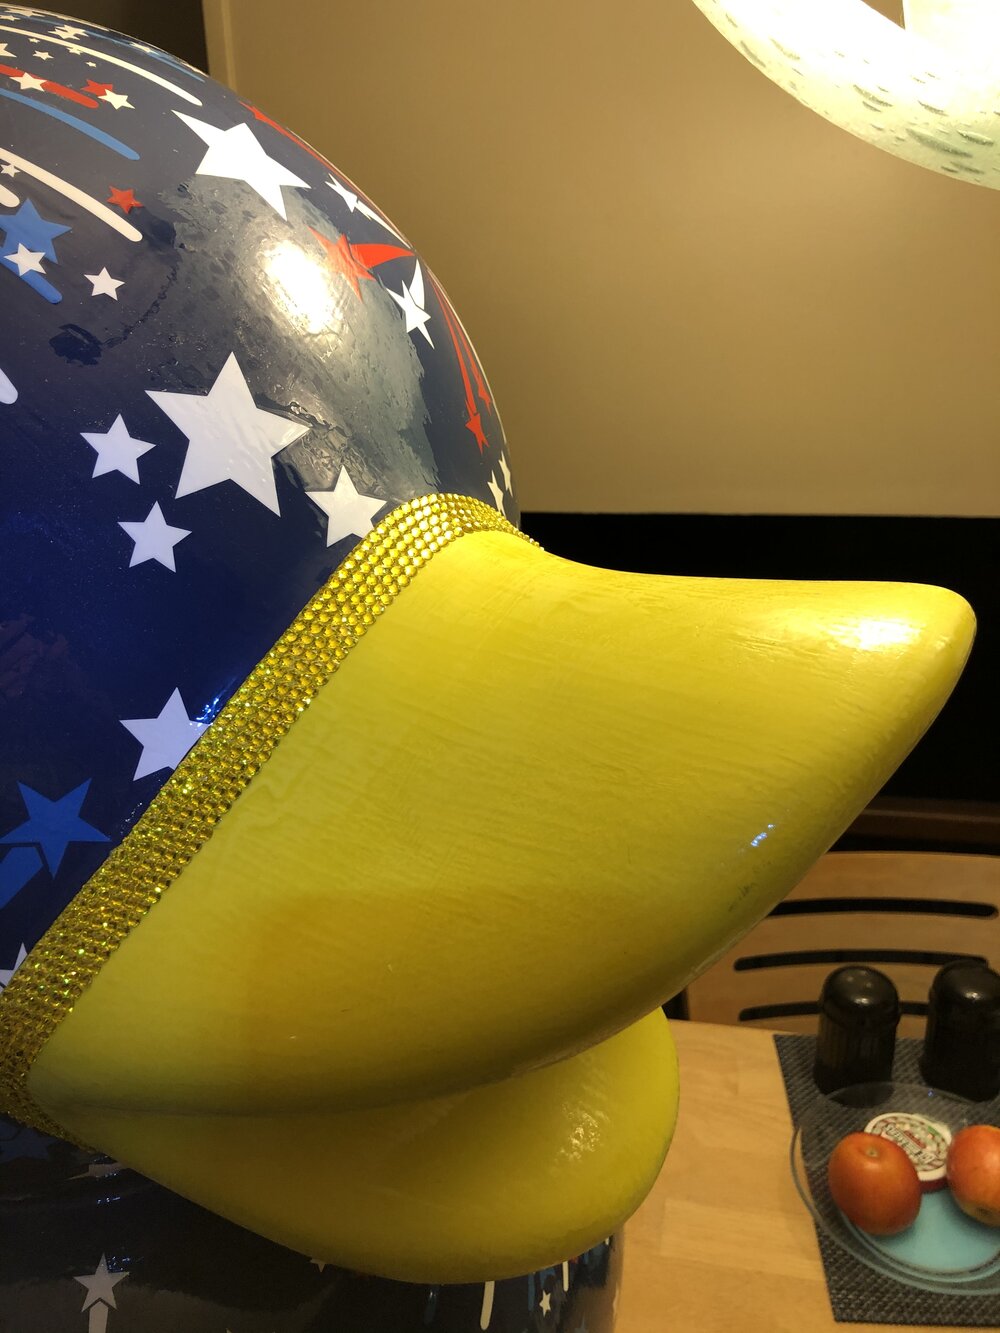
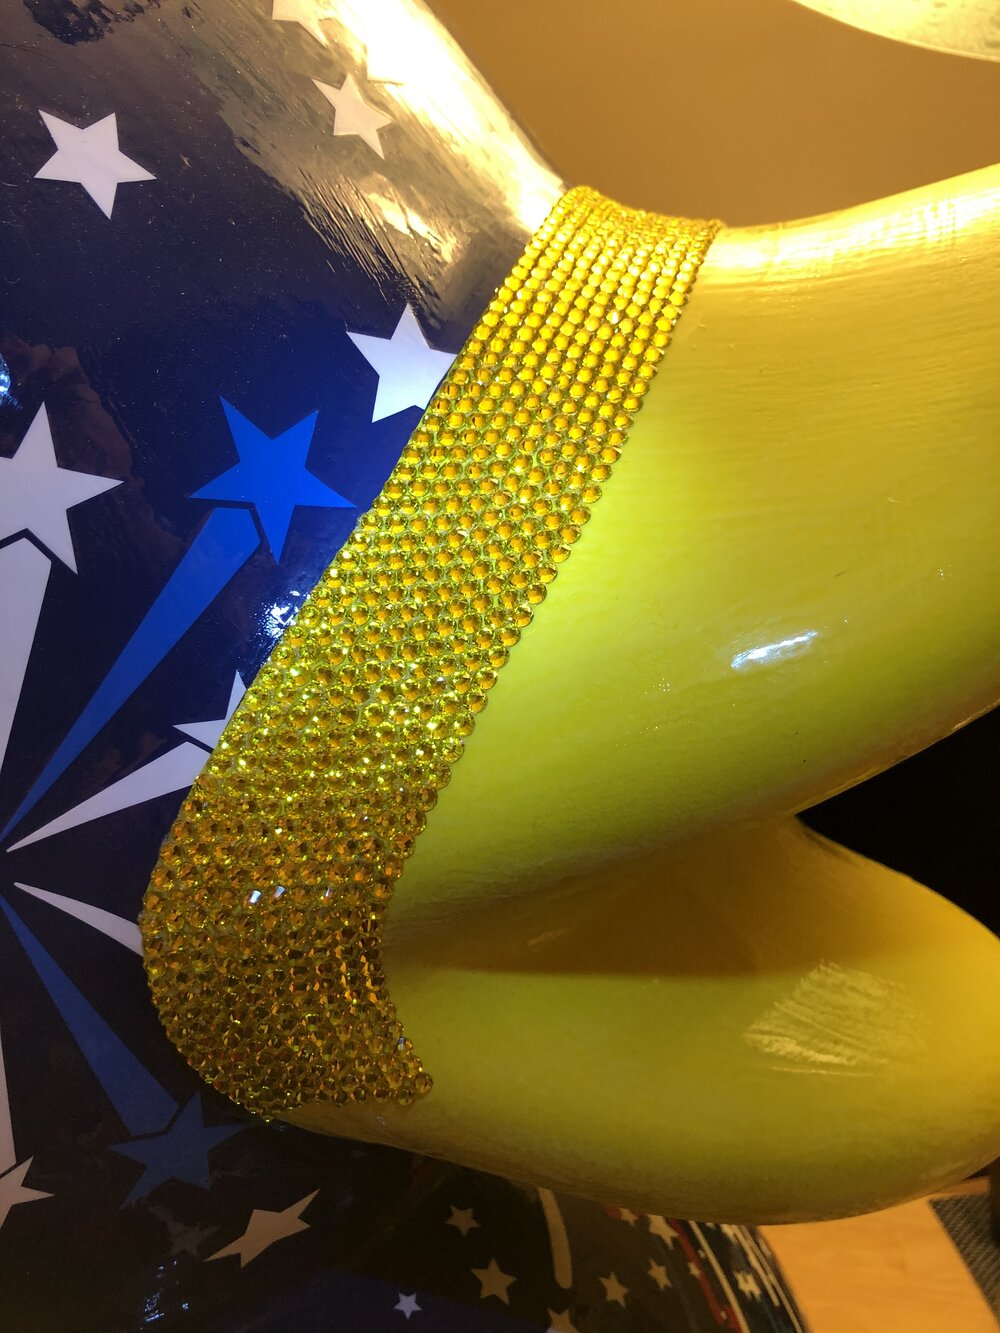
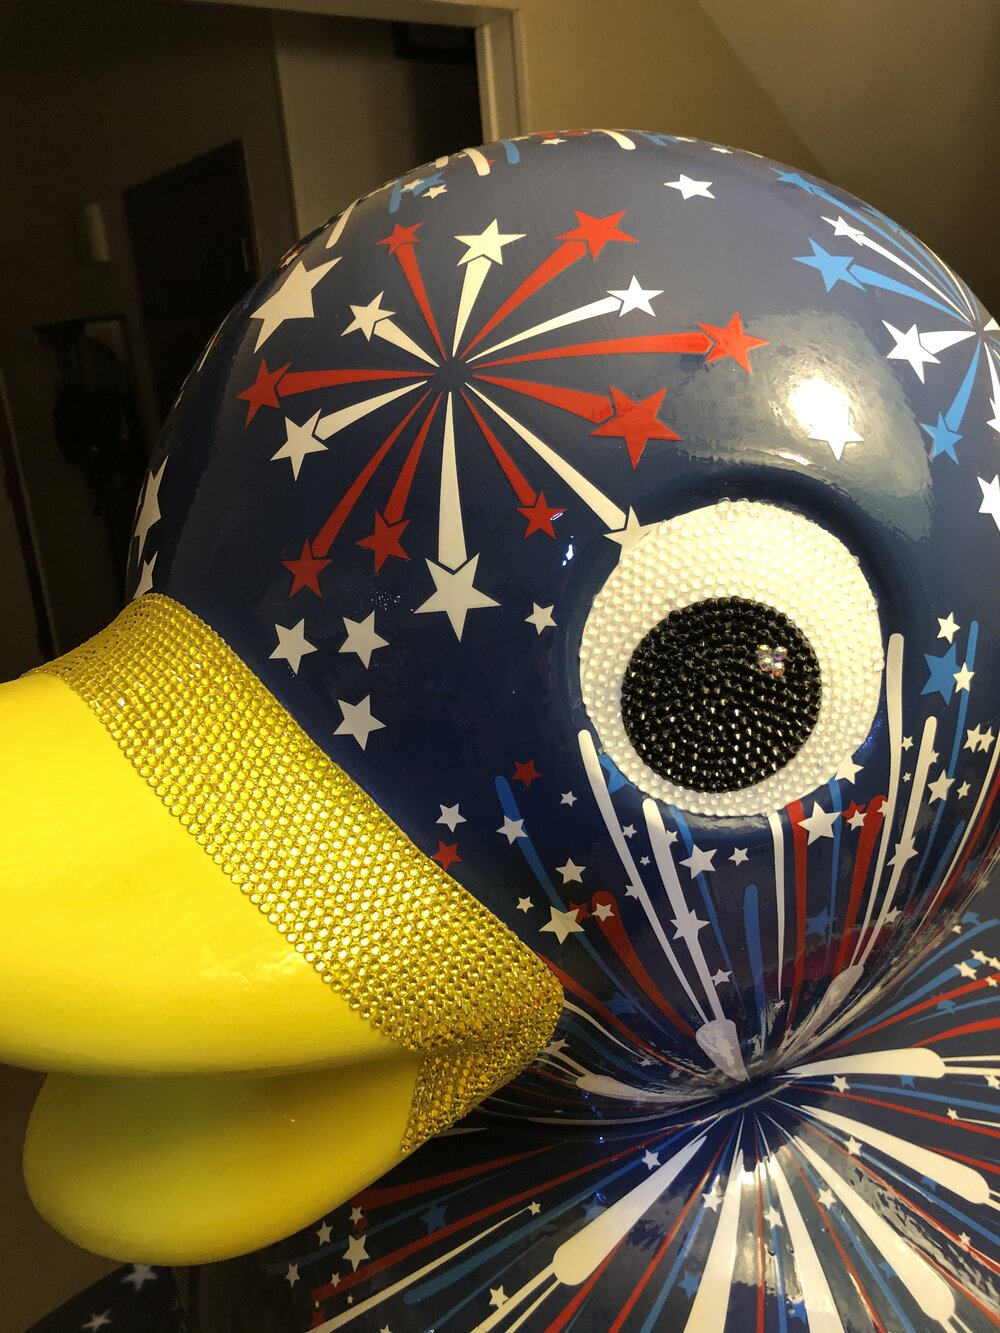

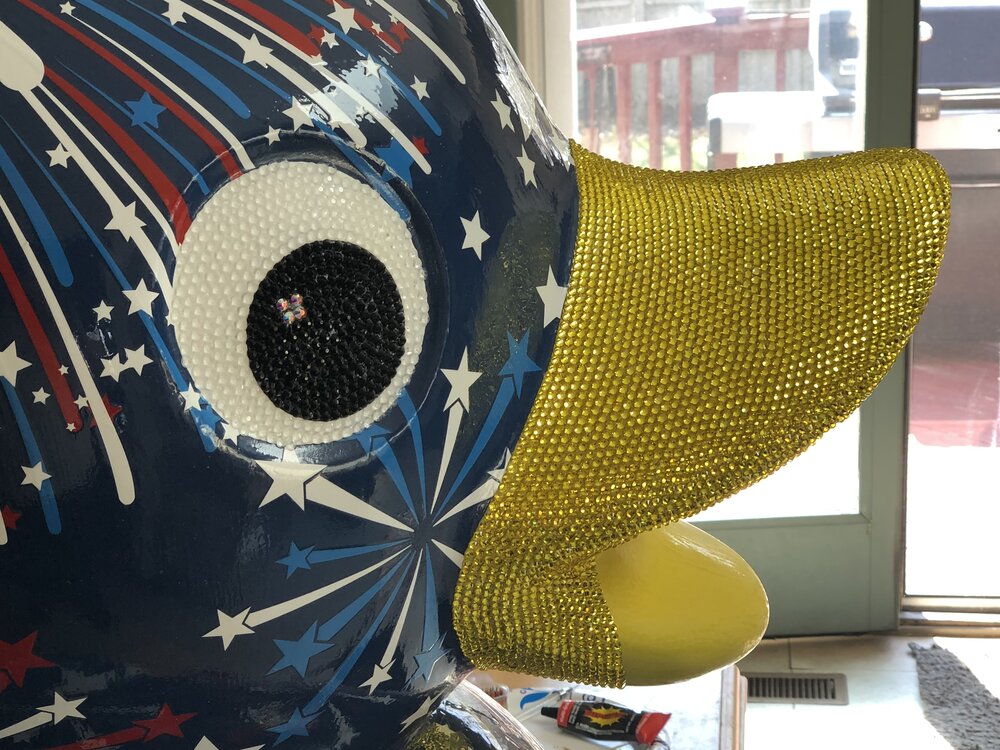
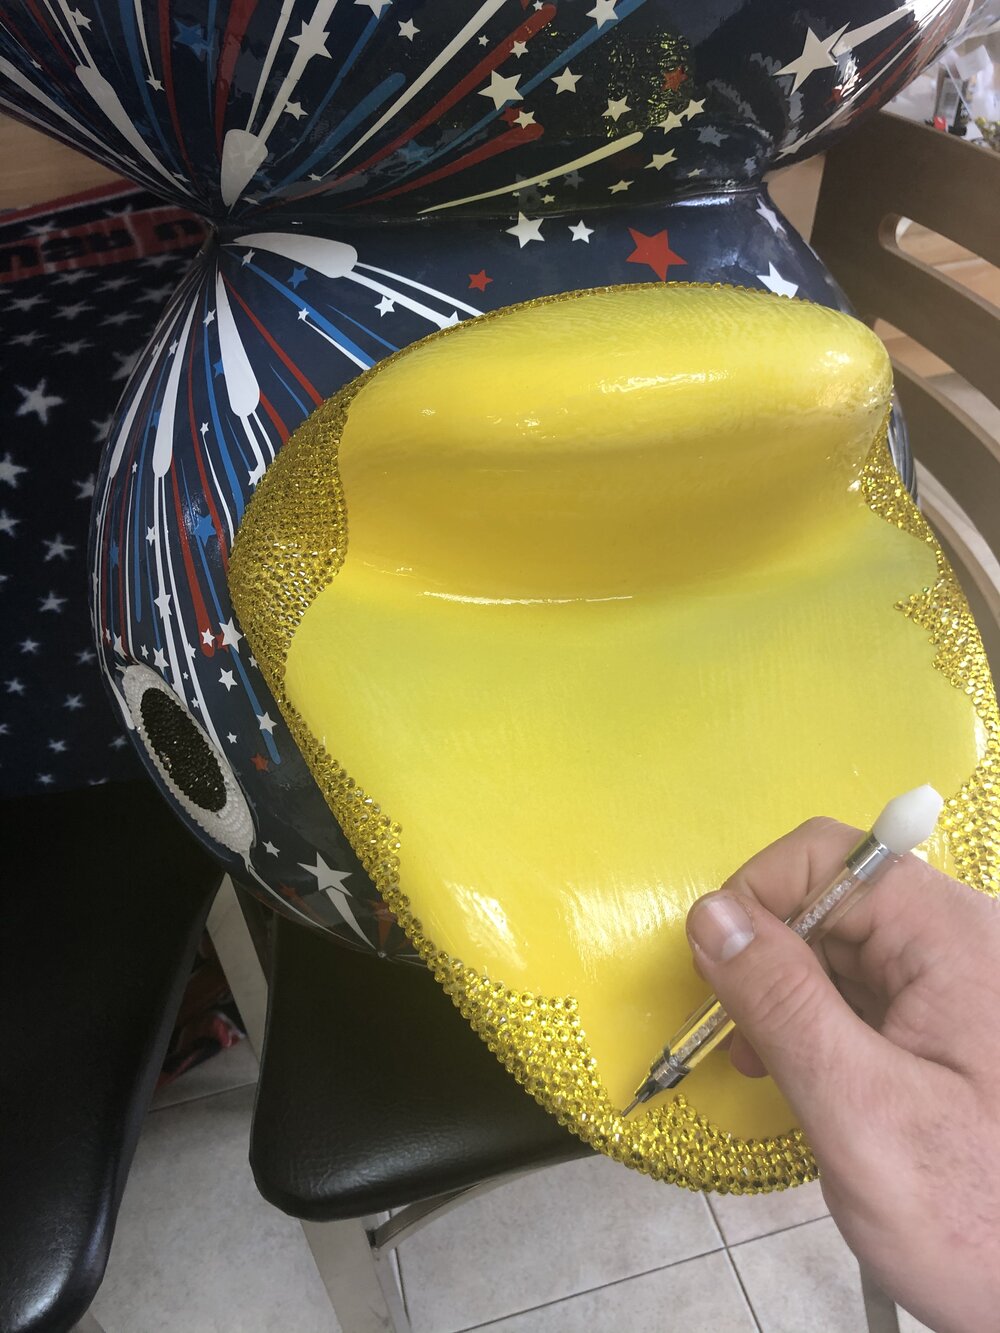
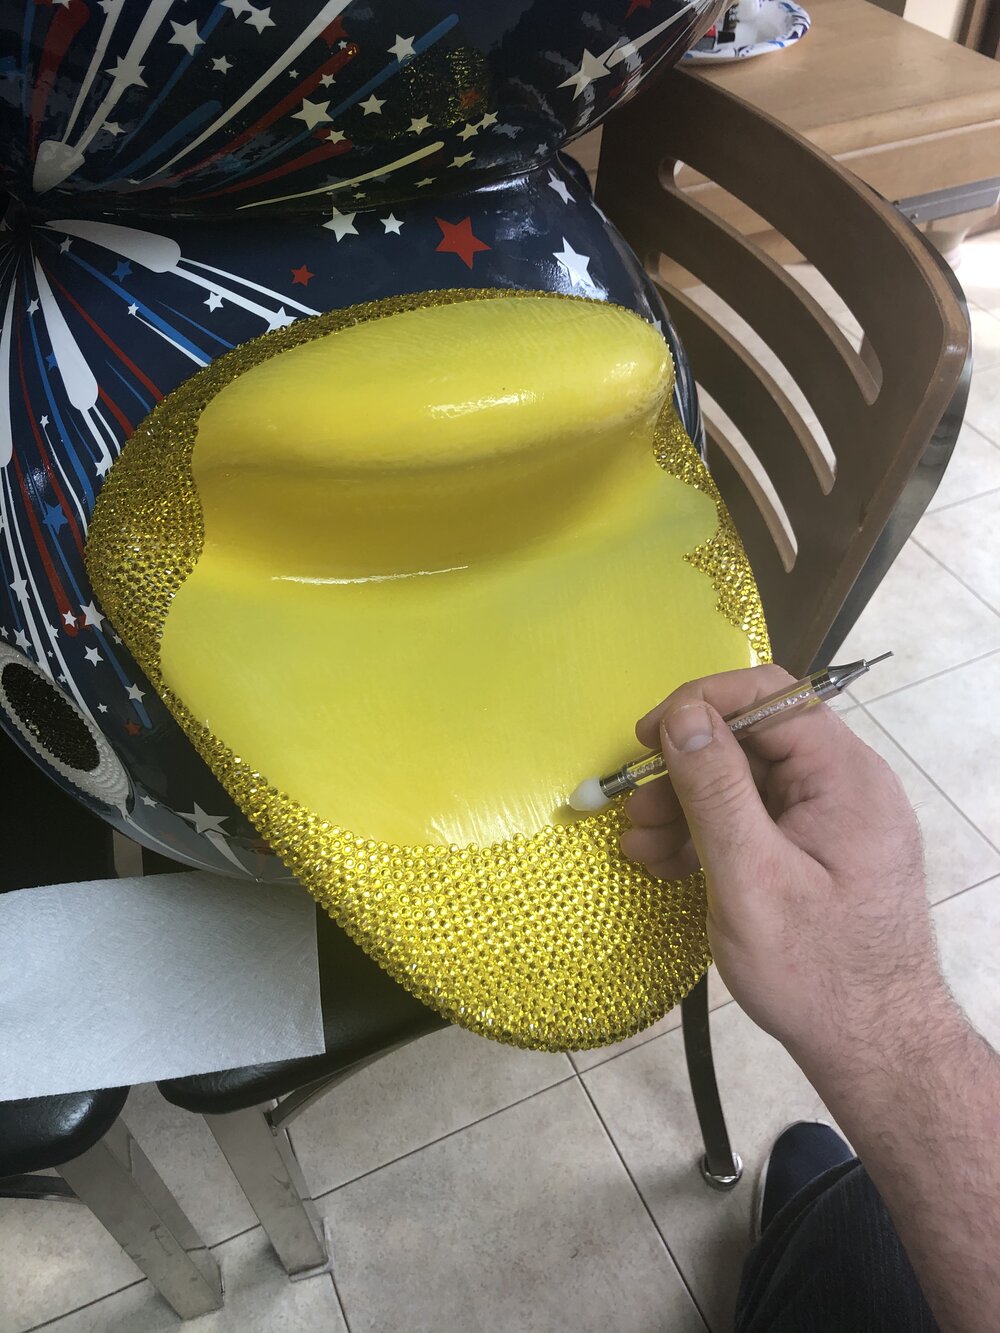
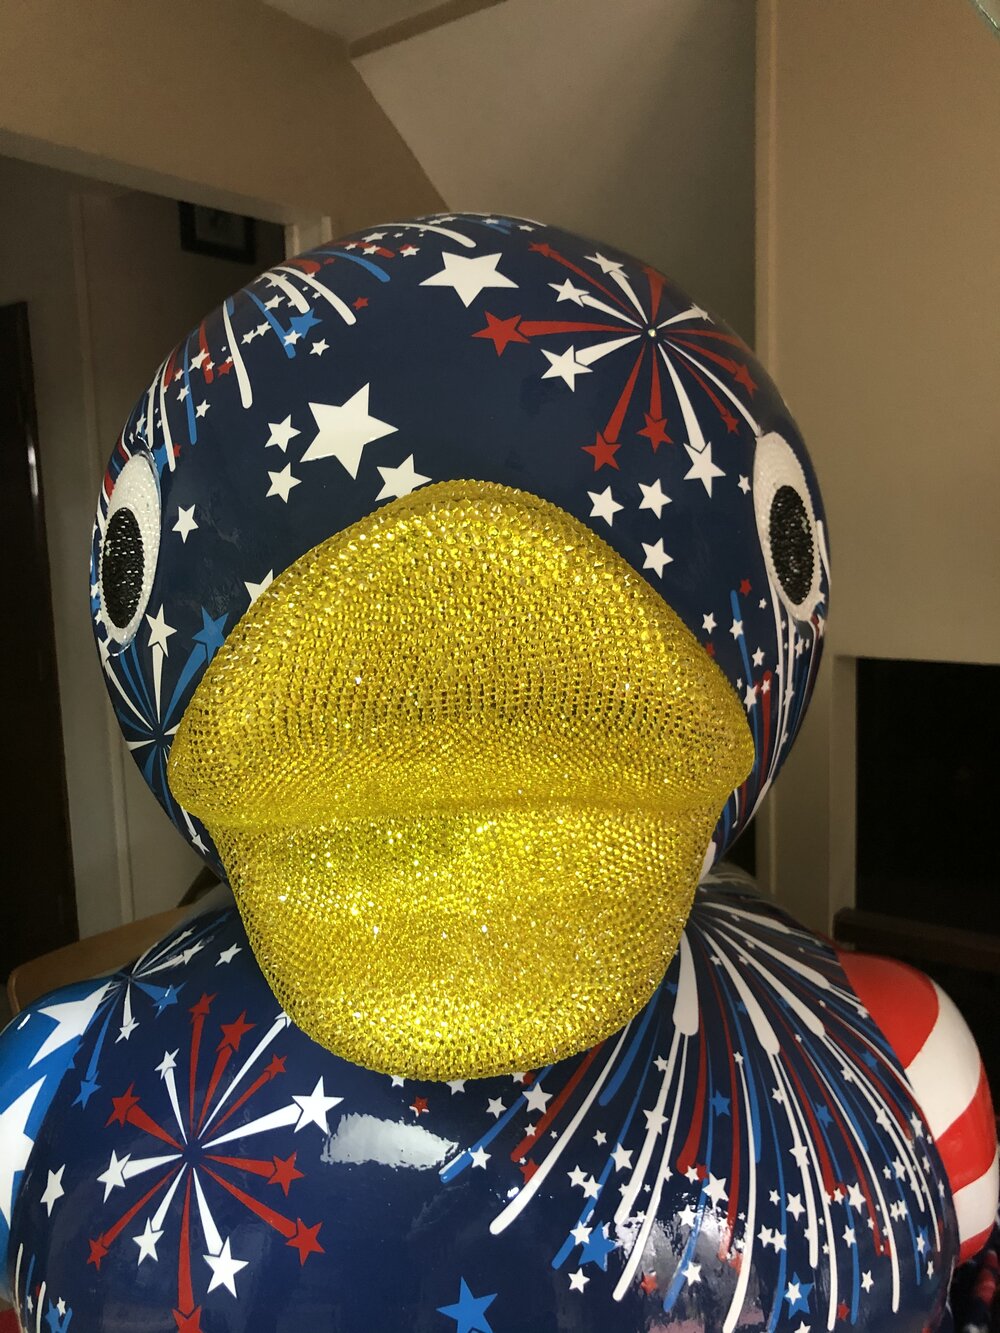
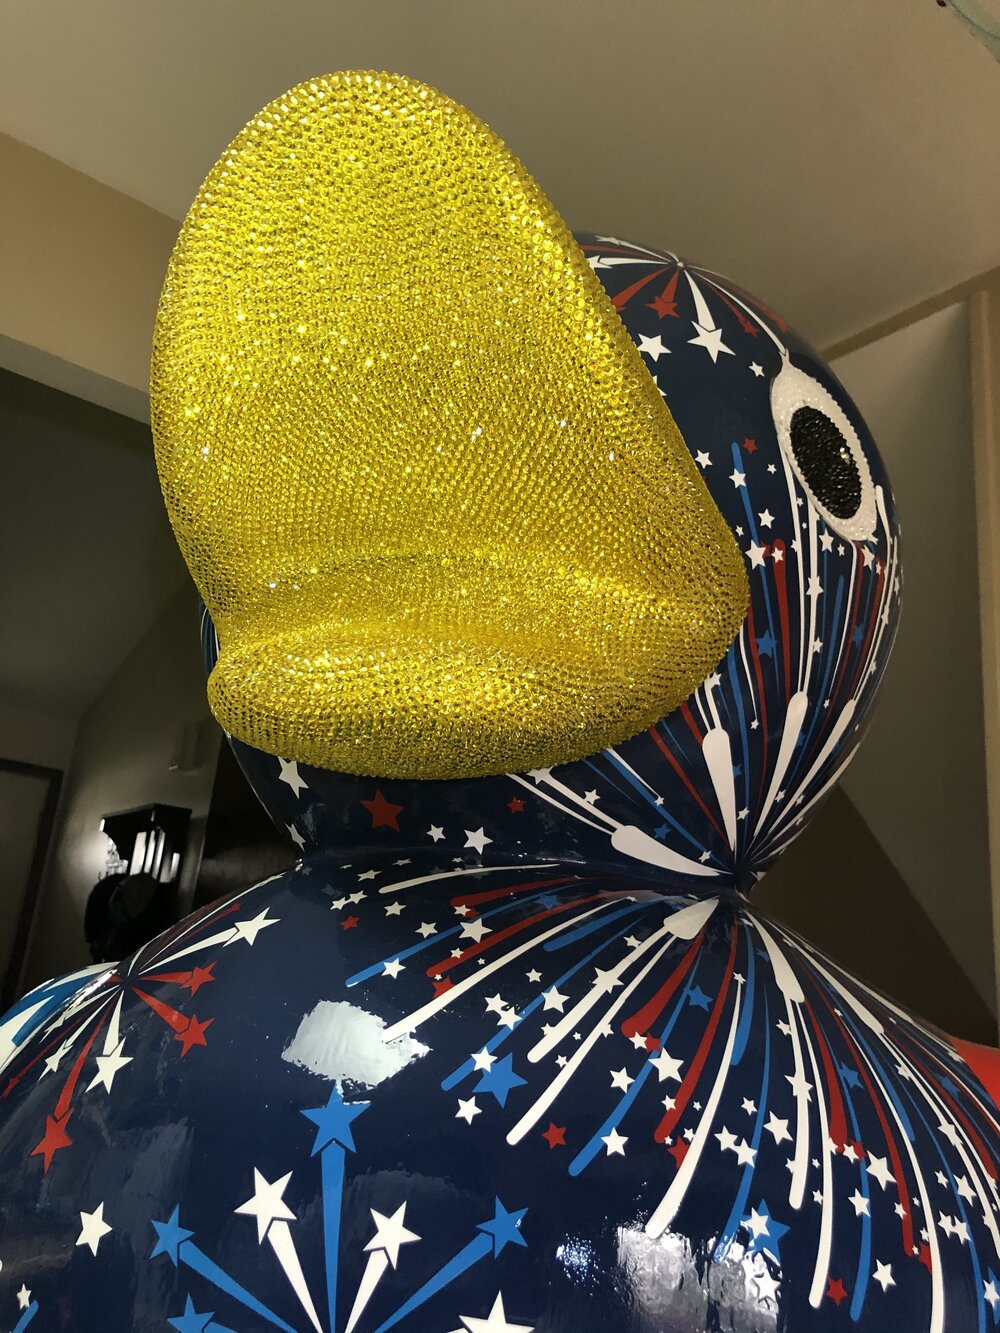
Going by weight of the bag of rhinestones before and after I had finished the beak, there are well over 10,000 citrine rhinestones on the beak when it was done!
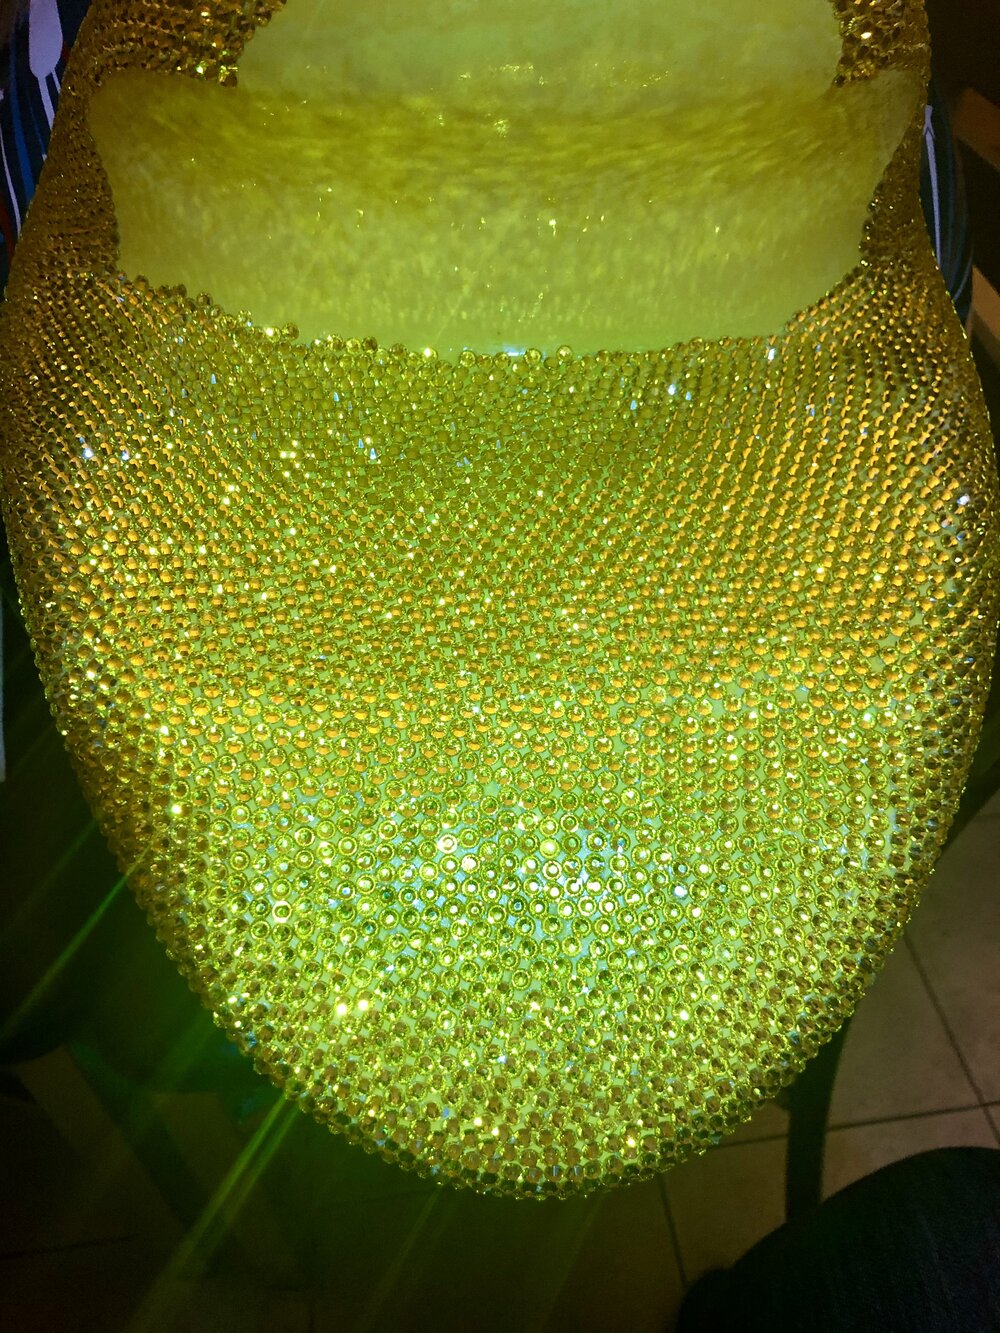
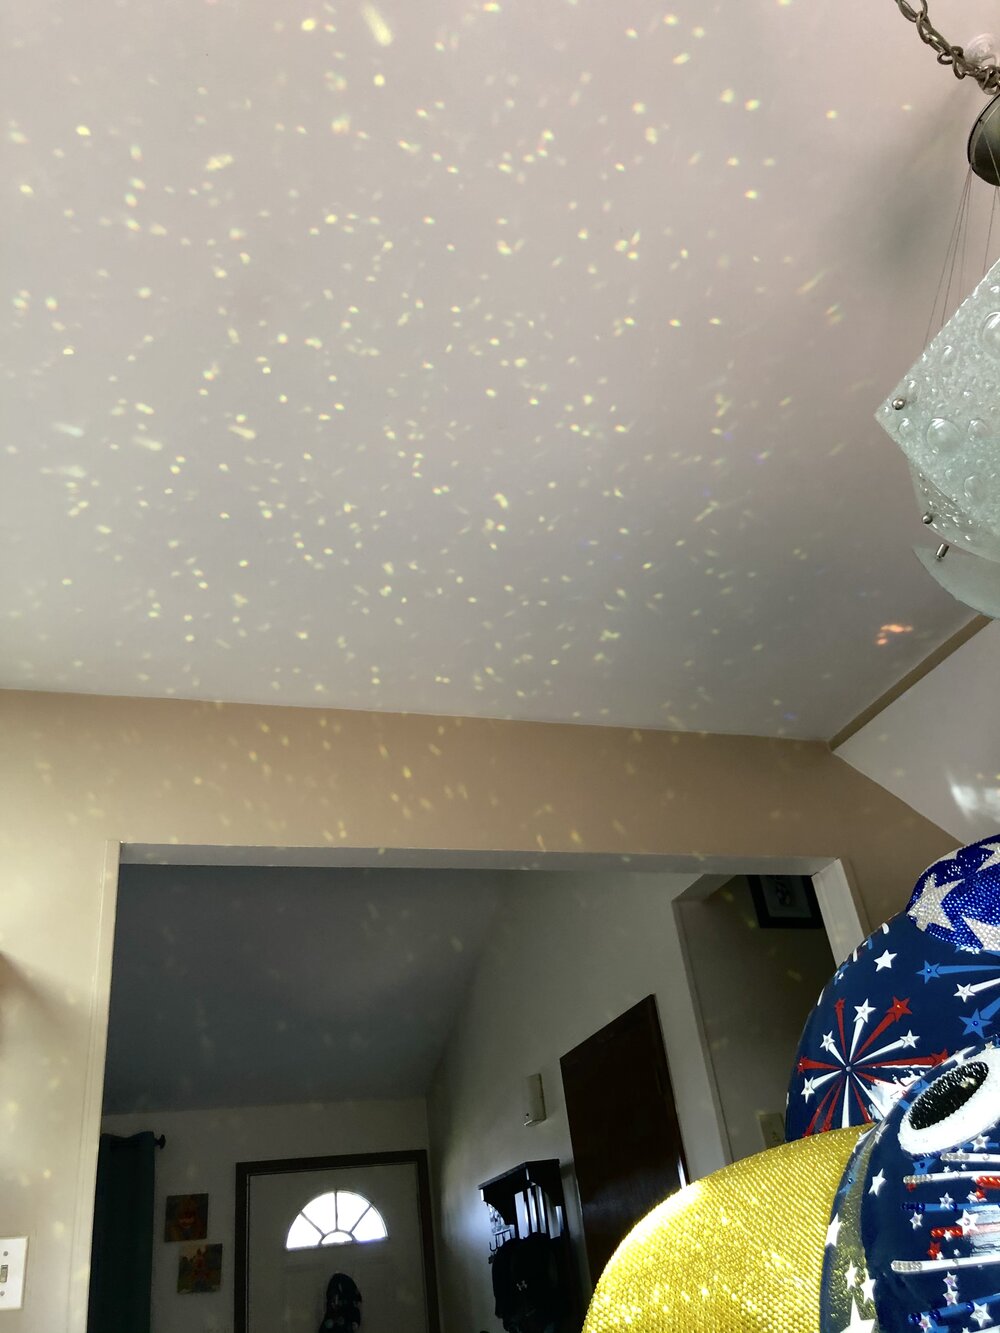
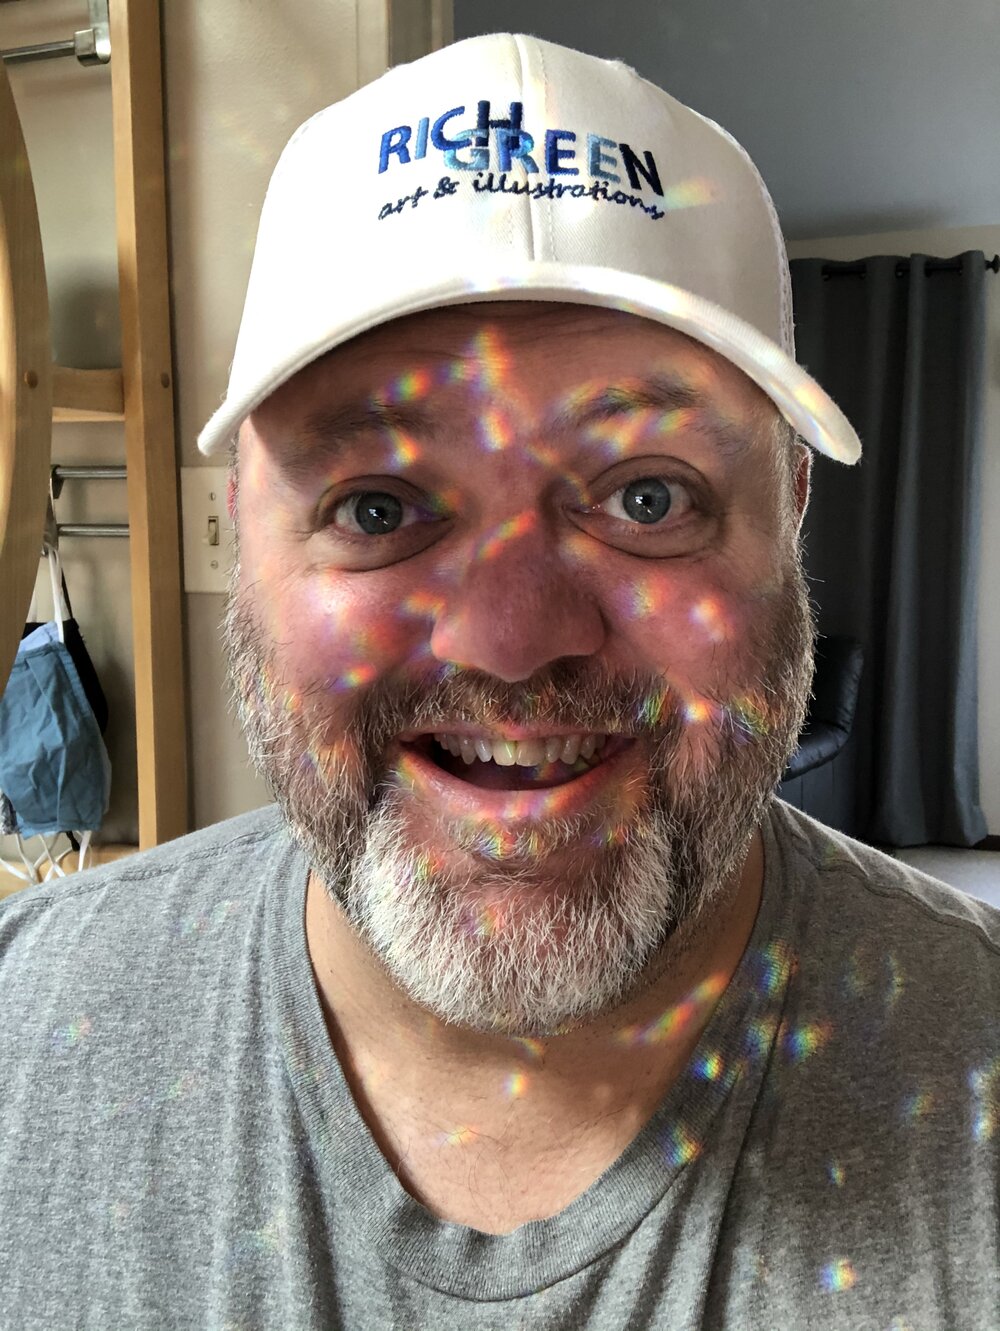
Each day at a certain time the sunlight coming through my kitchen skylight would catch a little bit of the duck on the table. I looked up to find that the beak was being hit by the light and my kitchen ceiling, walls, floor were just covered in all these incredible points of light.
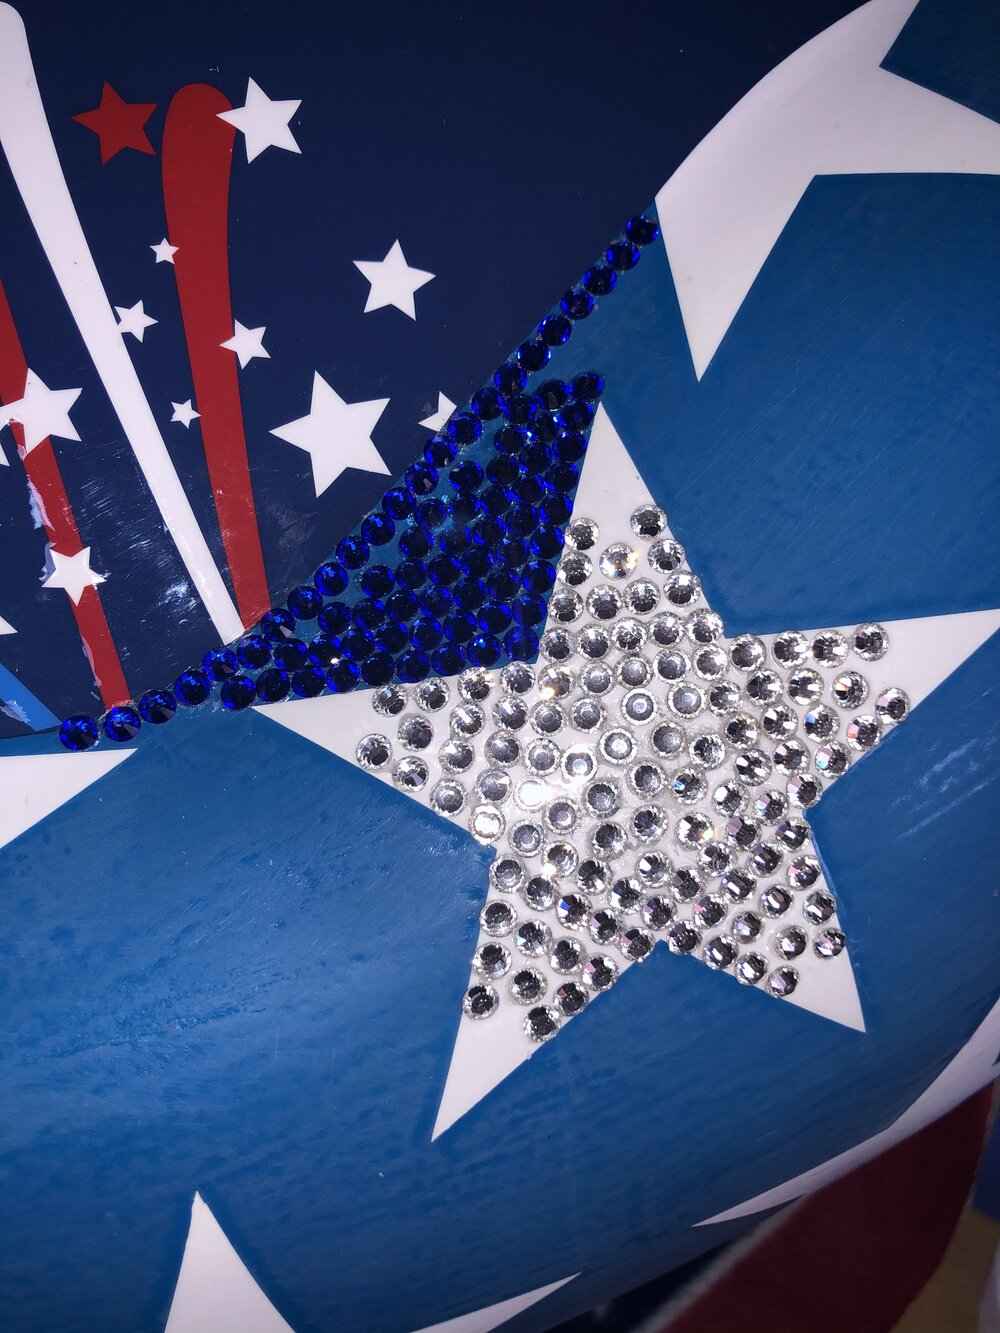
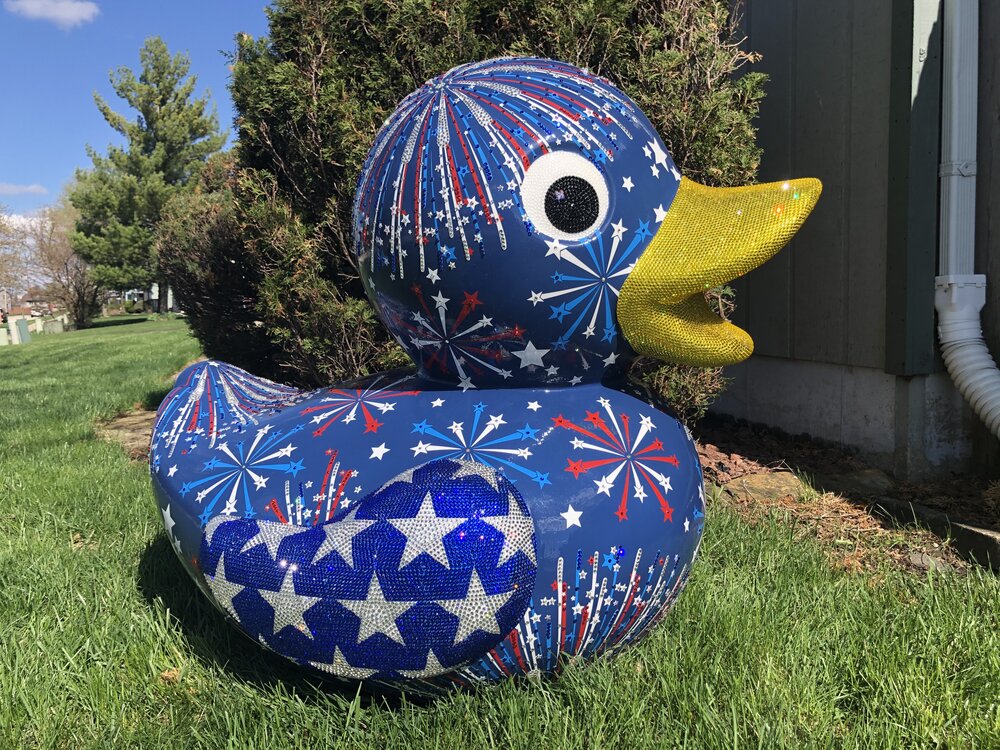
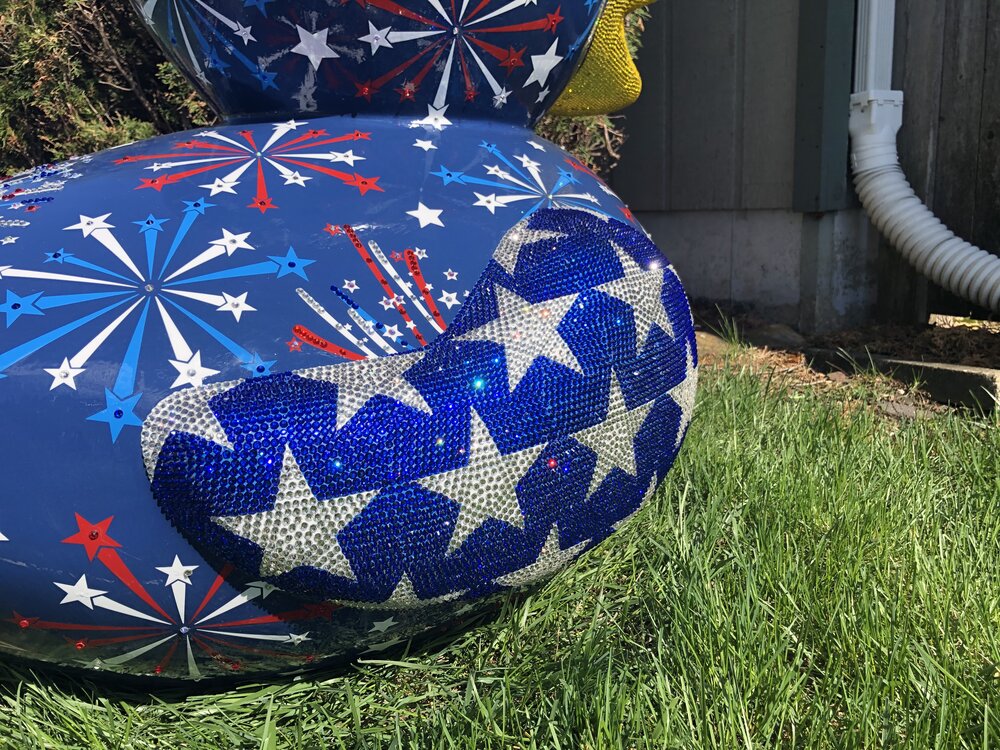
Then it was onto working on the blue wing with the stars. Remember how I planned out the rhinestone pattern on the stars in advance, I am so glad I did that as they came together absolutely perfectly and as planned. I had to really burn the midnight oil to get this wing done as the Mayor of Lockport reached out to me asking if I could send him photos of the profile on this side of the duck for some event advertising they were going to do. And when he asked I had the wing finish scuffed a few stars started. I needed to get him the photos the next morning. So I was up just about all night to make this happen. But I was not going to pass up this awesome opportunity for it to be featured!
One of the advertisement graphics featuring Fire Quackers in it!
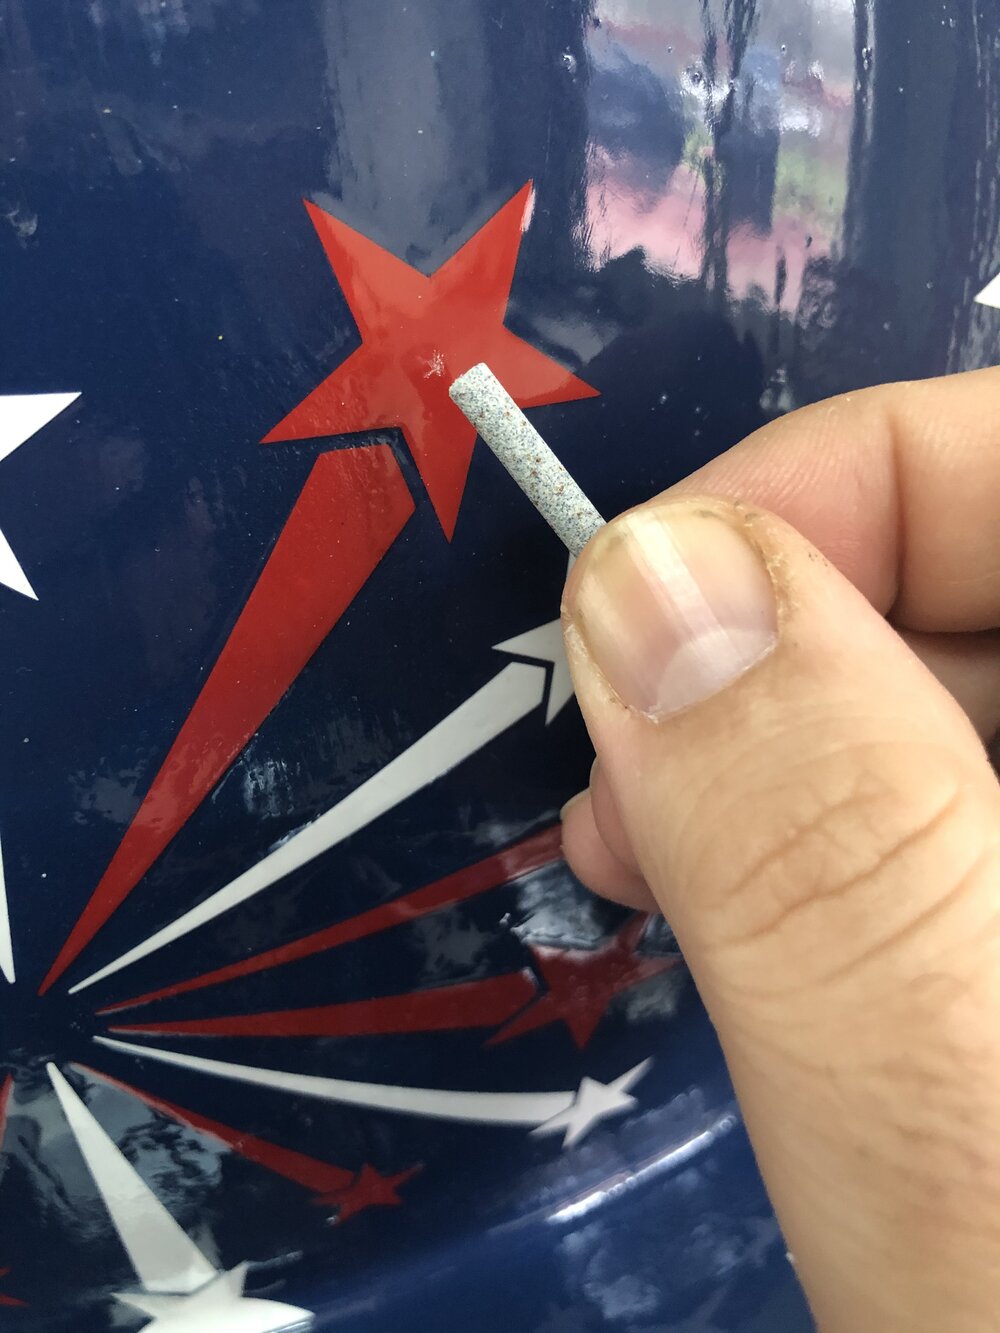
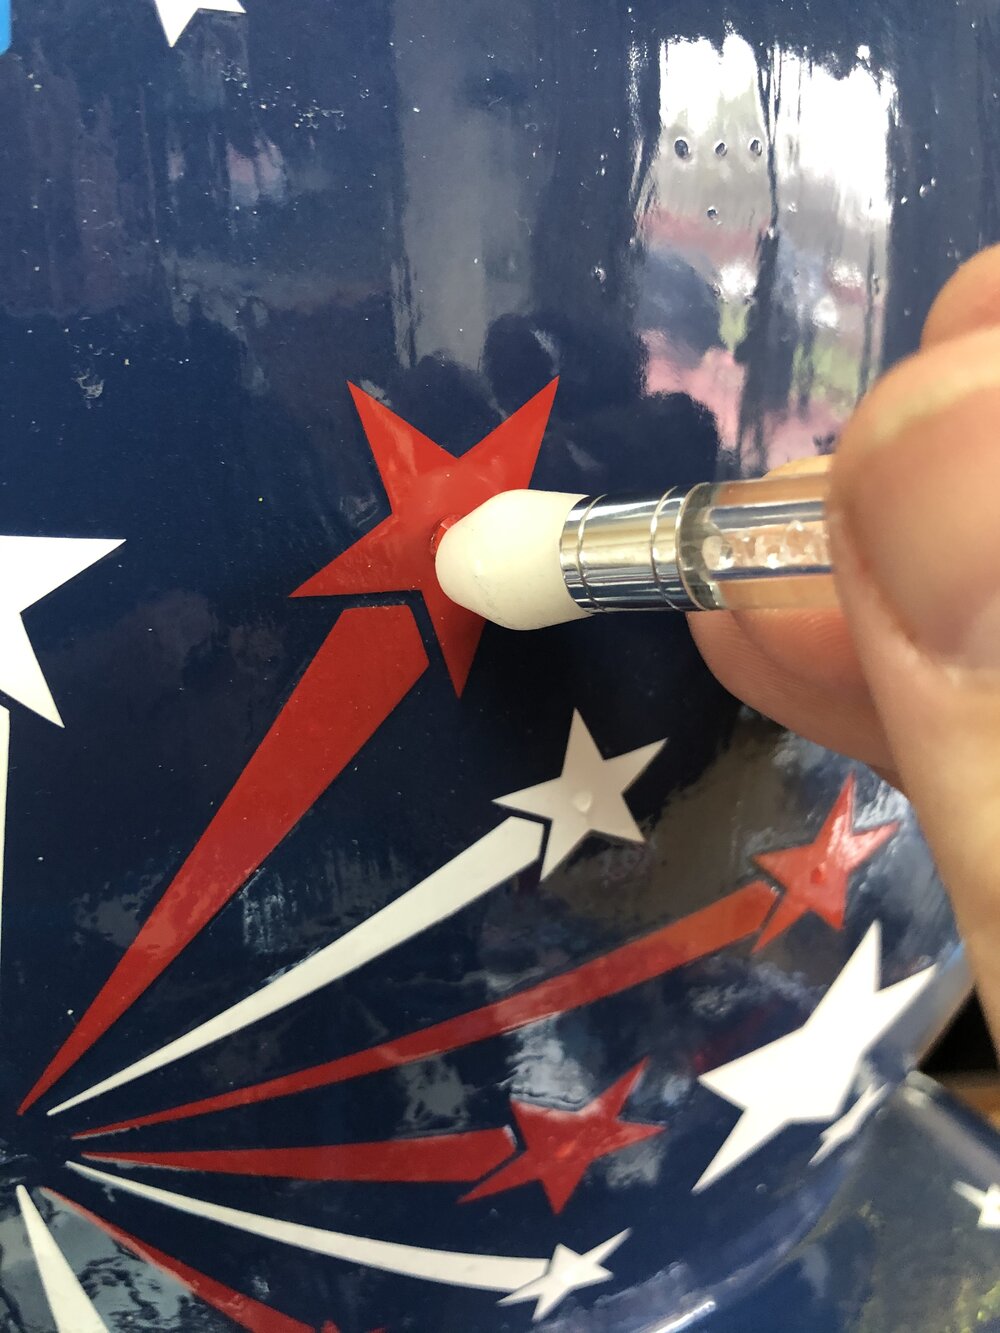
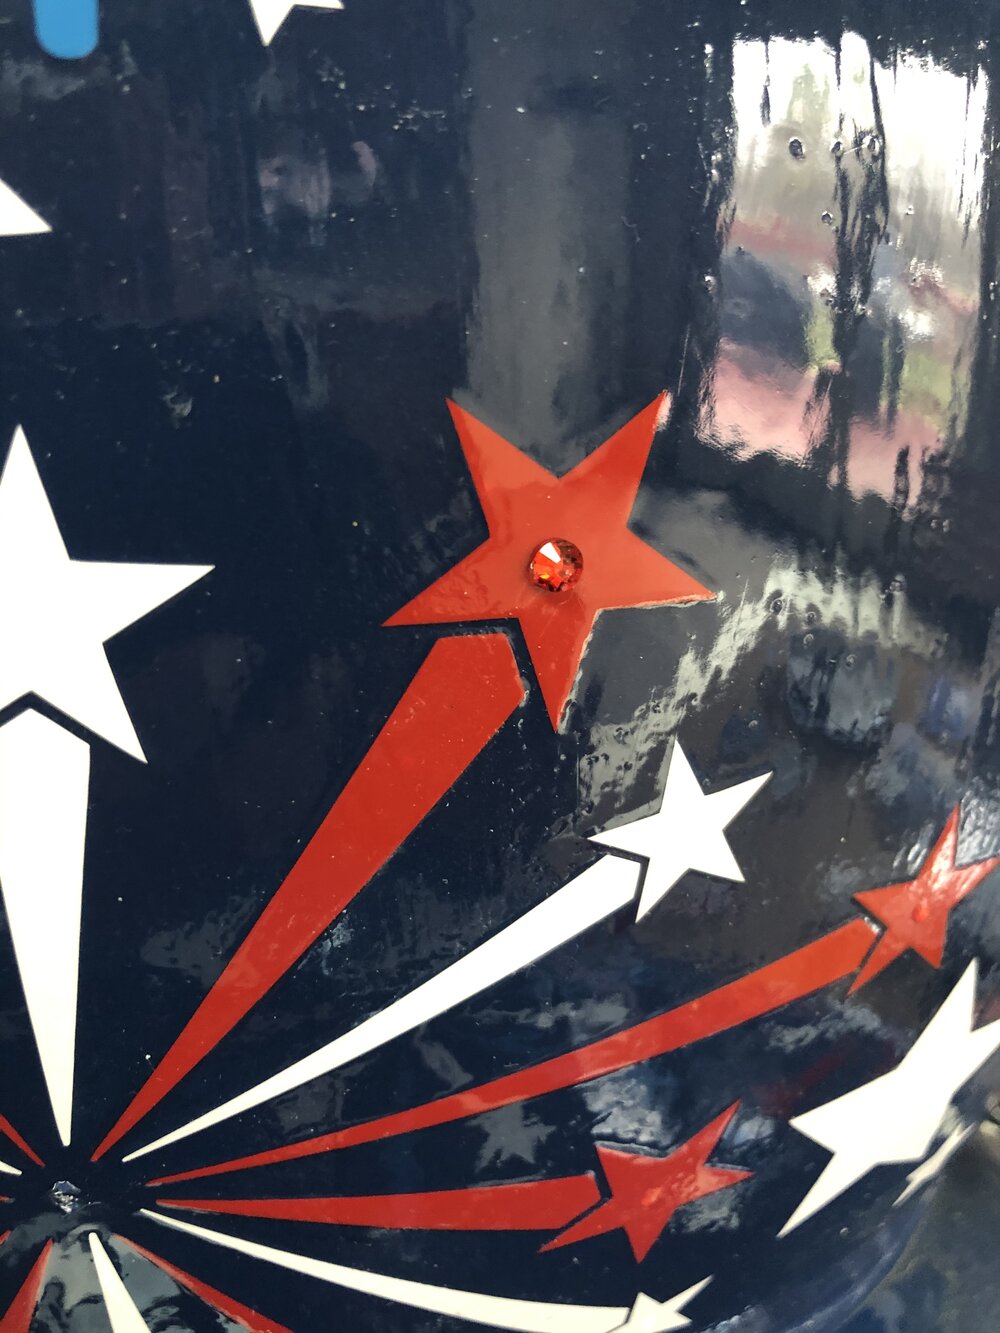
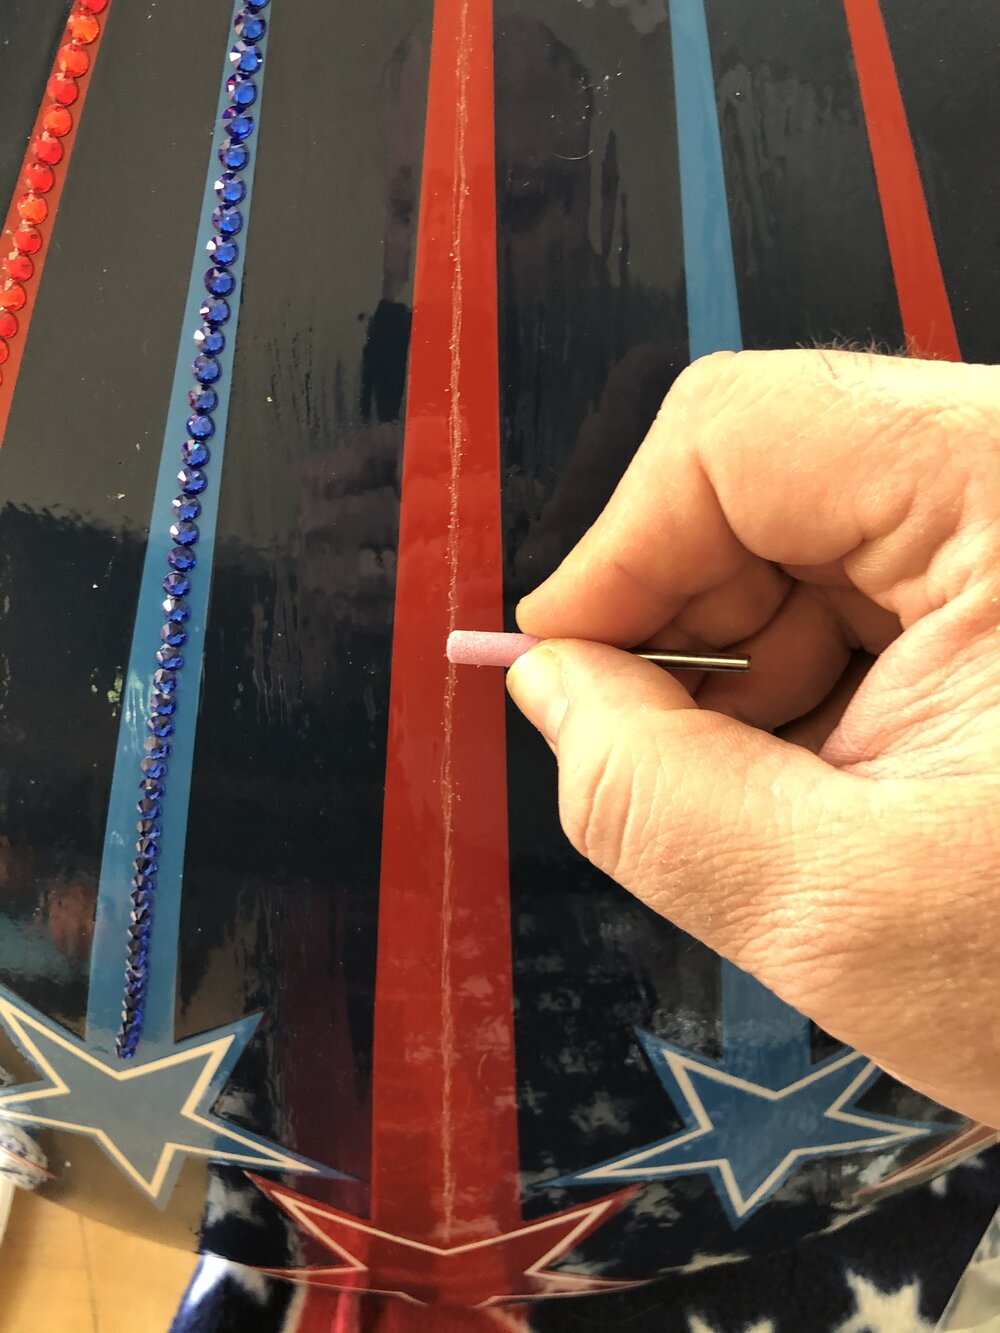
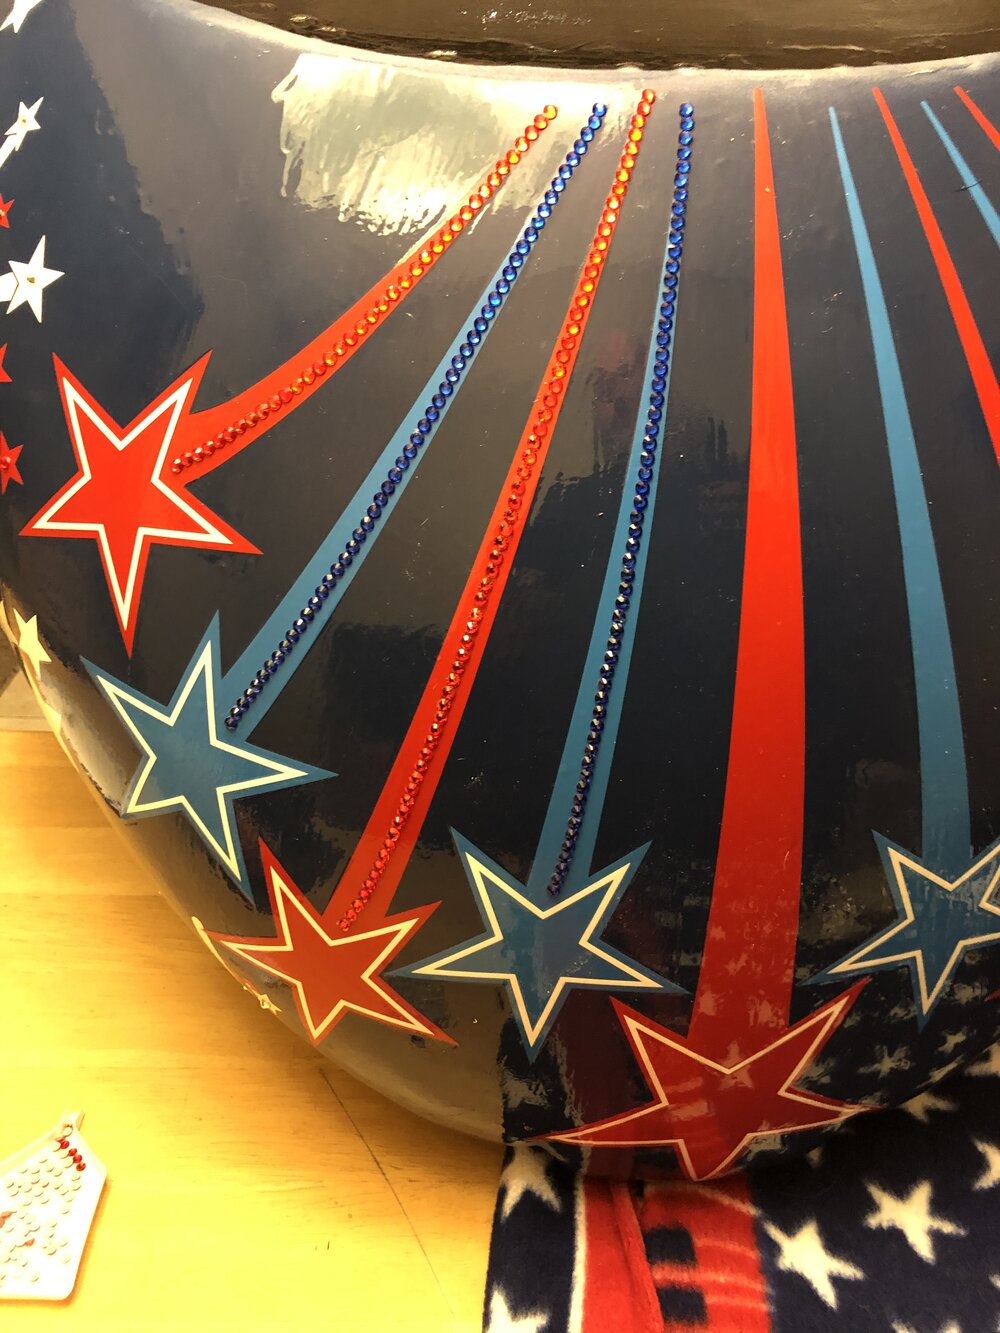
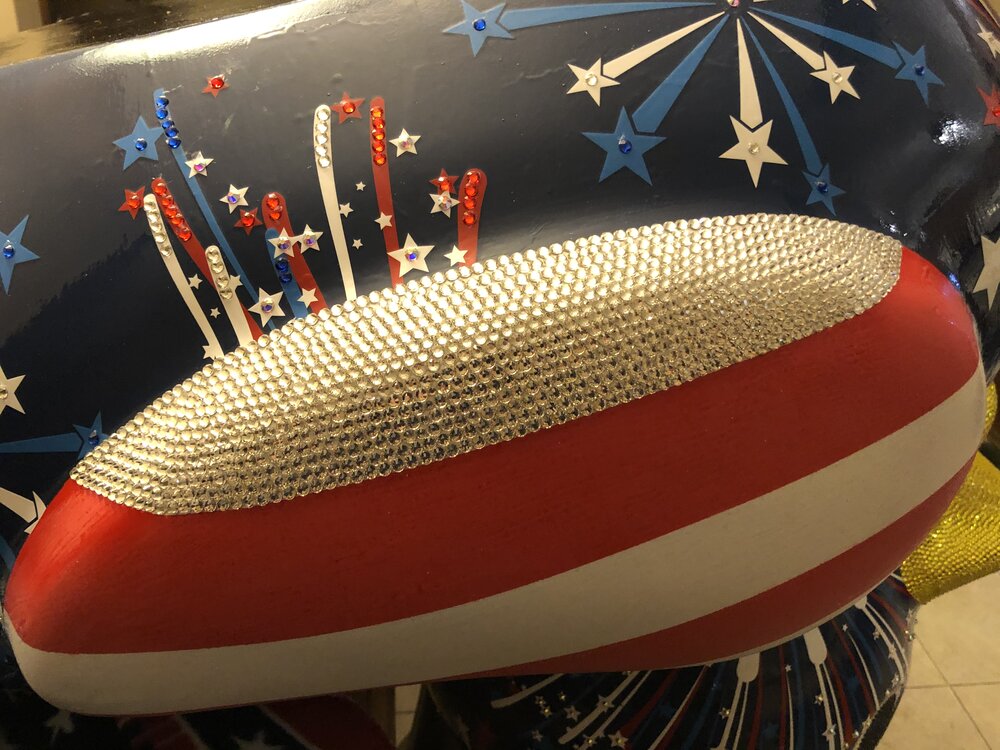
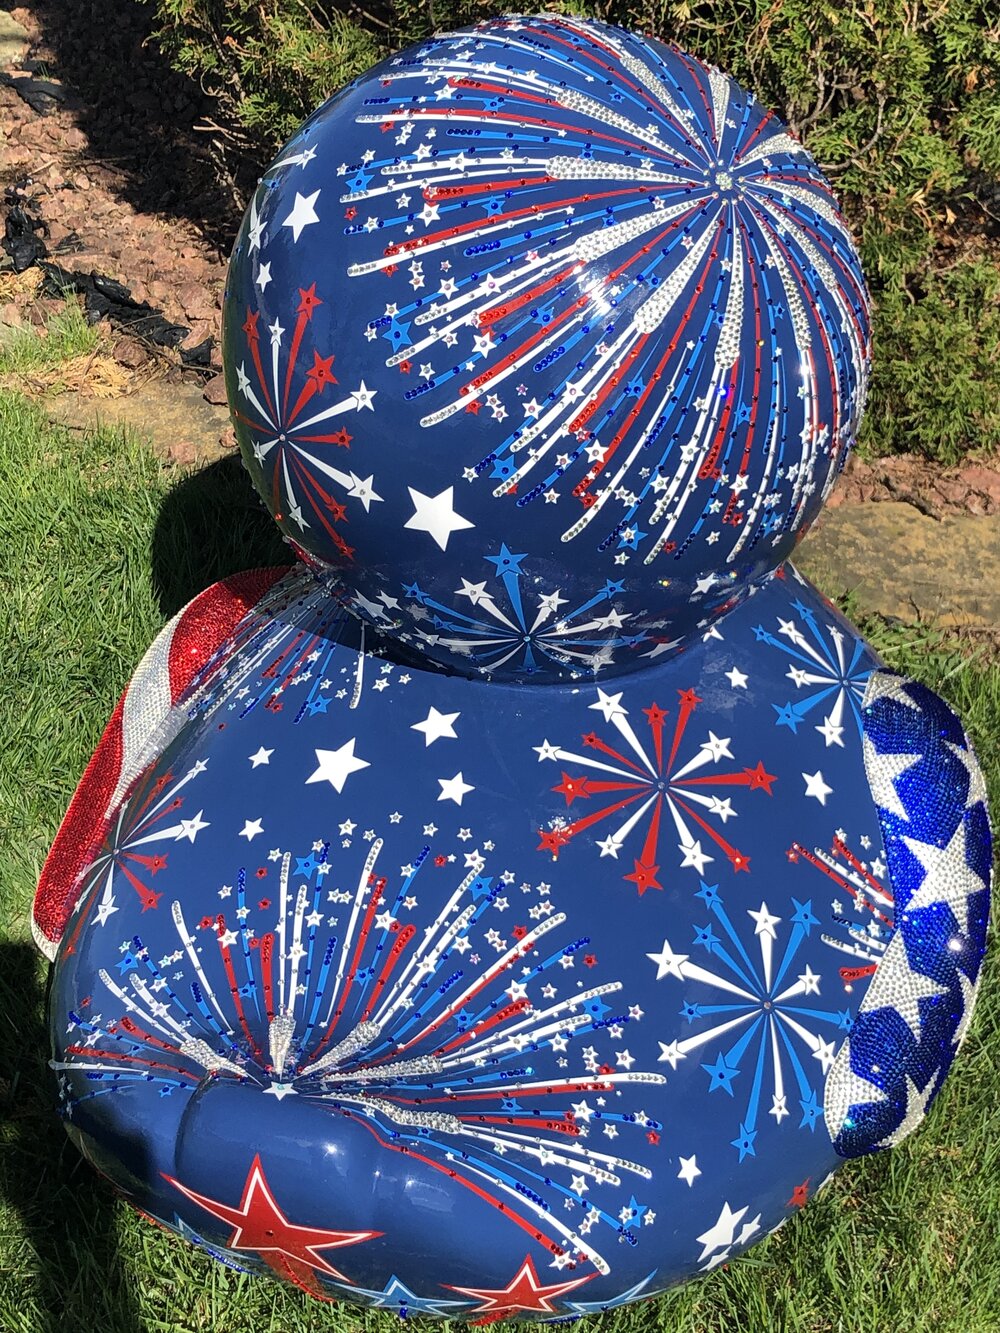
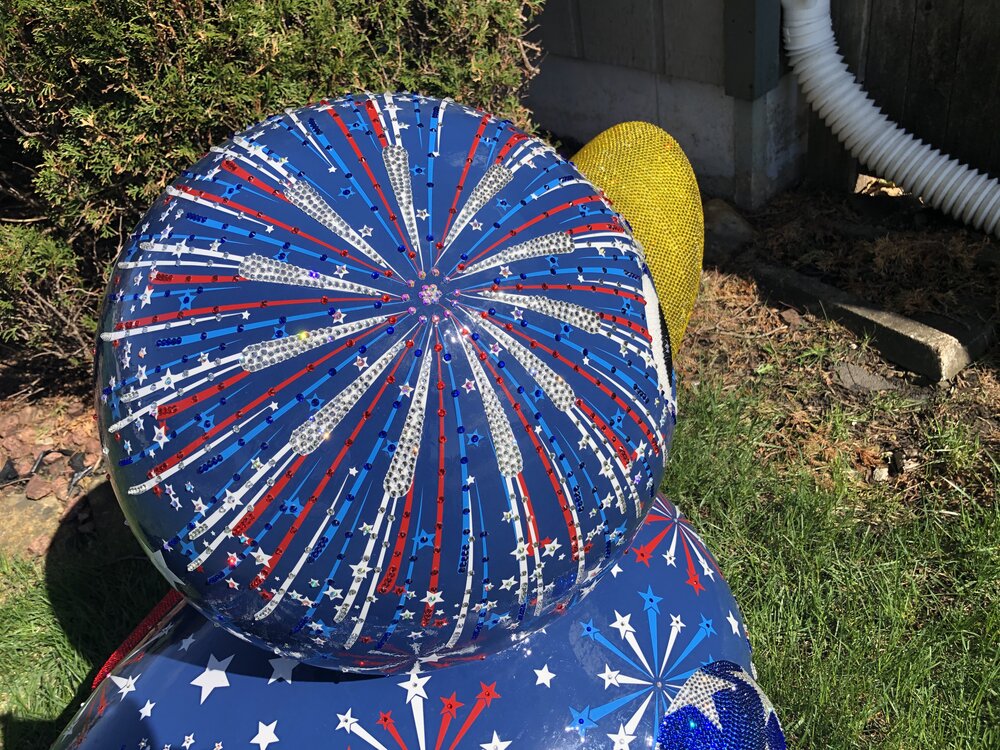
With this wing finished, I moved onto figuring out the fireworks bursts. They were probably my least favorite thing to apply the rhinestones too, as I had to use a little Dremel grinding bit by hand to scuff/scratch the finish of the surface to give the rhinestone glue something to grip onto. But I just worked on them one section at a time making my way around the duck. I wanted the large bursts to have rhinestones applied as if they were the actual points of light trailing out as the firework bursts in the sky. For the smaller fireworks I just wanted to add one stone to each star to keep them simple and give your eye a place to rest here and there.
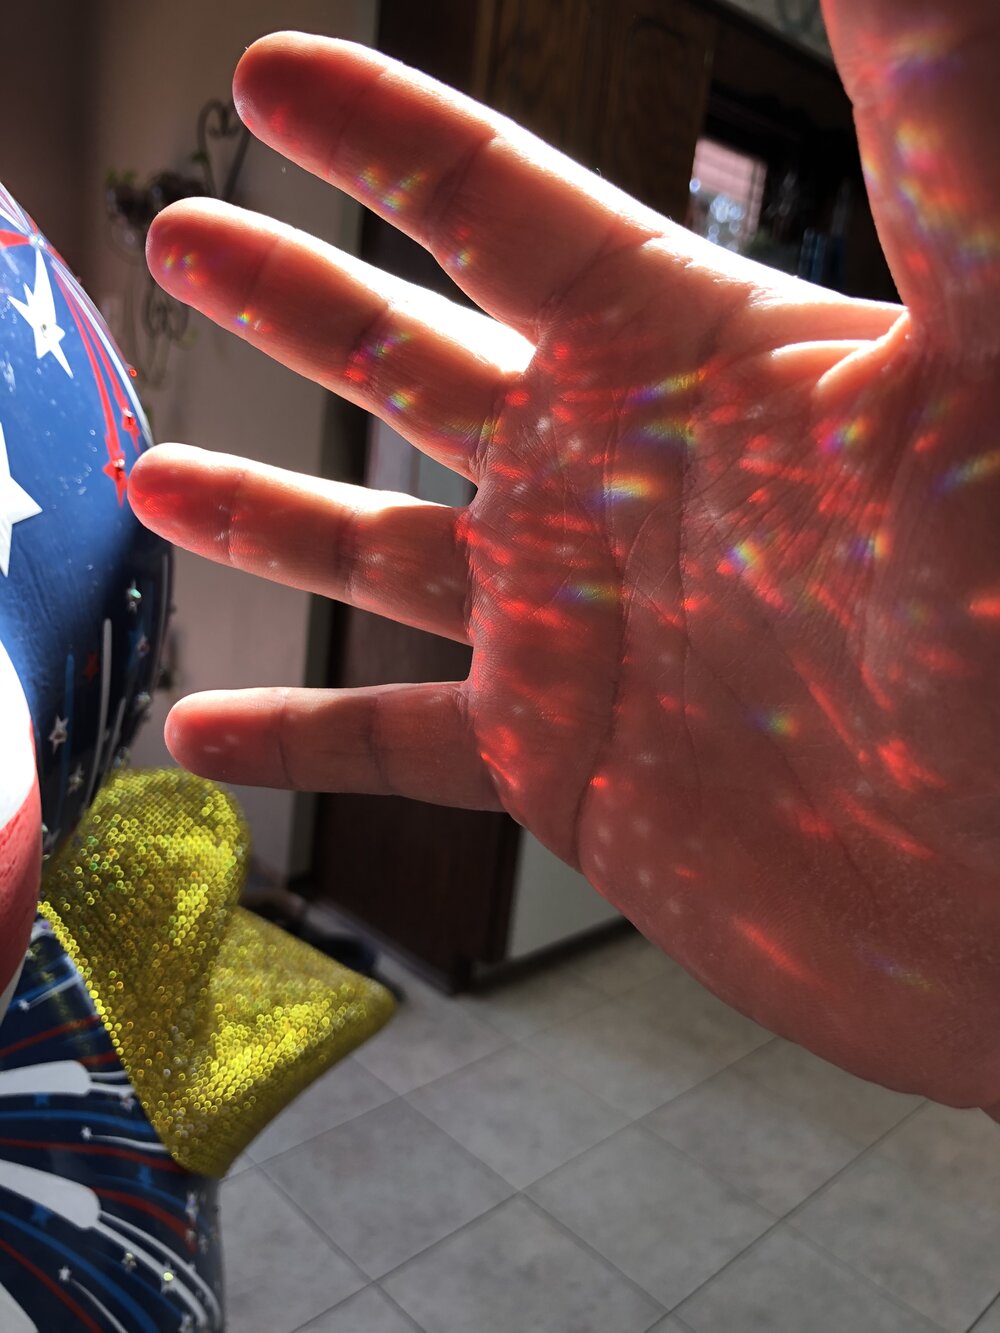
In between working on the fireworks, the final bulk batch of red rhinestones arrived and it was time to work on the red and white stripe wing. I started with the duck upside down so I could get the bottom of the wing done. And then eventually flipped it over. As I was working on this wing, the sunlight came into my kitchen through my skylight once again and as you can see I became covered in millions of little reflections of the light from the rhinestones.
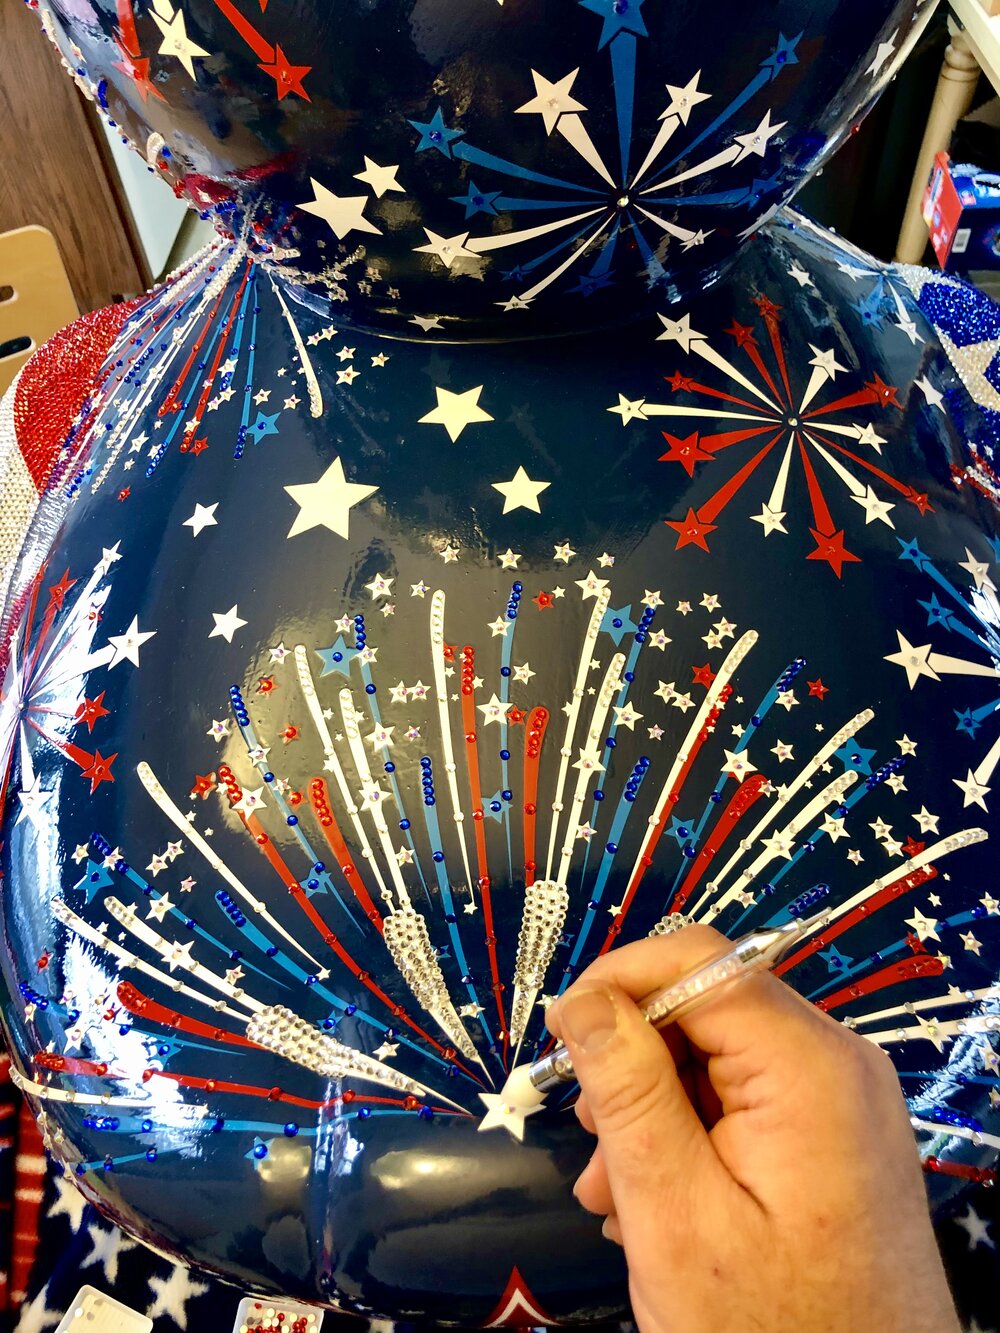
With the wing done it was time to finish up the last of the fireworks. Here I am placing the very last rhinestone onto the ducks in the star at the top of the tail.
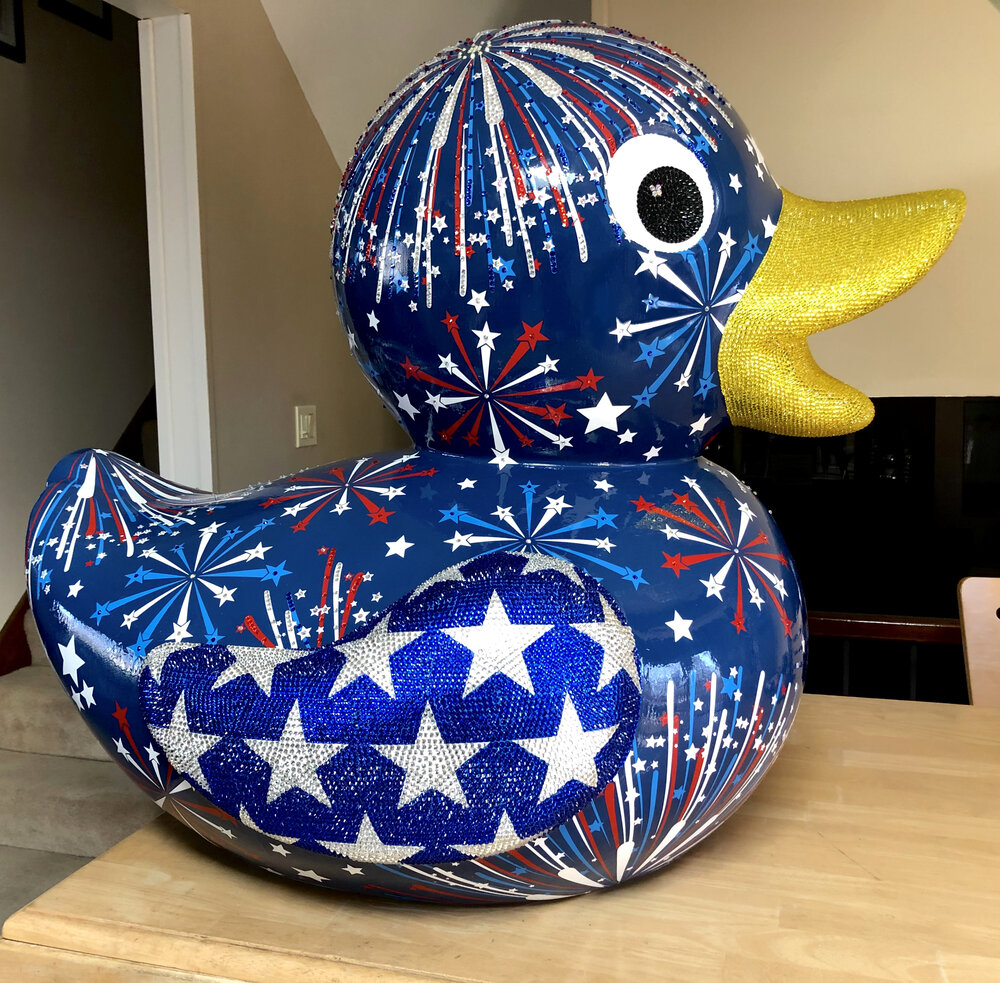
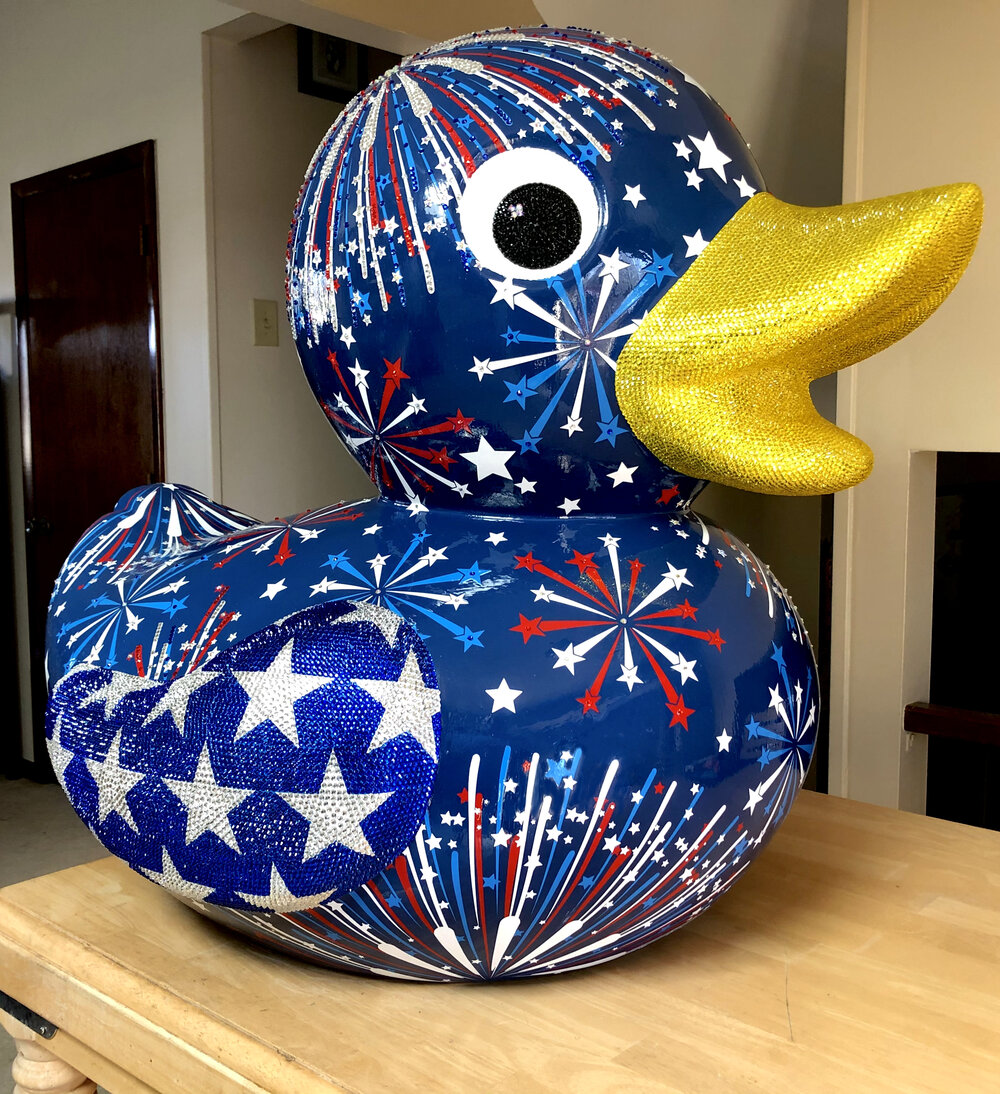
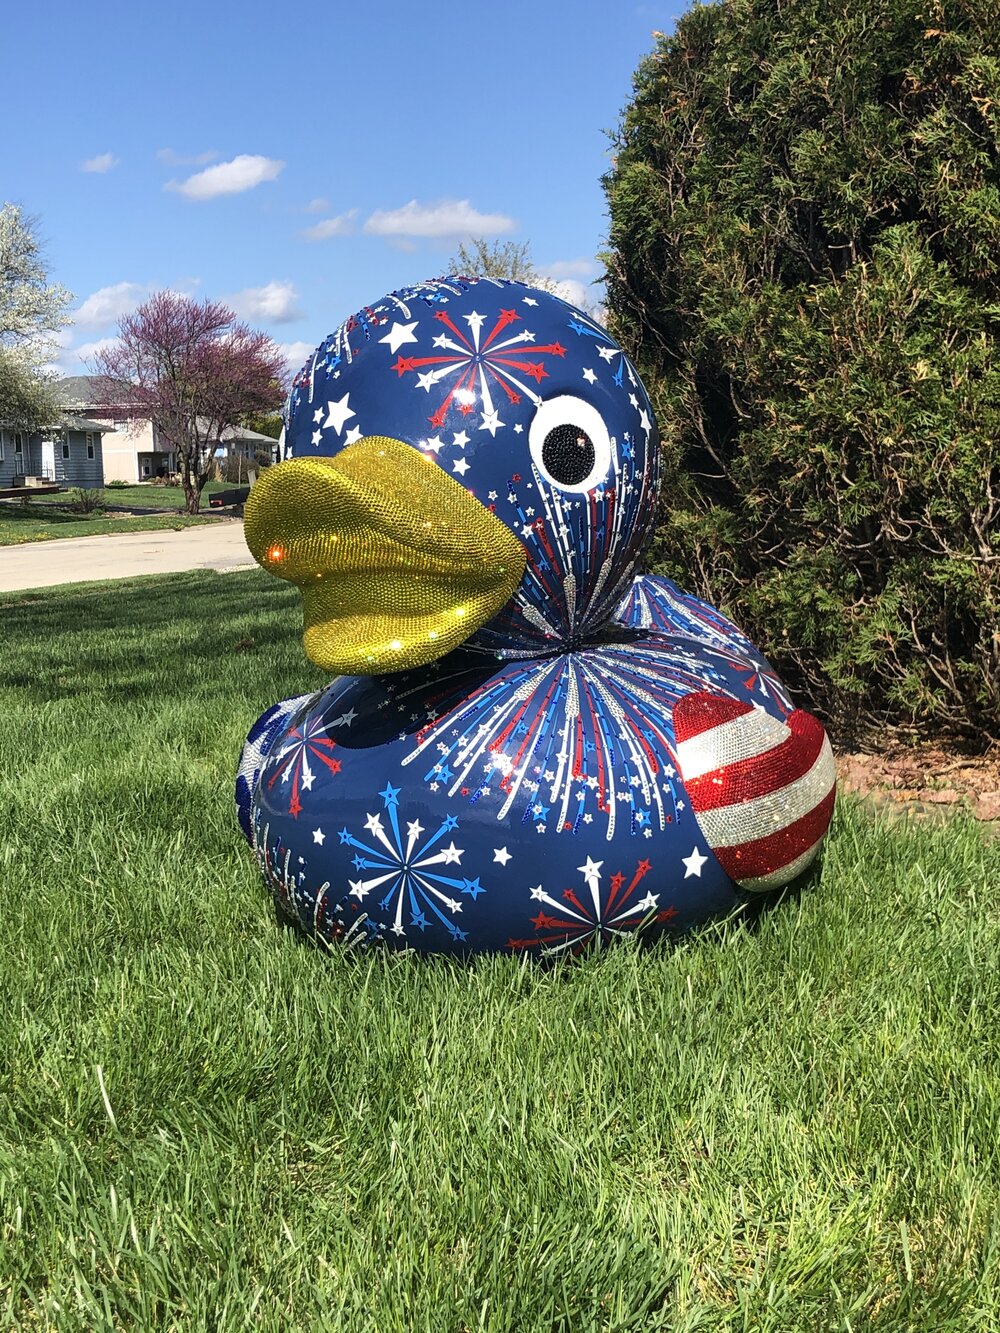
Of course the day I finished it was a bit overcast and gloomy outside, but the first chance I got to bring it out into the full sunlight, I took. And it is everything i had imagined and hoped for when I dreamed this concept up. All of the hours (and we are talking a good 160-200 hours total from concept to completion, were worth it!
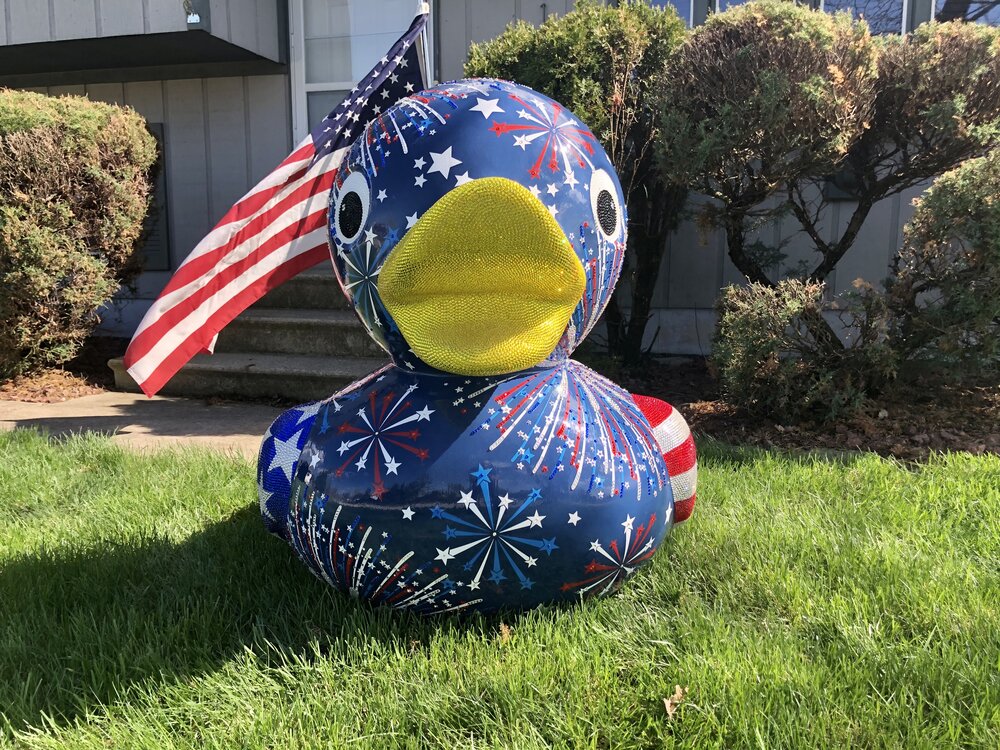

FIRE QUACKERS
Will be on display at George’s Restaurant located at 990 N State St, Lockport IL. 60441
The Keep Our Small Businesses Afloat! Summer Art Series is schedule to begin in May 2021 and run through early September. Hope you can stop by and check it them out!
If you do get a chance to see FIRE QUACKERS in person, please be sure to take some photos with it and share them with me. You can tag me on social media and I will add them to a wall of fame here on my website!